Woodhaven 5434: Frame and Panel Master User Manual
Page 3
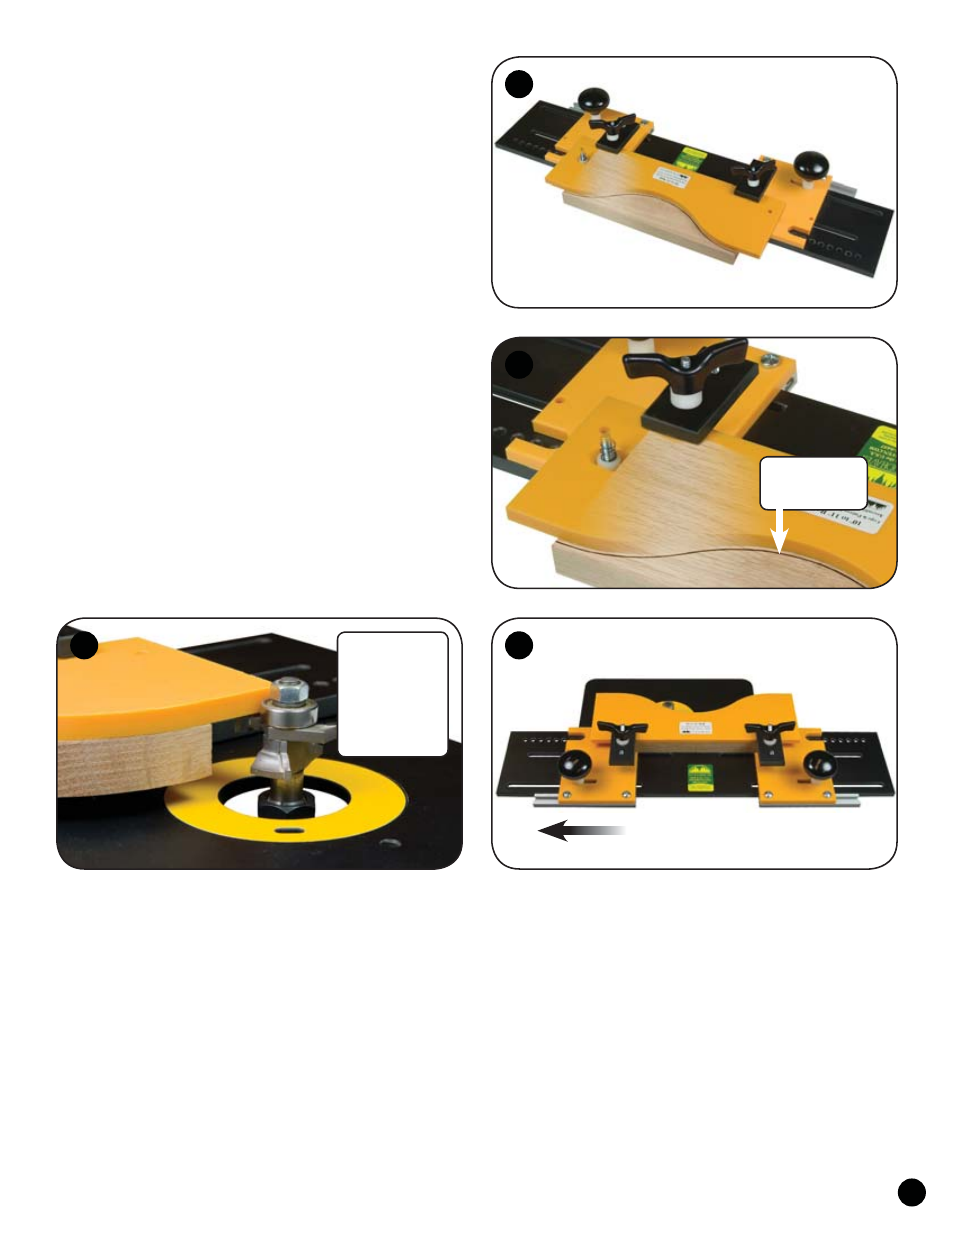
MARK & CUT RAIL PROFILE
Place the rail on the base and slide the fences up against
each end of the rail so it's between the notches in the fences.
Place the template on the 1-1/4" bolts. See fig. 2 & 6.
Adjust the fences/rail to center the rail on the template
so there is an even amount of template overhanging the rail at
each end. Using the template as a pattern, draw a pencil line on
the rail. See fig. 7. Remove the rail and saw it to shape, staying
approximately 1/8" away from the finished line.
Re-install the rail and template on the base. Clamp the
template/rail to the base using the knobs on top of the clamp
pads. The knobs are larger than previous ones so they're
easier to tighten. However overtightening may cause damage
to the jig! Hold the jig by the handles and machine the rail to
shape using a flush trimming bit. See fig. 8.
Remove the machined rail and install another. If you have
a second router setup, you can go directly from shaping the rail
with a flush trim bit to machining the pattern (up to 1/2" deep)
without having to remove the rail between operations. For
the safest pattern cutting operation, at least 1/8" of the bearing
should ride on the template at the start of the cut. This way the
template acts as a starting pin, providing the best control of the
part. Depending on part thickness, this may require you to add
a spacer between the bearing and the cutter. See fig. 9.
Rail routing: feed direction
Draw line for
rough cut
Place template on
1-1/4" bolts
Place rail between &
against notches in fences
2
8
7
6
9
For safety,
at least 1/8"
of bearing
should ride
on template