Woodhaven 6010: HD Mortise Table User Manual
Page 2
1
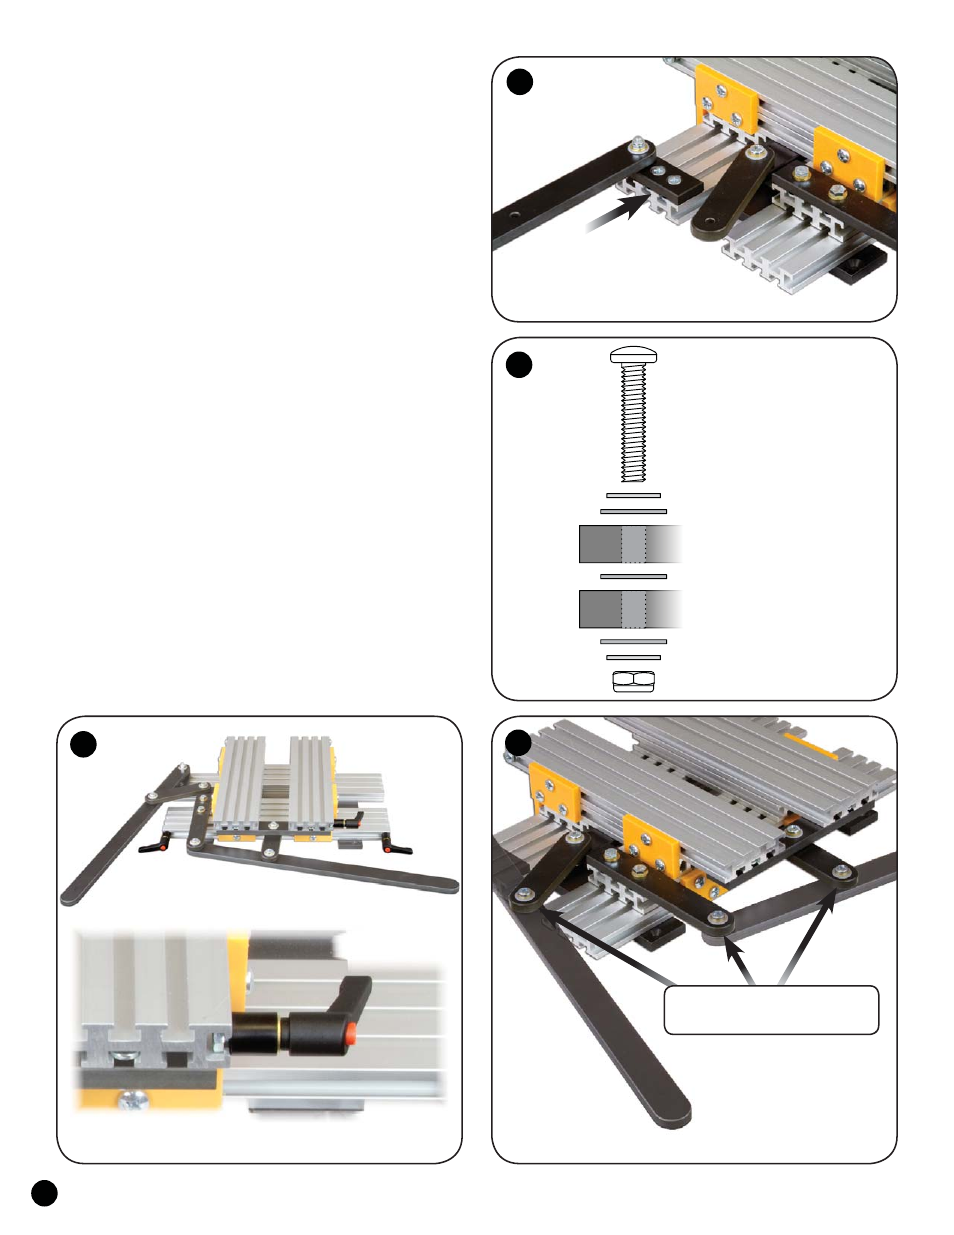
Bracket
5776B 1-1/4” screw
WB002 brass washer
WB002 brass washer
NUT010A locknut
WN001 nylon washer
WN001 nylon washer
WN001 nylon washer
Handle
BEFORE BEGINNING
Identify and verify that you have all the parts
listed. Read the instructions at least once, familiarizing
yourself with the parts, before beginning. You’ll need a #3
Phillips screwdriver and a 7/16" wrench for assembly.
ATTACH HANDLES TO HD MORTISE TABLE
Attach the Handle w/bracket (6010H2) to the location
shown on the HD Mortise Table assembly (6010HD).
Insert a 5/8" screw (MF006) thru the two countersunk
holes in the handle bracket and start an oval nut (5760B
- flat side first) on the end of the screws. See fig. 1.
Slide the two oval nuts into the T-slots of the Ultra
Track where indicated, adjust the bracket so it’s flush with the
end & edge of the track and tighten the screws. See fig. 1.
Attach the handles (6010H1 & 6010H2) at the three
locations indicated on the two brackets. You’ll need a 1-1/4"
screw (5776B) two brass washers (WB002), three nylon washers
(WN001) and a locknut (NUT010A) for each attachment point.
Later on after you’ve completed mounting the HD Mortise
Table to your Horizontal Router Table, adjust these screws/nuts
until you have the desired tension on the handles. See fig. 2 & 3.
ATTACH STOPS TO TABLE
On three of the 1-1/4" bolts (HB030) install a 5/8" spacer
(BUSH004), a brass washer (WB002) and a ratchet handle
(5860). Slide the head of the bolts in the T-slots of the Ultra
Tracks where shown. The two front/lower stops control the
left-to-right movement of the table and the third upper/side
stop controls the forward movement of the table. See fig. 4.
2
1
4
3
Attach Handles to brack-
ets at these three locations.