Woodhaven 7600-7603: Dovetail Jigs User Manual
Page 3
2
1
BEFORE BEGINNING
Identify and verify that you have all the parts listed.
Read the instructions at least once, familiarizing yourself
with the parts before beginning assembly. You’ll need a
7/16" wrench and a #2 & #3 Phillips screwdriver.
DETERMINE HOW JIG WILL BE USED
The Dovetail Jig can be used in a portable mode
(on a router table, see cover), or in a stationary mode
(clamped to a bench, see cover). Determine how you want
to use the Dovetail Jig and assemble it according to either
the Stationary Use or the Portable Use instructions.
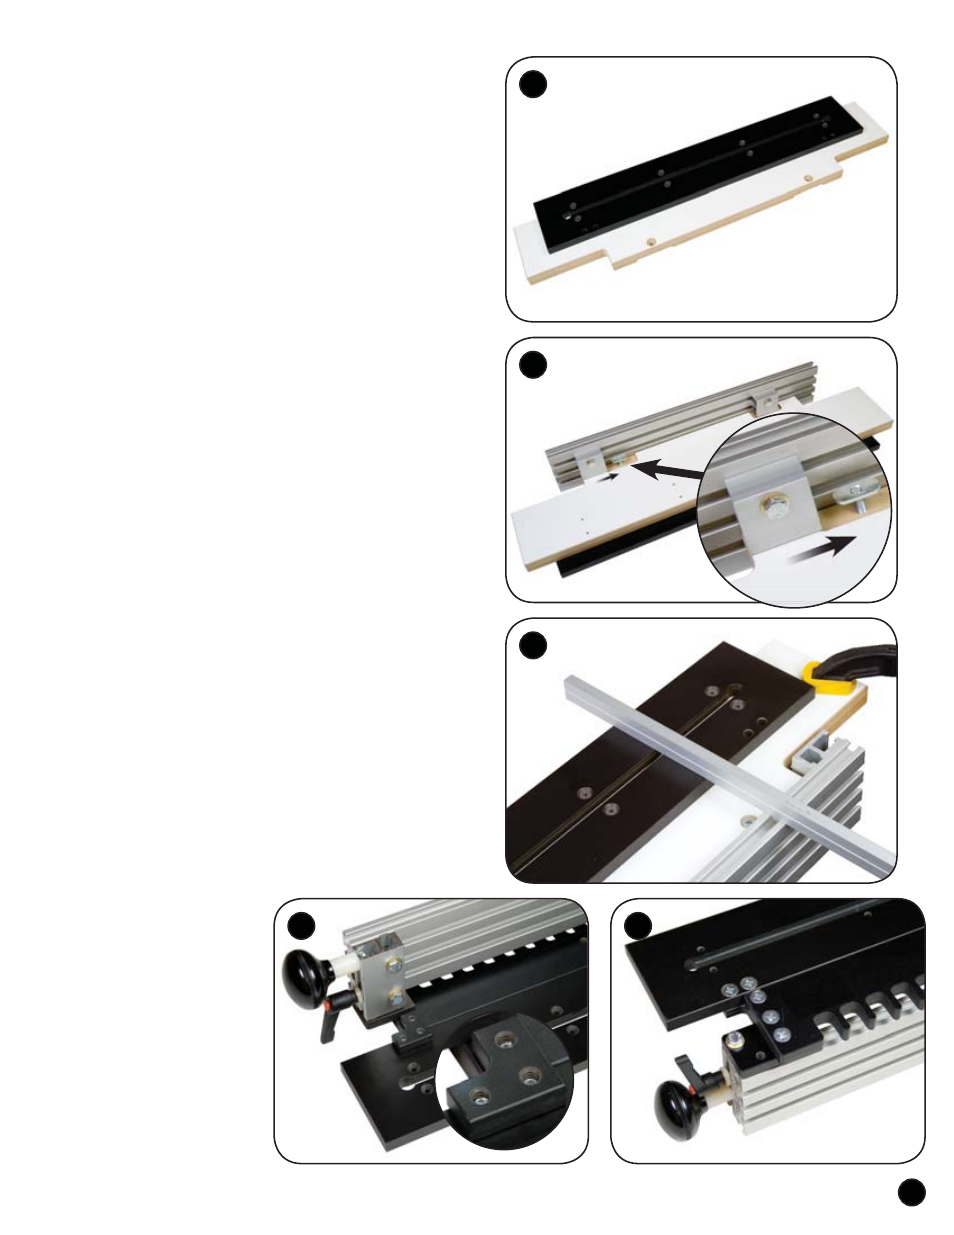
ASSEMBLY - STATIONARY USE
If you’re using the Dovetail Jig in a stationary mode,
perform this part of the assembly first. The MDF base (7600F)
has eight small pilot holes and two 1/4" countersunk holes
(with recesses on the opposite side) drilled in it. By hand,
attach the clamp base (7600B1) to the side of MDF base
with the 1/4" countersunk holes, using eight 1" wood screws
(SFP008). Hand tighten the screws only. See fig. 1.
Install a 1" screw (MF015) thru the two countersunk
holes in the MDF Base (7600F) and start oval nuts (5760B
- raised side first) on the ends of the screws. Lay the clamp
base/MDF base down on a flat surface and set the Ultra Track
(4418) on edge next to the MDF base. See fig. 2A & 2B.
Install a washer (WB002) on two of the 1" bolts (HB030).
Insert a bolt thru the hole in both of the MDF base connectors
(7600H) and start oval nuts (5760B - raised side first) on the
ends of the bolts. Slide both connectors on to the upper T-slot
of the 18" Ultra Track (4418). Position them so the open T-slot
in the base connectors slide on to the two oval nuts on the
MDF base. Tighten the base connectors to the Ultra Track,
then turn the assembly over and tighten the two screws in the
MDF base. Make sure that the top of the clamp base and the
edge of the Ultra Track are on the same plane. See fig. 2B.
ASSEMBLY - PORTABLE USE
If you’re using the Dovetail Jig in a portable mode, perform
this part of the assembly only after you have completed the
INSTALL TEMPLATE portion of the instructions (next section).
Attach the two clamp base connectors (7600C2) to each
side of the clamp base (7600B1) using four 3/4" screws (MF010)
inserted thru the countersunk holes in the clamp base. Attach the
protruding ends of the clamp base connectors/clamp base to the
dovetail template (7600T - or
whatever template you’re
using) using two 3/4" screws
(MF010). See fig. 3 & 4.
Attach a knob (5590) to
each of the template supports
(7600A) using a 1-1/4" bolt
(HB040), a 5/8" spacer
(BUSH004) and a 1/4" spacer
(BUSH002). These are meant
to serve as handles when
using the jig portably, but if
you have the toggle clamps
you can use those as the
handles also. See fig. 3 & 4.
2B
7600B1
7600F
3
7600C2
7600B1
4
7600B1
7600T
4418
7600H
2A