Vortech 2011-2012 6.4L Hemi Challenger User Manual
Page 17
P/N: 4CL020-020 v1.0, 12/02/2014
©2014 Vortech Engineering, Inc
All Rights Reserved, Intl. Copr. Secured
7
Fig. 5-k
SUPERCHARGER
MTG PLATE
OEM A/C
LINE
Fig. 5-l
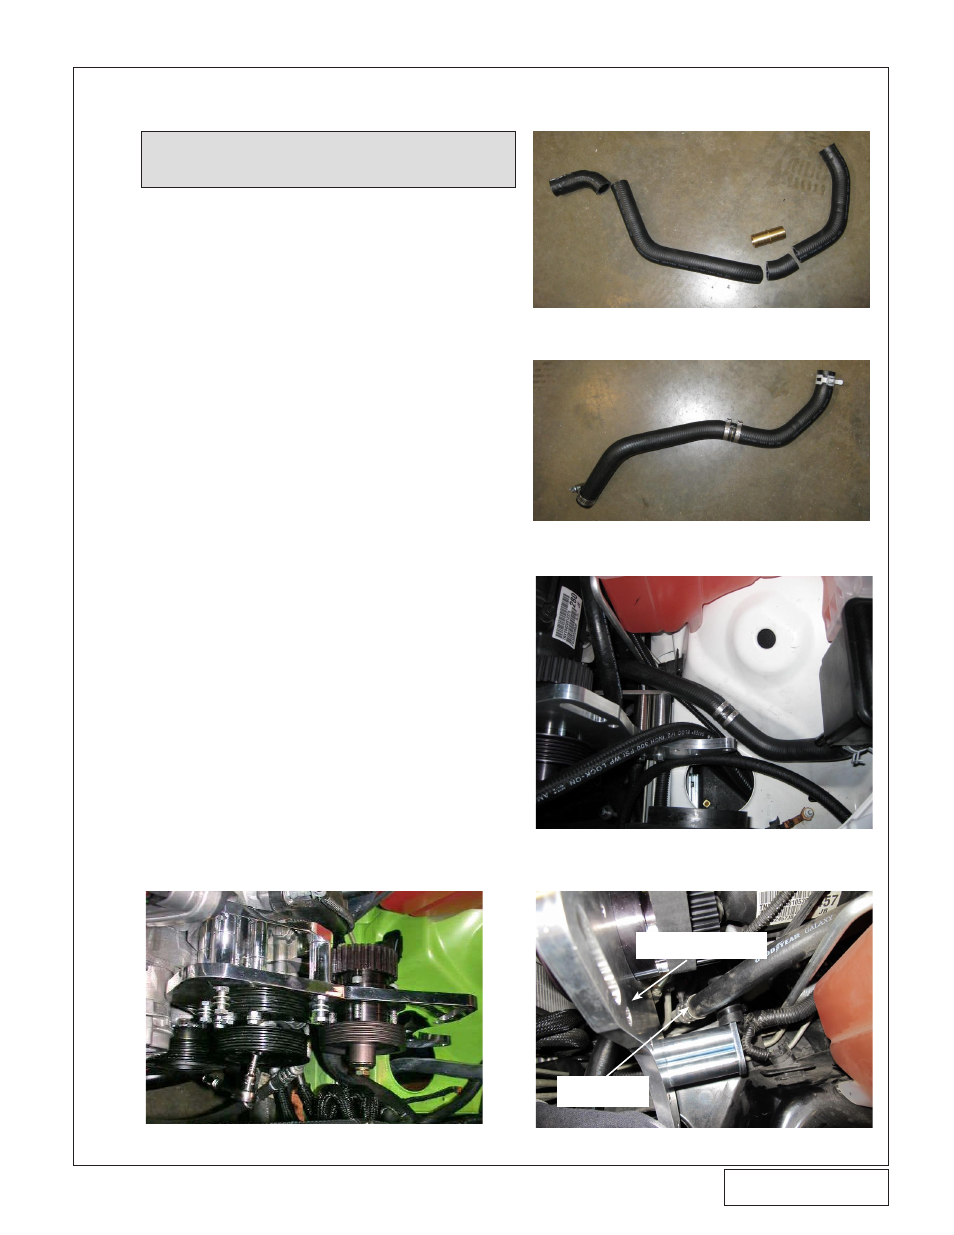
H. Challenger M6 Only:
Remove power steering
hose from pump to reservoir. Cut hose as depicted
in Fig. 5-h Set aside the two longer pieces of hose
and discard the two shorter pieces. Replace the
small bend with a ¾ hose union and attach the 2
pieces of hose together.
I. Challenger M6 Only:
Install the hose so that
the end with the single bend attaches to the
pump. Do not install clamps. Mark union for cor-
rect clocking. Remove the hose from the car and
install stepless clamps at union. (See Fig. 5-i)
J. Challenger M6 Only:
Install hose assembly
back into car using the factory clamp to secure
the hose to the reservoir and a supplied hose
clamp to attach the hose to the power steering
pump. (See Fig. 5-j)
K. Start the supplied 8mm bolt in the outside hole
making sure that it does not protrude through the
back and impact the a/c line. See Fig. 5-k.
L. Install a .475” spacer between the supercharger
mounting plate and the power steering pump at
the two remaining power steering pump mounting
holes. Install 8mm x 90mm bolts and washers.
M. Position the supercharger mounting plate as-
sembly in front of the engine and secure it to the
head using the three M8 x 100 mm bolts and one
M8 x 120mm bolt. (See Fig. 5-l).
N. Tighten all of the mounting plate bolts in steps
so that the protruding bolt heads do not hit the
power steering pump pulley.
O. Reattach the threaded power steering line to the
power steering pump. Attach the large-diameter
power steering line from the previously installed
reservoir to the fittings installed onto the power
steering pump. Once all the lines are secured,
fill the power steering fluid reservoir with power
steering fluid & verify that there are no leaks.
Fig. 5-h (Challenger M6)
Fig. 5-i (Challenger M6)
5.
SUPERCHaRGER MOUNTING PLaTE INSTaLLaTION, CONT’D
Fig. 5-j (Challenger M6)
NOTE:
Steps H, I, J apply to Challenger M6 only. All
others, skip to Step K.