Installation instructions, Lamps operated, Mounting the ice-420-em-a – IOTA ICE-420-EM-A User Manual
Page 2: Mounting the threaded body test switch (tbts), Illustration 1 downlight fixture
Page 2
INSTALLATION INSTRUCTIONS
CAUTION: Before installing, make certain the A.C. power is off and the
ICE-420-EM-A unit connector is disconnected.
1. LAMPS OPERATED
Refer to the chart below for the type of lamp(s) operated and the number of lamps to be operated in the emergency mode.
If you have any questions regarding specific lamps, contact Customer Service.
INSURE WIRING IS IN ACCORDANCE WITH THE NATIONAL ELECTRICAL CODE AND LOCAL REGULATIONS.
*The
6
″ violet leads provide the lamp selection option. The unit is shipped from the factory with the leads discon-
nected and capped. When used with particular lamp types, violet leads should be connected to one another. Refer
to chart for lamp selection options.
2. MOUNTINg ThE ICE-420-EM-A
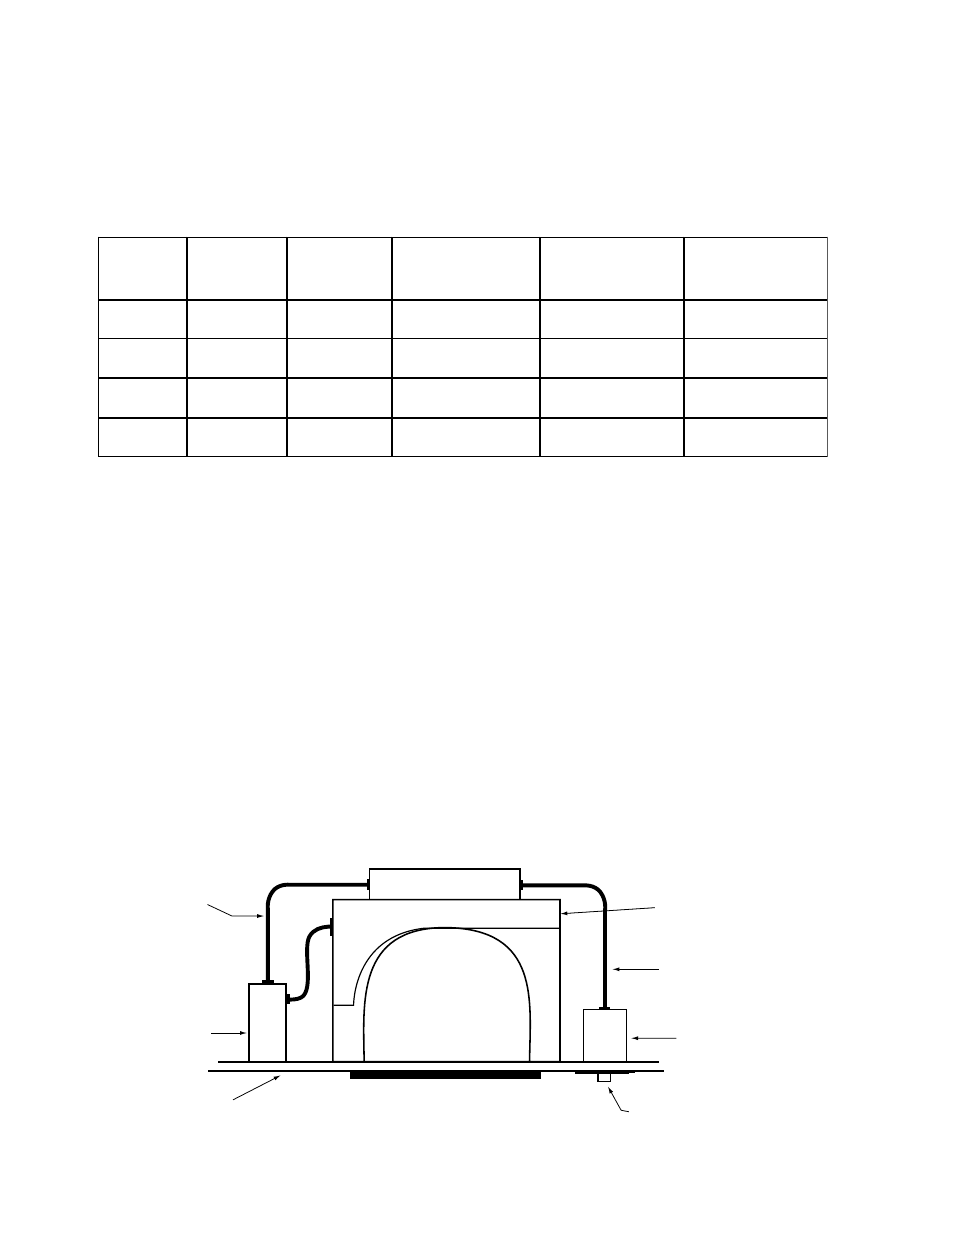
When used with ceiling mounted downlight fixtures, the
ICE-420-EM-A should be mounted on the fixture above
the ceiling. The flex conduit marked “A” should be wired into the ballast/lamp compartment or to an electrical junc-
tion box on the fixture which allows access to the ballast/lamp connections. Refer to Illustration 1 for typical mount-
ing.
When battery packs are remote mounted, consult Customer Service for the maximum allowable distance between
the battery pack and the lamp.
3. MOUNTINg ThE ThREADED BODy TEST SWITCh (TBTS)
Cut a single gang switch box into the ceiling tile adjacent to the fixture within reach of the
ICE-420-EM-A flex
marked “B”. After mounting the switch box, connect flex “B” to the box and route all leads inside the box. Refer to
Illustration 1 for typical mounting. NOTE: For proper operation, use only the test accessories provided with the
unit. See Page 1 of the Instruction Manual.
N
O
I
T
P
O
P
M
A
L
E
P
y
T
y
C
N
E
g
R
E
M
E
N
O
I
T
A
R
E
P
O
g
N
I
R
I
W
S
M
A
R
g
A
I
D
1
2
3
4
10W-32W
42W-70W
10W-13W
18W-32W
Compact
Compact
Compact
Compact
One Lamp
One Lamp
Two Lamp
Two Lamp
Connected
Connected
Disconnected
Disconnected
1,2
1,2
3
3
*VIOLET
LEADS
FLEX “A”
JUNCTION
BOX
CEILING
TILE
A.C. BALLAST &
LAMP SOCKET COMPARTMENT
FLEX “B”
SWITCH BOX
TEST SWITCH
CHARGE LIGHT
Illustration 1 Downlight Fixture
ICE-420-EM-A
TBTS