Installation instructions, Lamps operated, Mounting the isl-28 – IOTA ISL-28 User Manual
Page 2: Wiring, Installing the charge indicator, Installing the test switch
Page 2
INSTALLATION INSTRUCTIONS
CAUTION: Before installing, make certain the A.C. power is off and the
ISL-28 unit connector is disconnected.
1. LAMPS OPERATED
The
ISL-28 can be used with most 2´-4´ lamps. Refer to the chart below for the types of lamp(s) operated and the
number of lamps to be operated in emergency mode.
*The 6
″ violet leads provide the lamp selection option. The unit is shipped from the factory with the leads disconnected
and capped. When used with particular lamp types, violet leads should be connected to one another. Refer to chart for
lamp selection options.
2. MOUNTING THE ISL-28
Remove the ballast channel cover. Mount the
ISL-28 in the ballast channel at least
1
/
2
″ away from the A.C. ballast(s).
When battery packs are remote mounted, consult Customer Service for the maximum allowable distance between
the battery pack and the lamp.
3. WIRING
Refer to the wiring diagrams on the back page for the appropriate wiring of lamp(s) and ballast. Install in accordance
with the National Electrical Code and local regulations. For additional wiring diagrams consult Customer Service.
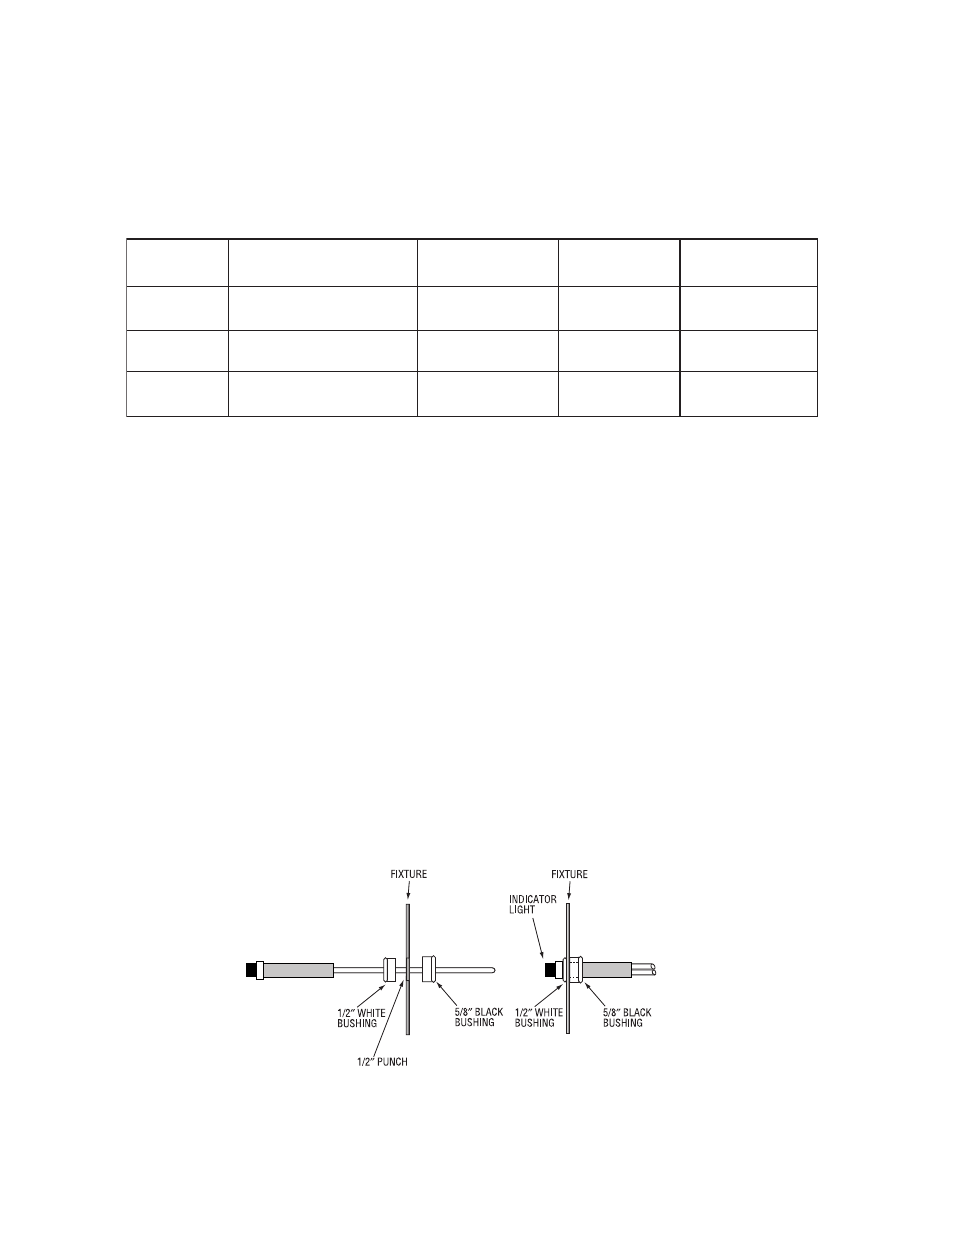
4. INSTALLING THE CHARGE INDICATOR
Select a convenient location on the side of the fixture so the
Charge Indicator can be seen after installation. Al-
low for proper clearance inside the fixture and drill or punch a
1
/
2
″ hole. Snap the
1
/
2
″ white bushing into the hole.
Push the LED
housing into the bushing and secure it in place with the
5
/
8
″ black bushing (see Illustration 1). Con-
nect the LED red and white wires to the ballast LED marked wires.
5. INSTALLING THE TEST SWITCH
The
Test Switch should be mounted on the side of the fixture, preferably adjacent to the Charge Indicator. Drill
or punch a
1
/
2
″ mounting hole.
Illustration 1
OPTION
LAMP TYPE
EMERGENCY
OPERATION
*VIOLET LEADS
WIRING
DIAGRAMS
1
2
2 FT T5-T8 Single, Bipin
4 FT T5(28W) -T8
Single, Bipin
One Lamp
One Lamp
Connected
Disconnected
1, 2, 3, 4, 5, 6, 7, 8, 9
1, 2, 3, 4, 5, 6, 7, 8, 9
3
3 FT T5 Single, Bipin
One Lamp
Disconnected
1, 2, 3, 4, 5, 6, 7, 8, 9