Dream Property DM7020 User Manual
Page 24
- 24 -
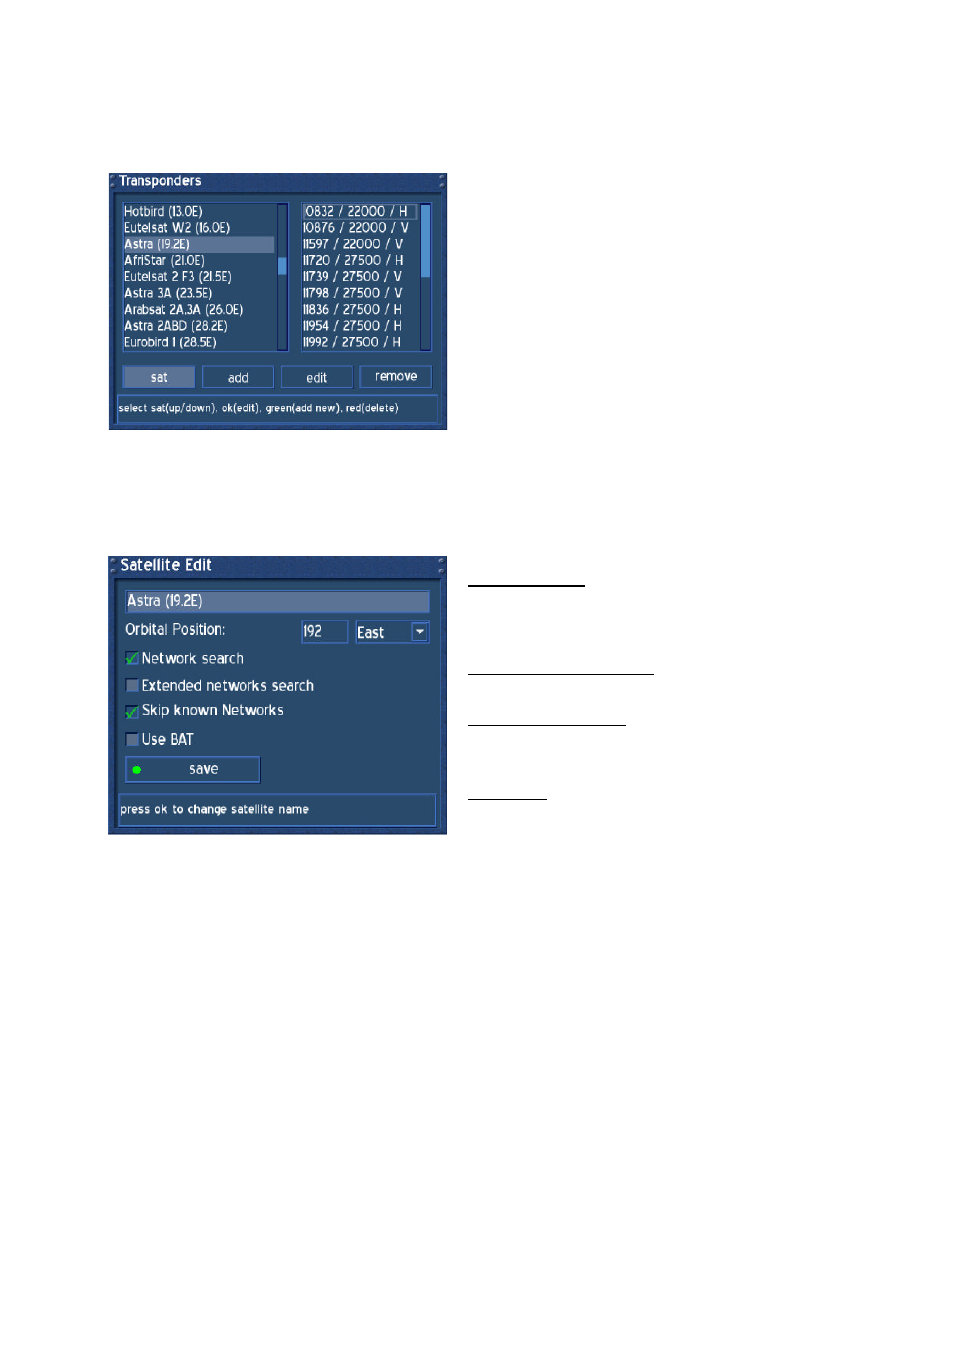
24. Transponder Edit
Press the MENU-Button to enter the OSD-Main menu.
Go to (6) Setup -> (2) Service Searching -> (4) Transponder Edit.
This Menu keeps all known satellites the Dreambox
scans for. If you recognize a missing satellite, add or
edit the satellite.
Pressing the OK-Button on the sat-button, enters the
Satellite Edit Menu.
Pressing the OK-Button on the add-button, adds a
new frequency to the selected satellite.
Pressing the OK-Button on the edit-button, edits the
Transponder Values for the selected satellite.
Pressing the OK-Button on the remove-button,
removes a transponder frequency from the selected
satellite.
Pressing the green Option-Button adds a new
satellite.
Pressing the red Option-Button deletes a satellite.
Follow the Instructions on the Statusbar.
Network search:
The NIT holds the Information about the Satellites
and the TV/Radio- Programs.
(NIT = Network Information Table)
Extended network search:
Set a check to scan the NIT from other Transponders
Skip known Networks:
Unchecking this, decreases the sat scan. The NIT will
not be used.
Use BAT:
Bouquet Tables of the Provider will be used, if
available.
(BAT = Bouquet Association Table)
Press the green Option-Button to save.