Connecting the nosecone – Chicago Gaming Galactix User Manual
Page 7
7
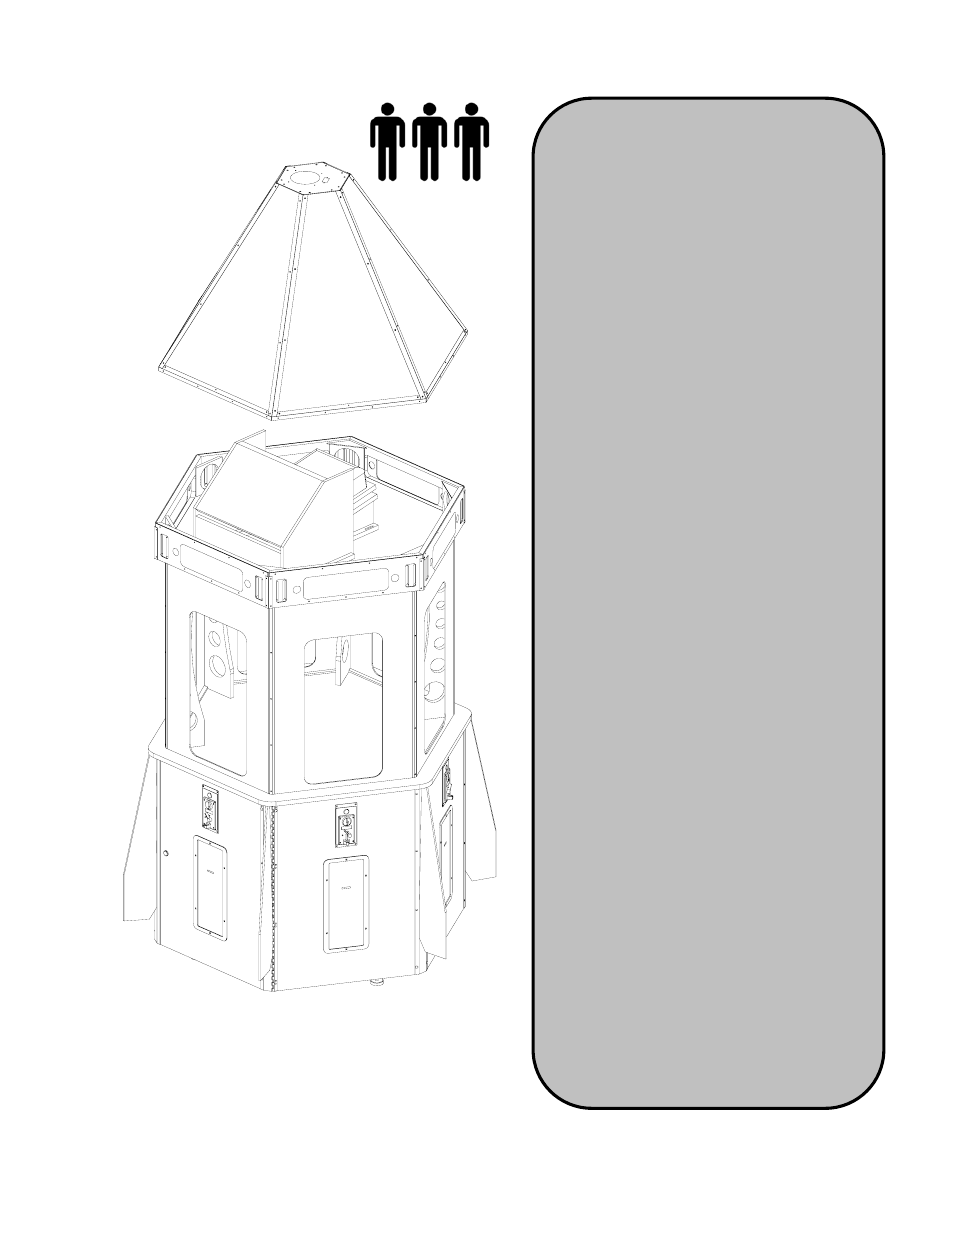
5. Connecting the Nosecone
REQUIRES 2-3 PEOPLE
The Nose Cone has an A/C access hole next
to the fan. If you are going to run the A/C
through the top of the game, go to page 10
for instruction before installing the Nose
Cone.
Locate the bag of fasteners labeled Nose
Cone, which contains (24) #6 x 5/8” Black
Screws.
Find the cable harness hanging over the top
edge of GalacTix. This will connect to the
Chase Top cable harness in the Nose Cone.
With the help of another adult, lift the Nose
Cone to the top of the main cabinet. Be very
careful to not hit the Projector or Mirror Box
Set the Nose Cone on top of the cabinet so
that it is still easy to lift.
Connect the Chase Top Cable inside the
Nose Cone to the corresponding cable on
top of the Main Cabinet.
Turn the game on. Check that all LED PCBs
in the Nose Cone are lighting up and the fan
in the top is running.
Push the Chase Top Cable inside the Nose
Cone. Adjust the Nose Cone so that it slides
onto the Main Cabinet, making sure not to
pinch the Chase Top Cable.
With GalacTix turned on, walk around the
cabinet and check that there are no shadows
on any of the marquees. If there is a
shadow, lift the Nose Cone on that side and
adjust what is causing it (cables, packing
material, and etcetera).
Use the (24) #6 x 5/8” Black Screws to
secure the Nose Cone to the Main Cabinet.