Servicing lights in nose cone, Extending lamp life: economy mode, Drop down a/c access – Chicago Gaming Galactix User Manual
Page 10
10
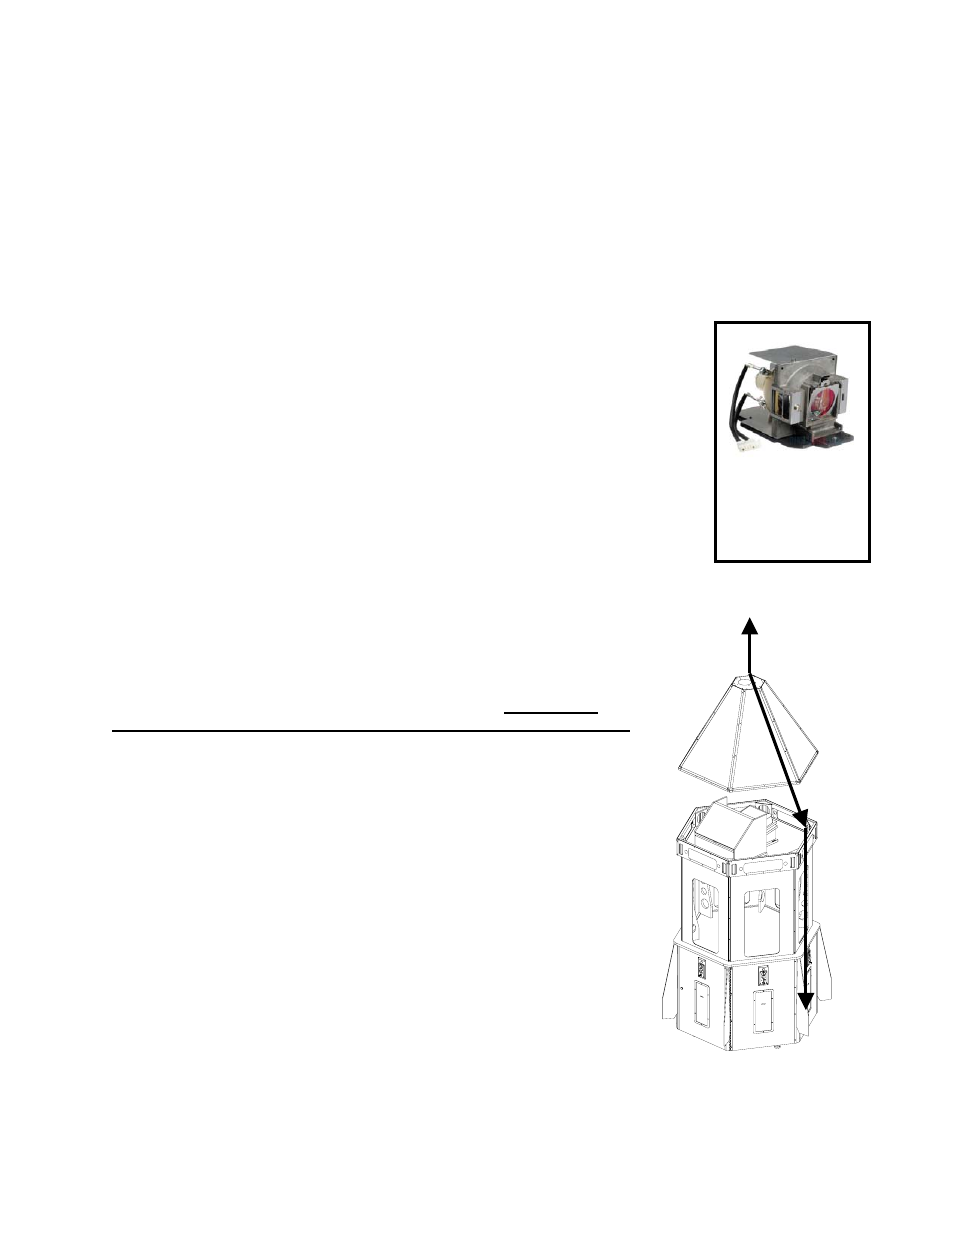
8. Servicing Lights in Nose Cone
Remove the screws that hold the Nose Cone to the Cabinet
With the help of another person, lift the Nose Cone up without removing it. Disconnect the Chase Top
Cable to free the Nose Cone.
Remove the Nose Cone and set it on the floor, protecting it from damage. Be very careful not to hit the
Projector or Mirror Box when removing the Nose Cone.
If one of the LED Boards was not working, check that the cables connected to the boards in the Nose
Cone have not become disconnected.
If replacing a CCFL Tube, remove the white lamp guard to access the bad bulb.
9. Extending Lamp Life: Economy Mode
The lamp in the projector will normally last from 3,000 to 4,000 hours. To extend the
life of the lamp, you can change the projector to Economy Mode.
Economy Mode reduces the projector’s power consumption by 20% and increases
the life of the bulb by 1/3. This will make the projected image darker, which might
make the game’s screen harder to see in areas with bright ambient light.
To set the projector to Economy Mode, use either the remote or the buttons on the
projector to enter the projector’s menu. Go to System Setup: Advanced. Select
Lamp Settings, then Lamp Mode. Use Left or Right to turn Economy Mode on or off.
Press Menu again to exit.
See pages 23-24 for more information on Economy Mode and when to change the
lamp.
10. Drop Down A/C Access
At the top of the Nose Cone is a cut out for drop down A/C access. If you
are running the power cord through the top of the game, THE POWER
CABLE MUST BE CONNECTED WHILE INSTALLING THE NOSE CONE.
There is an IEC cable extension that is installed in the cabinet. It runs from
the top of the cabinet, next to the projector, down to the power inlet plate
behind the Service Door.
Find the 6’ power cable in the Cash Box. Feed the female end of this cable
down through the top of the hole in the Nose Cone, leaving the male end of
the cable sticking out of the top.
As you are connecting the Nose Cone (See page 7) connect the female
end of the power cable to the male end of the extension next to the
projector.
Finally, open the Service Door and connect the other end of the extension
cable to the power inlet plate.
MX613ST
Projector Lamp
Part Number
000-LMP-5JJ3T05