Warning – Troy-Bilt 12069-7HP User Manual
Page 29
Attention! The text in this document has been recognized automatically. To view the original document, you can use the "Original mode".
To Operate the Tiller
CAUTION
To avoid serious personai injury or
damage to equipment:
• Always place Wheels/Tines/PTO
Drive Lever in NEUTRAL before
starting engine, and before en
gaging wheels, tines or other PTO-
driven attachments.
• Be sure there are no obstacies
behind you before reversing.
• Wheels/Tines/PTO Drive Lever
should automatically return to NEU
TRAL when released from RE
VERSE position. If it does not,
move lever to NEUTRAL manually
and see Section 5 to adjust it.
• No reverse motion should occur
if Wheels/Tines/PTO Drive Lever
is not held up in REVERSE. See
Section 5 for adjustment steps. Do
not use tilier uniess properly ad
justed.
• Always return to NEUTRAL and let
all motion stop before shifting to
FORWARD or REVERSE.
When first practicing, keep the
Tines/PTO Clutch Lever in DIS
ENGAGE position and the Wheel
Speed Lever in SLOW position.
To Begin Tilling:
1. Start the engine (see previous
instructions). The Wheels/Tines/
PTO Drive Lever must be in NEU
TRAL before starting the engine.
The Wheel Speed Lever must be in
either SLOW or EAST position.
2. Test the Forward Interlock
Safety System. See page 26.
3. Set Depth Regulator Lever to
desired depth and increase engine
speed. (When “practicing”, keep
tines in the “Travel” position.)
4. Move Tines/PTO Clutch Lever
to ENGAGE position (if practic
ing, leave in DISENGAGE).
IMPORTANT - Do not move
Tines/PTO Clutch Lever to EN
GAGE unless Wheels/Tines/PTO
Drive Lever is in NEUTRAL.
Tiller damage may occur!
5. For forward motion of wheels
and tines, squeeze and hold either
or both Forward Interlock Levers
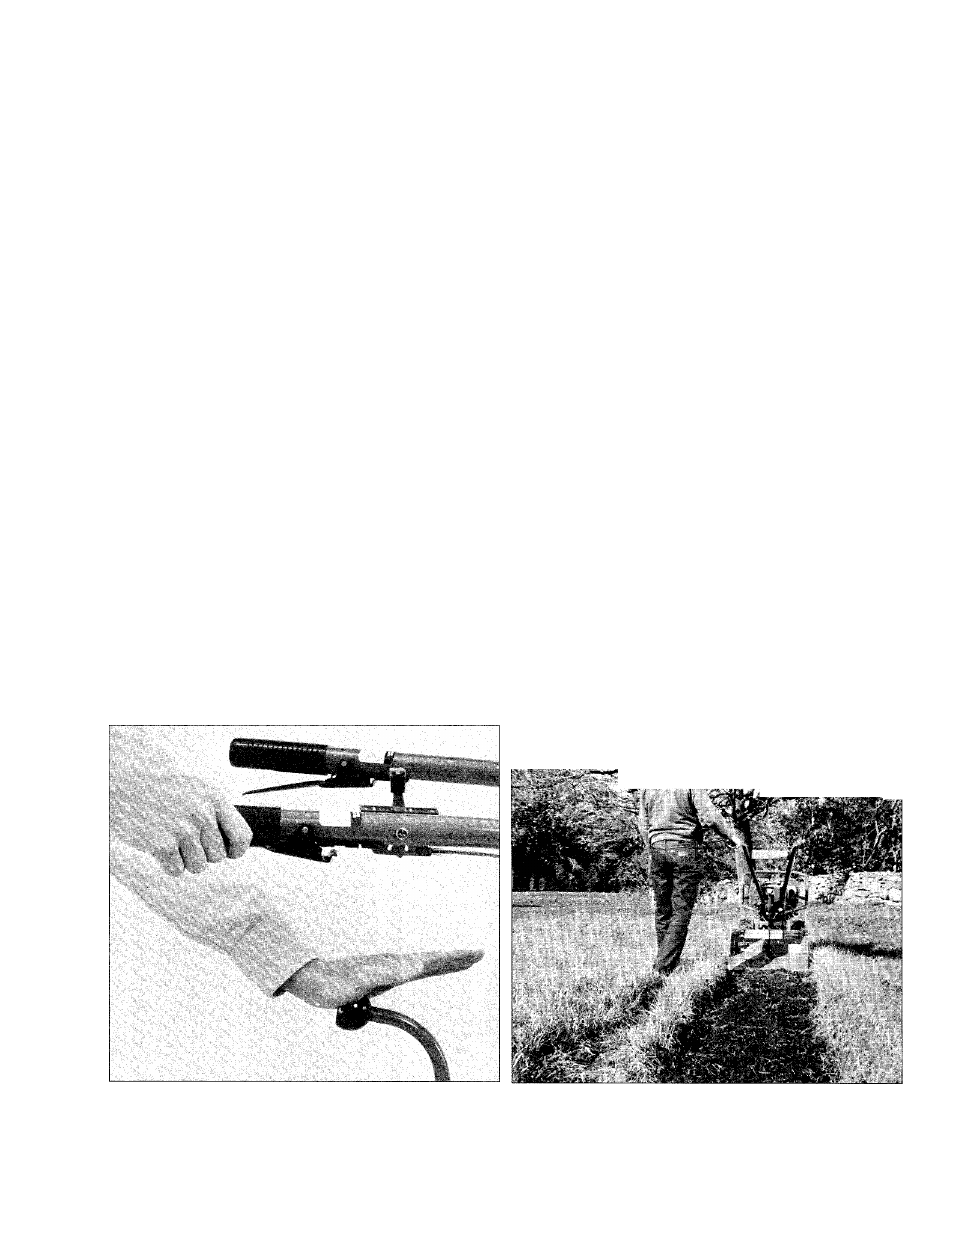
(see Photo 4-7) against the handle
bar grip, then move the Wheels/
Tines/ PTO Drive Lever down to
FORWARD position.
6. When the tiller moves forward,
relax and let the wheels power the
tiller along while the tines dig.
Walk behind and a little to one side
of the tiller (on the side that is not
yet tilled - see Photo 4-8). Use a
firm grip with one hand on the han
dlebars, but keep your arm loose.
IMPORTANT- Let the tiller
move ahead at its own pace. Do
not push it ahead—this reduces
operator control. Do not push
handlebars down attempting
deeper digging— this takes
weight off the wheels, cuts trac
tion, and causes the tines to try to
propel the tiller.
WARNING
To avoid injury, keep hands,
feet, iegs, and clothing away
from revolving tines.
Photo 4-7: Squeeze either or both Forward Interlock
Levers UP before moving Wheels/Tines/PTO Drive Lever
down into FORWARD.
Photo 4-8: Guide tiller with one hand.
29