D) tines/pto clutch lever, E) depth regulator lever, Warning – Troy-Bilt 12069-7HP User Manual
Page 22: F) handlebar height adjustment lever
Attention! The text in this document has been recognized automatically. To view the original document, you can use the "Original mode".
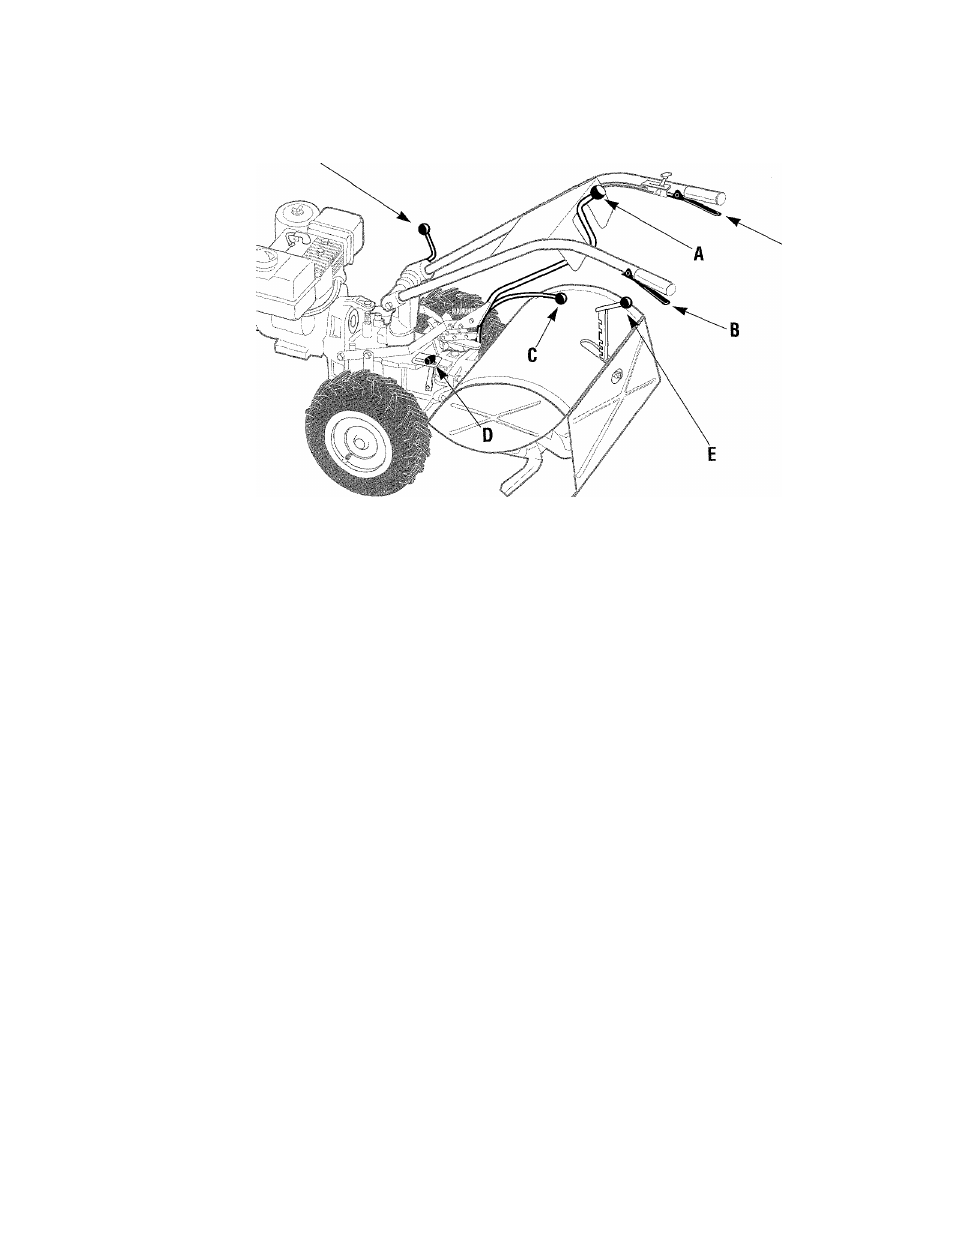
Figure 3-1 (Repeat) : A- Wheels/Tines/PTO Drive Lever; B- Forward Interlock Levers; C- Wheel Speed Lever;
D- Tines/PTO Clutch Lever; E- Depth Regulator Lever; F- Handlebar Height Adjustment Lever.
D) Tines/PTO Clutch Lever
This lever (D, Figure 3-1) is
used to engage or disengage power
from the transmission’s PTO
clutch to the tines or any optional
PTO attachments. It has two oper
ating positions: ENGAGE and
DISENGAGE. To avoid damage
to the transmission, always put
Wheels/Tines/PTO Drive Lever in
NEUTRAL before shifting Tines/
PTO Clutch Lever.
ENGAGE - Lever moved into de
tent slot furthest from engine. Use
to operate tines or other PTO attach
ments. After shifting to ENGAGE,
briefly operate machine in FOR
WARD to fully engage PTO clutch.
DISENGAGE - Lever moved into
detent slot nearest engine. Use to
disengage power to tines or other
PTO attachments before transport
ing, loading, turning, or backing up.
E) Depth Regulator Lever
Used to regulate the tilling
depth of the tines. It also has a
TRAVEL position, which places
the tines out of the ground.
Located at the rear of the tine
hood. See E, Figure 3-1. To oper
ate the lever, pull it straight back
and then slide it up or down to any
of 8 notched settings.
The highest notch places lever in
the TRAVEL setting. For shallow
tilling and cultivating, place lever
in second or third notch from top.
The other notches are for deeper
tilling and for power composting.
WARNING
To avoid personal injury, al
ways place the tines in the
TRAVEL position before start
ing engine. This prevents tines
from touching ground until
you are ready to begin tilting.
F) Handlebar Height
Adjustment Lever
Located near the bottom of the
handlebars (F, Figure 3-1), this
lever is used to adjust and lock the
handlebars at any of four heights.
Note: Swapping the positions of
the inside handlebar ratchets ex
pands the choice of handlebar
heights from two to four settings.
^ WARNING
For use with the PTO Chipper/
Shredder attachment only,
the handlebars can be swung
30° to the right side by loos
ening the mounting bolt at
the bottom of the handlebar
base. Never operate your
tiller or other attachments
with the handlebars swung
out to the right side. This
could result in unsafe han
dling and personal injury.
22