B. trimmer advance, C. cutting methods – Poulan 195 User Manual
Page 12
Attention! The text in this document has been recognized automatically. To view the original document, you can use the "Original mode".
c. Always wear heavy, long pants, long sleeves,
hoots, and gloves. Do not go barefoot or wear
sandals, short pants, short sleeves, jewehy,
loose clothi^, or clothing wi^ loosdy hang
ing straps, ties, tassels, etc.; th^ can he caught
in moving parts. Secure hair so it is above
shoulder length. Being fldiy covered will hdp
protect you from pieces of toxic plants such as
poison ivy thrown by the blade, which could be
more ofal^ard than touching the plant itself.
d. Do not swing the tool with such force that you
are in danger of losing your balance.
e. Never start or run the en^e inside a closed
room or building. Breathing exhaust fumes
can kill.
f. Keep handles free of oil and fuel.
2. TOOLSAFETT
Inspect the entire tool before each use. Re
place damaged parts. Check for hiel lea^ and
make sure all fasteners are in plabe and se
curely fastened.
Use only .080” diameter line. Never use wire
or юре, string, etc.
Be sure the shield is prop^ly attached.
Make sure trimmer head is properly installed
and securely fastened. Refer to “Assembly.”
a.
b.
c.
d.
e. Be sure trimmer head stops turning when en
gine idles. See “Carburetor Adjustments.”
Make carburetor adjustments with the drive
shaft housing supported to prevent the trim
mer line from contacting any object.
Keep others away when making carburetor ad
justments.
h. Use only POULAN PRO accessories or attach
ments as recommended.
f.
8. CUTTING SAFETY
Inspect the area to be cut before each use. Re
move objects (rocks, broken glass, nails, wire,
string, etc.) which can be thrown or become en
tangled in the trimmer head.
Always keep the engine on the ri^t side of
your body.
Hold the tool firmly with both ban<^.
Keep firm footing and balance. Do not over-
rea
Do not raise the engine above your waist
Keep all parts of your body away from the trim
mer line and muffler when engine is running,
h. Use only for jobs explained in this manual.
a.
b.
c.
e.
f,
g
B. TRIMMER ADVANCE
__ • The trimmer line will advance approiri-
xnately 2 huches^ach time the bottom of the
trimmer head is tapped on the ground with
the engine running at full throttle.
• The most efificient line length is the maxi
mum length allowed by the line limiter.
• Always keep the shield in place when the
tool is being operated. Figure 9.
• To Advance Line:
1. Operate the engine at fidl throttle.
2. Hold the trimmer head parallel to and above
the gras^ area.
3- Tap bottom of trimmer head lightly on ground
one time. See Figure 9, Approximately 2
inches of line will be advanced wiiii each t^.
NOTE: Alvpays tap trimmer head on a grassy
area. Tapping on surfaces such as coiunrete or
a^halt can cause excessive wear to tbe trim-
merhead,
NOTE: If the line is worn down to two
inches or less, more than one tap will be re
quired to obtain the most efficient line length.
A
WARNING
Use only .080” diameter line. Other sizes of line
wiii^iyfadvHnce
pf^^yDo
not
use
other
ma
terials such as wire, string, rope, etc. Wire can
break off during cutting and become a dUinger-
ous missile that can possibly cause serious in-
_____________________ -______________ _______ _____ _______ _
A
WARNING
Use minimum speed and do not crowd the line
fence posts, etc), which can damage the trunmer
hea^
become
entan^ed
in
the
line,
or
be
thrown causing a serious hazard.___________________
To Advance Line,
Tap Bottom Of
Trimmer Head On
Ground One Time.
line Limiter Cuts line
To Proper Length.
he
Figure 9
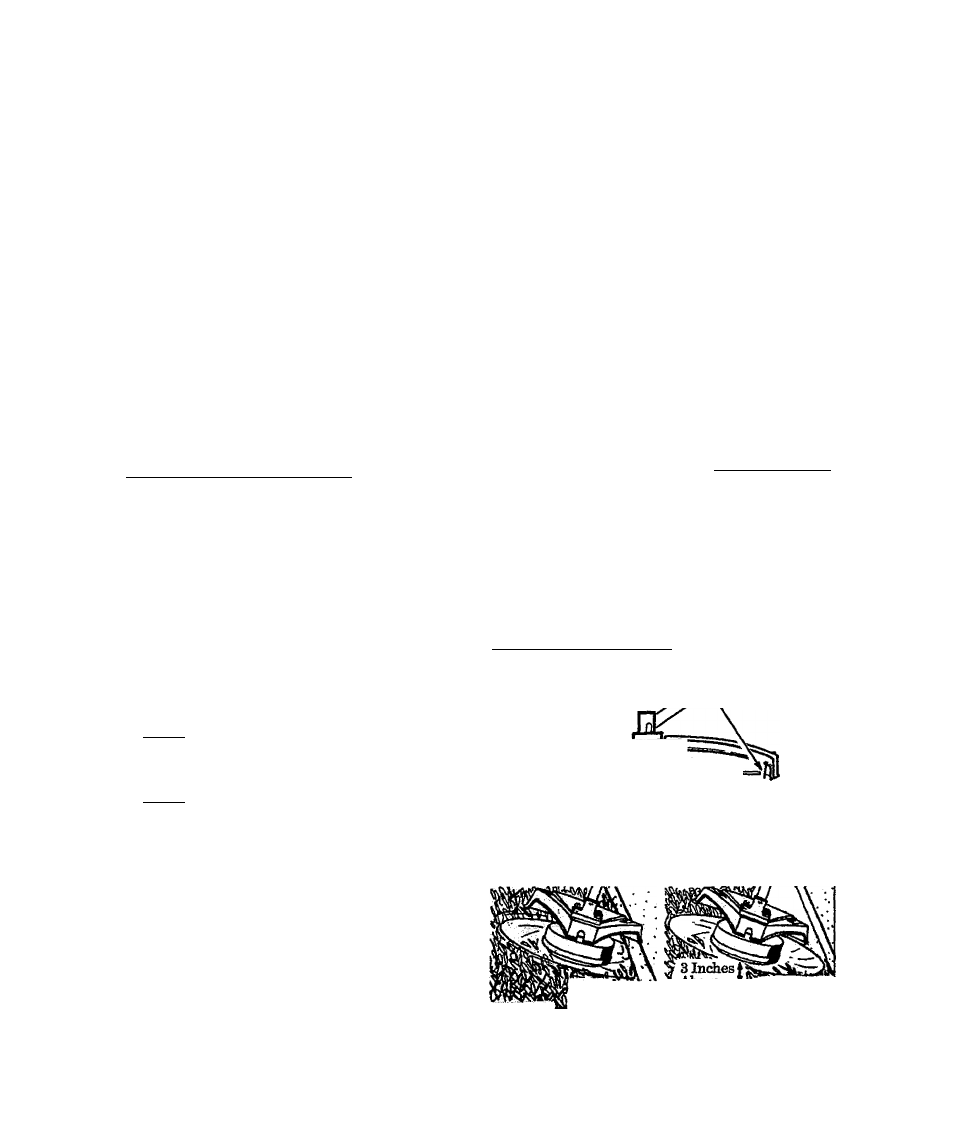
C. CUTTING METHODS
•
The tip of the line does the catting. You will
achieve the best performance and minimum line
wear by not crowding line into cutting area. The
83id wrong ways are shown in FÍgm^ 10.
•
For trimming or scalping, use lesis than full
throttle to increase line life, especially;
- during light duty cutting.
— near objects around which the line can vuap
such as small posts, trees or fence wire,
- 1 2 -
line
___
Crowded Into
WRONG ^ Work Area
я
^ove
¿ATipofthe
*• Ground» Line Does
RIGHT
^ The Cutting
Figure 10