A warning, Choosing wheel and tine speeds, Warning – Troy-Bilt 682J User Manual
Page 20
Attention! The text in this document has been recognized automatically. To view the original document, you can use the "Original mode".
Section 4: Operation
A
WARNING
The HIGH speed belt range position
combined with a FAST wheel speed
setting propels the tiller at the fastest
pace. Redyce the engine throttle speed
when starting out to help awoid personal
injury or property damage if using this
speed combinalion.
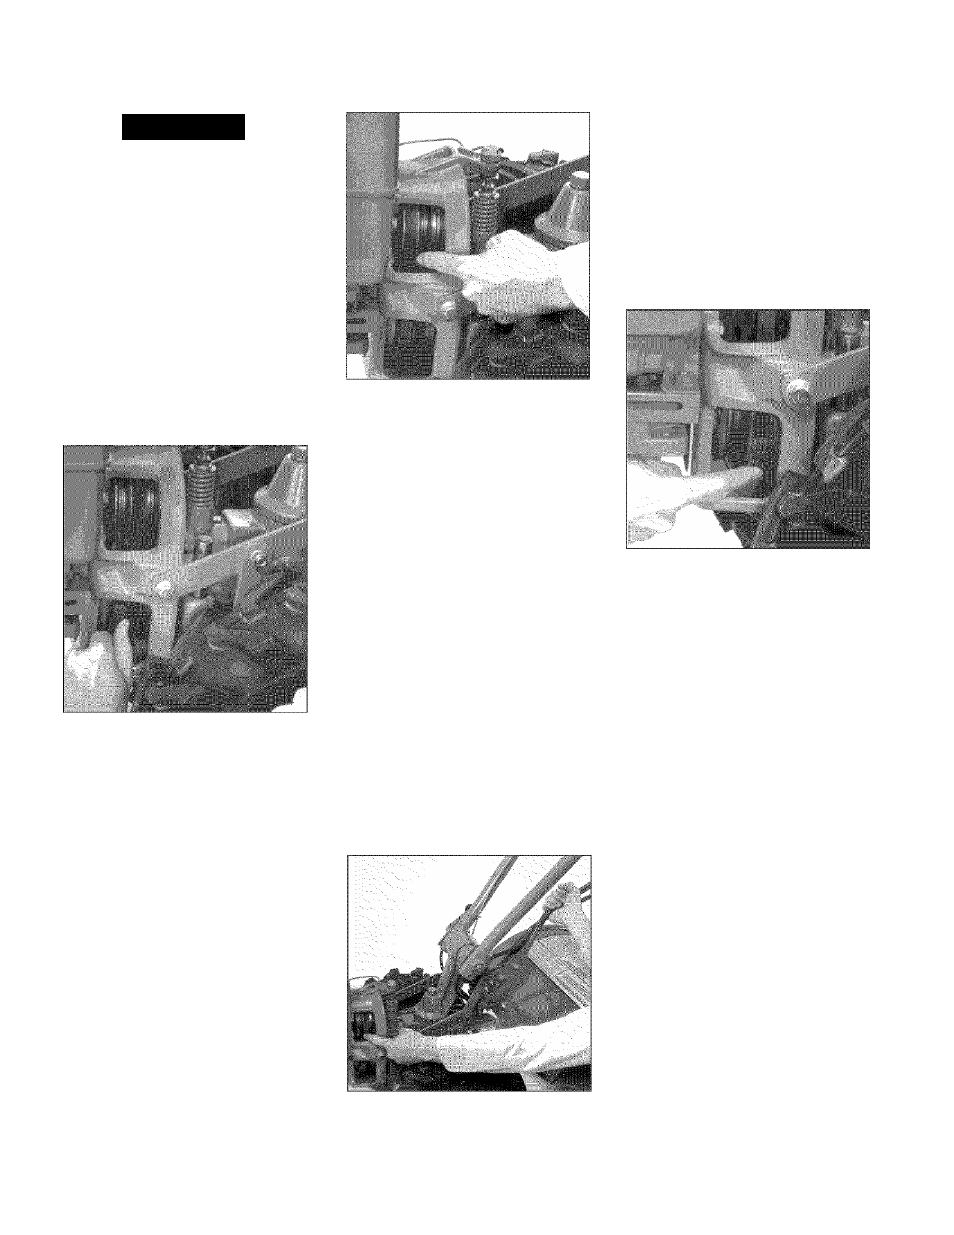
3. Kneel on
left side
of tiller. To create
belt slack, reach over to
right side
of the
pulleys and push in at the center of the
belt with a finger. At the same time, use
your left hand to work the belt part-way
onto the lower-front transmission pulley
groove {Figure 4-10).
Figure 4-10: Low range to high range.
Shows moving belt from lower-rear
groove onto lower-front groove.
4. Go to the other side of the tiller to
finish seating the belt onto the pulley
groove.
5. Working from the
left side
of the tiller,
work the belt as much as possible onto
the top-front engine pulley groove (Figure
4-11).
6. Finish seating the belt from the
right
side
of the tiller.
IMPORTANT:
Proper
belt
tension
is
important for good performance. See
Section 5,
Drive Belt Maintenance
for
information on belt maintenance schedule
and procedures.
NOTE: If extra belt slack is needed to
move
the
belt,
just
raise
the
Wheels/Tines/PTO Drive Lever up into
REVERSE. This lowers the engine pulley,
and creates more slack.
Figure 4-11: Low range to high
range. Shows moving belt from top-
rear groove onto top-front groove.
7. Check
both sides
of the high range
pulley grooves to verify that the belt is
properly seated.
Chaniirig Belt From HIGH Range to
LOW Range
1. To avoid personal injury, shut off
engine, let all moving parts come to a
complete stop, then disconnect spark
plug wire from spark plug and move wire
away from spark plug before making any
adjustments. Let engine and muffler cool.
2. Move the Wheels/Tines/PTO Drive
Lever into NEUTRAL.
3. Stand on left side of tiller. Use your
right hand to hold the WheelsATines/PTO
Drive Lever up into REVERSE position.
Use your left hand to move the belt off
top-front engine pulley groove to top-rear
engine pulley groove (Figure 4-12).
4. Goto right side of tiller and finish
seating the belt.
5. Still holding the lever up in REVERSE
position, and working from the left side of
the tiller, move the belt from the lower
front transmission groove to the lower-
rear transmission groove.
6. Go to the right side of the tiller and
finish seating the belt (Figure 4-13).
Figure 4-12: High range to low
range. Shows moving belt from top
front groove onto top-rear pulley
groove.
Figure 4-13: High range to low
range. Shows moving belt from
lower-front onto lower-rear groove.
7. Check that the belt is fully seated in the
pulley grooves. Check this from both
sides of the tiller.
Choosing Wheel
and Tine Speeds
Your tiller has four FORWARD wheel/tine
speed combinations for handling a variety
of tilling tasks and gardening jobs. Exper
iment with the tine depth, engine speed,
and wheel/tine speed and determine the
combination that provides the best
results. Here are some tips:
1. Advance the throttle lever so the engine
has sufficient power.
2. When tilling untilled or hard earth, do
not set the Depth Regulator too deep. The
tiller will buck and the engine will load
down.
3. You will know your settings are idea!
when the tines break-up the soil easily,
the engine does not labor, and your
progress is steady and smooth.
See Table 2,
Wheel Speed and Belt Range
Selection Guideior
recommendations.
20