SINGER 9113 User Manual
Page 37
Attention! The text in this document has been recognized automatically. To view the original document, you can use the "Original mode".
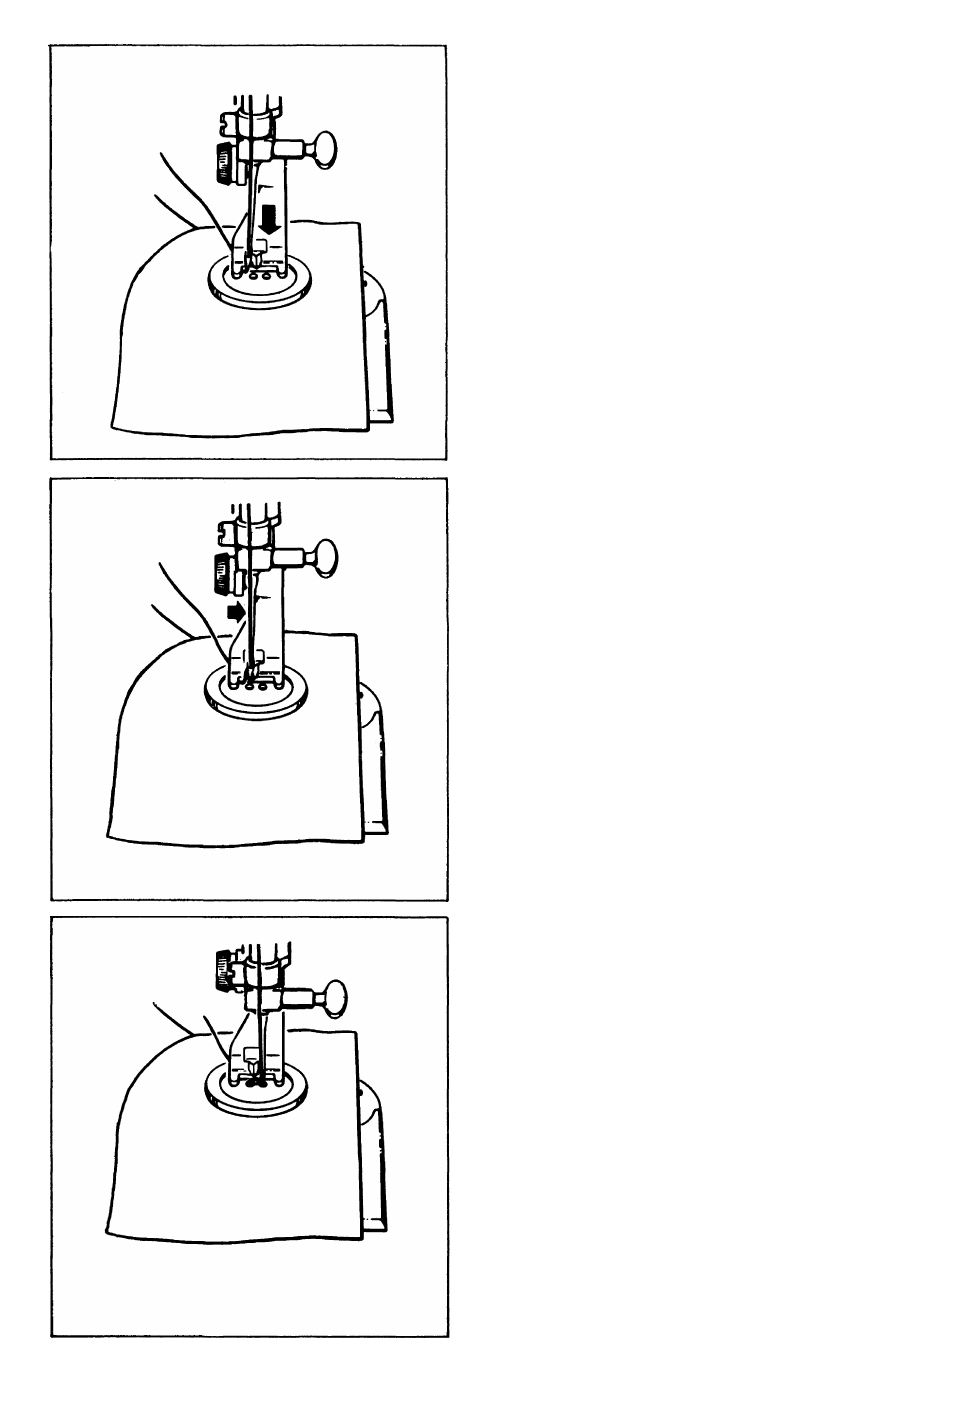
2.Turn hand wheel toward you, lowering
needle into either hole of button.
3.
Continue turning hand wheel until
needle rises and moves over the other
hole of button. Adjust width if necessary.
4. Lower needle into hole.
• Run machine slowly making 6 or more
stitches to attach button.
• Remove work from machine, leaving 4"
(10cm) of thread.
•
• To secure stitching, pull thread ends to
inside of garment and knot close to
fabric.
35
See also other documents in the category SINGER Sewing machines:
- 401A (116 pages)
- Simple 3116 (94 pages)
- 1507 (88 pages)
- 1507WC (88 pages)
- 112W140 (32 pages)
- 147-2 (30 pages)
- 114-33 (43 pages)
- 119-3 (23 pages)
- 14K1 (10 pages)
- 147-104 (34 pages)
- 116-1 (20 pages)
- 115-2 (38 pages)
- 14U286 (40 pages)
- 14U286B (21 pages)
- 114-4 (29 pages)
- 142W25 (10 pages)
- 147-81 (28 pages)
- 118 (16 pages)
- 136W105 (22 pages)
- 114-41 (20 pages)
- 147-4 (28 pages)
- 105-3 (30 pages)
- 1027 (36 pages)
- 147-26 (37 pages)
- 12W208 (25 pages)
- 128-4 (25 pages)
- 109-320 (14 pages)
- CP17 (47 pages)
- 147-6 (56 pages)
- 132B26 (9 pages)
- 114-2 (36 pages)
- 1371A3 (86 pages)
- 14CG754 (53 pages)
- 147-50 (39 pages)
- 14T967DC (3 pages)
- 109-520 (13 pages)
- 14SH654 ULTRALOCK (48 pages)
- 147-86 (30 pages)
- 105-20 (23 pages)
- W303 (13 pages)
- 147-38 (53 pages)
- 114-22 (45 pages)
- 1375A1 (33 pages)
- 107-2 (31 pages)
- 1200A (4 pages)