Section 3 straight stitching, Adjusting stitch length, Straight stitching – SINGER 9113 User Manual
Page 20
Attention! The text in this document has been recognized automatically. To view the original document, you can use the "Original mode".
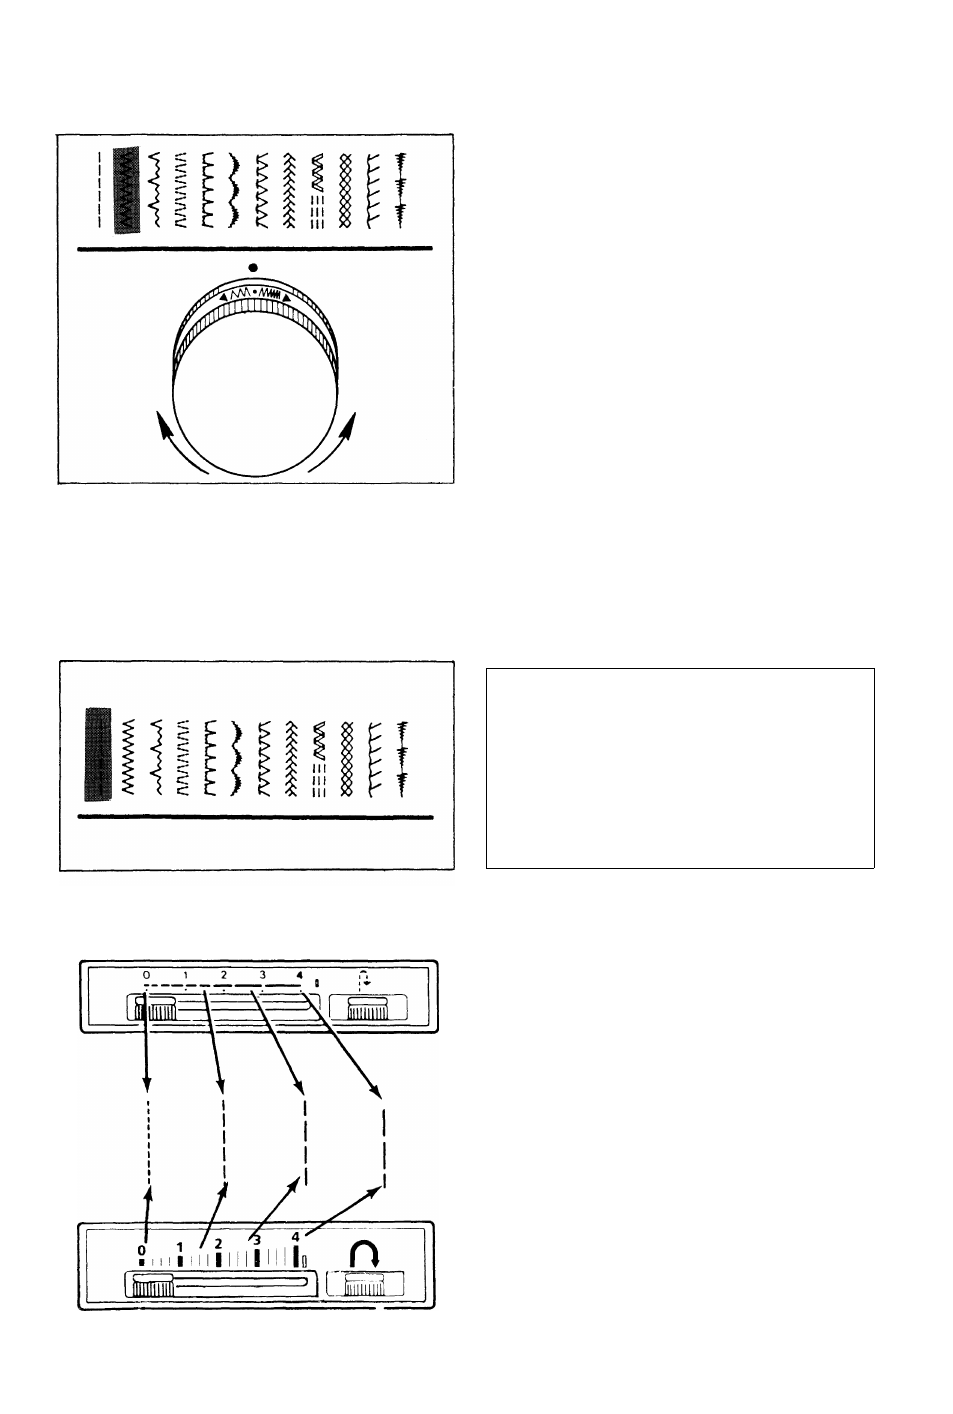
SELECTING A PATTERN
All the patterns your machine is capable of sewing are illustrated on the pattern display
panel of your sewing machine.
• Select a pattern by turning the selector
dial until indicator appears under desired
pattern.
• For instance, to sew a Zig-zag Stitch,
you would turn the selector dial until the
indicator appears under desired pattern.
• To change the stitch pattern, turn the
pattern selector dial left or right to the
desired pattern.
With each application, recommended settings are given. These have been highlighted for
easy identification. You can adjust each setting, however, as desired.
SECTION 3
STRAIGHT STITCHING
Before beginning a sewing project, check the Fabric, Thread and Needle Table on page
41 for the best needle and thread combination for your fabric.
RECOMMENDED SETTINGS
Stitch Selection:
Straight Stitch
Stitch Width:
|
l|
i Hl'wwwwWlM
1* « «0 tl 1
Stitch Length:
1-1/2 to 4
Foot:
General Purpose
(B)
Needle Plate
General Purpose
(A)
ADJUSTING STITCH LENGTH
The stitch length indicator is numbered
0 - 4 . The lower numbers are shorter
stitches. Shorter stitches are best for light
weight fabrics; longer ones for heavy
fabrics. To adjust the length of your stitches,
slide the stitch length lever to the left or
right.
18