Adjusting stitch balance – SINGER 9113 User Manual
Page 27
Attention! The text in this document has been recognized automatically. To view the original document, you can use the "Original mode".
ADJUSTING THREAD TENSION
Some Special Stitch patterns may require looser thread tension than others. To find the
proper tension for your application, make a test sample with the thread and fabric you
will be using.
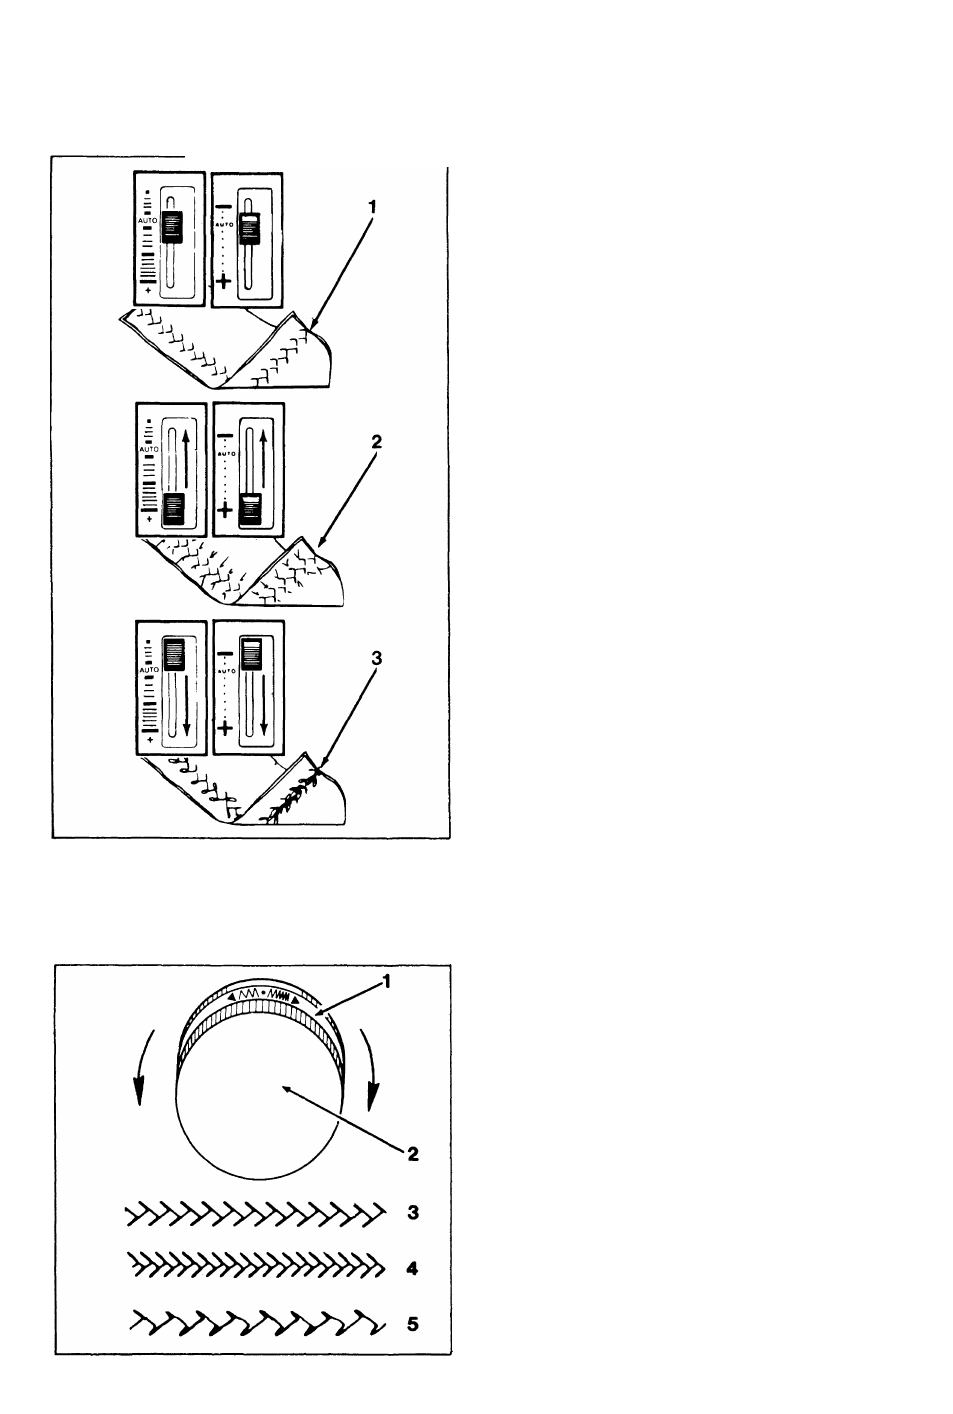
Proper tension produces a smooth, even
stitch (1).
Too much tension will produce a tight
stitch (2), causing fabric to pucker. Adjust
tension by moving lever up toward a
looser setting.
Too little tension will produce a loose
stitch (3), causing loops in your pattern.
Adjust tension by moving lever down
toward a tighter “ + ” setting.
ADJUSTING STITCH BALANCE
You can adjust the appearance of special color coded stitch patterns on the display panel,
by turning the stitch balance ring (1) behind the pattern selector dial (2).
A correctly balanced Fagoting stitch
should appear as illustrated (3).
When stitches are too close together (4),
separate them by turning the stitch balance
ring to the right.
When stitches are too far apart (5), bring
them closer together by turning the stitch
balance ring to the left.
25