SINGER W510 User Manual
Page 31
Attention! The text in this document has been recognized automatically. To view the original document, you can use the "Original mode".
87
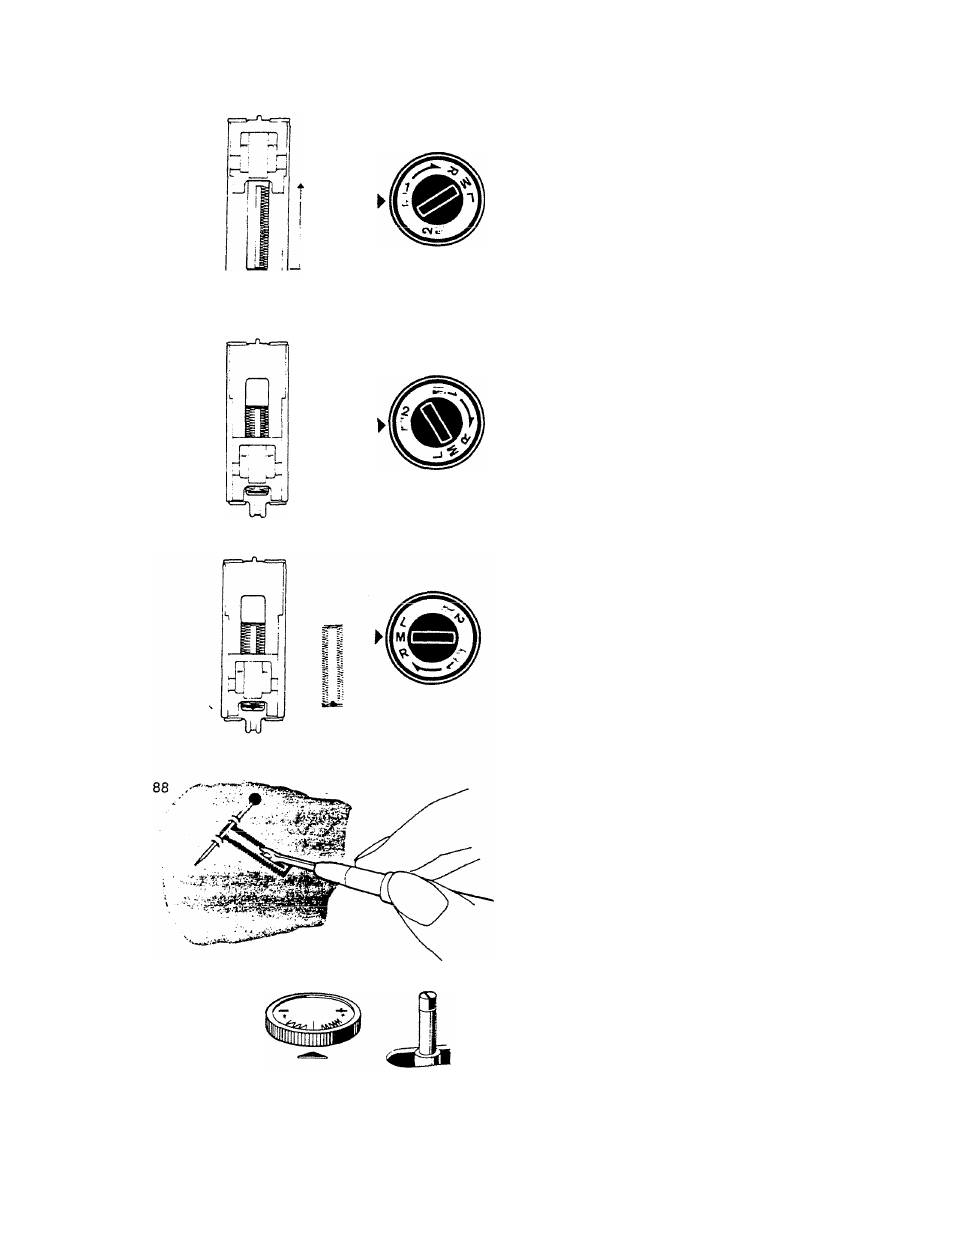
This buttonhole eliminates the need for
pivoting the fabric. It is used most often
on light and medium woven fabrics.
1
. Set the buttonhole control dial at the
first buttonhole picture. Lower the
needle into the mark at the front end
of the buttonhole. Lower the presser
foot. A few stitches will be made for
the bartack, then the stitching will
automatically continue up the right
side of the buttonhole in reverse.
Stop when the stitching reaches the
top end of marked buttonhole. At
this position the machine will be
sewing in reverse.
2.
With the needle up, select the second
buttonhole picture. A few bartack
stitches will be made then, stitches will
continue forward sewing the left side
of the buttonhole. White nylon slide
will run into the cardboard to prevent
sewing into the bartack. (Fig. 87)
3.
To lock the stitch, m.ake sure the
needle is out of the fabric. Make sure
the buttonhole control dial is at M
and take a few stitches.
4.
-Score the buttonhole with the back
edge of the seam ripper several times.
To
prevent
cutting
through
the
bartack, insert a straight pin through
the bartack. Cut buttonhole open
with the seam ripper. (Fig.
88
)
,'Vore.- Stitch IVidth Control shouui
ti'ivcys hr at "
this uuttonnole.
BUILT-IN BUTTONHOLER
Pattern;
Length: Buttonhole
Width; 0
F 66d D og! U p
Pressure: Normal
Foot; Buttonhole
Needle Position:
^vir-v.
1 2
■M
□TJ‘
Adjustment of stitch density:
Check the stitch density on a scrap of
fabric. If density is too open or too close,
re-adjust first the density of the left side
by stitch length dial, and, if the right side
density is not same as the left side, the
density of the right side may be varied
with a compensator dial located near the
bobbin winder, in order to make it match
with the left side.
29