Electrical connections, Sewing light – SINGER W510 User Manual
Page 10
Attention! The text in this document has been recognized automatically. To view the original document, you can use the "Original mode".
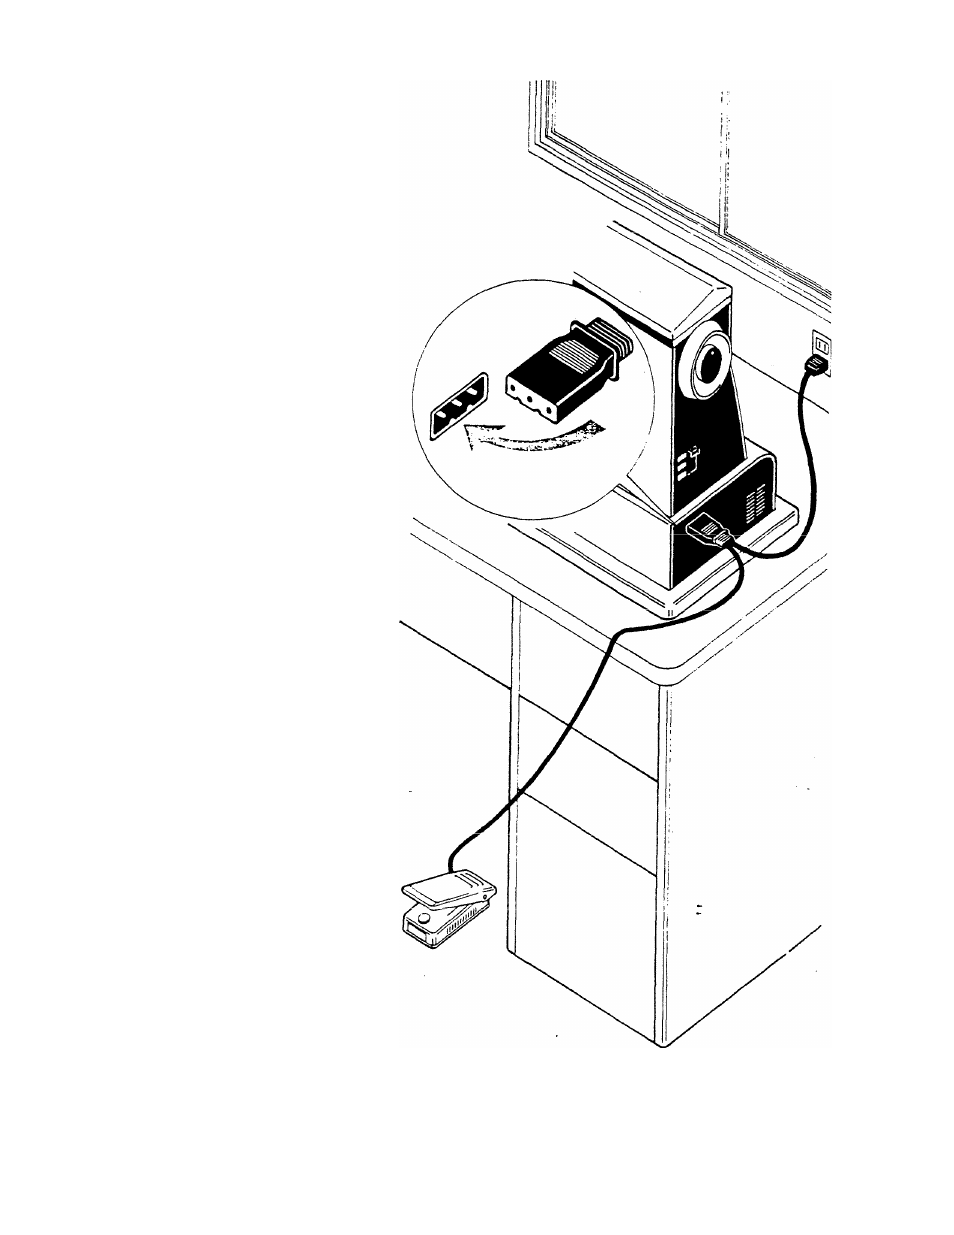
ELECTRICAL CONNECTIONS
Insert the plug with the indenta
tions on the underside into the
socket on the right side of the
machine. The plug will only go
in one way. Place the foot con
trol in such a position that your
foot rests comfortably on it.
Insert the plug into a wall outlet,
110-120 V.
SEWING LIGHT
The switch at the right side of
machine is the master switch for
on-off of both the light and the
motor. It is also for selection of
speed between fast and slow
sewing.
With the switch at "LOW" posi
tion, powerful slow speed sew
ing, less than 650 rpm is possible.
At
"HIGH",
sewing
speed
reaches upto 950 rpm maximum.
The light is turned on when the
switch is set at these positions.
At the lower range you may en
counter a noticable .hum or in
crease in motor noise. This is
common due to the increased
power
or
torque
needed
to
operate your machine.
With the switch at "OFF" posi
tion, the electric circuits for both
light and motor are completely
shut off. When machine is not
in use, always turn the switch off
for safety.
The sewing light is located in
face cover directly over the
needle to better illuminate the
stitching area.
With the power switch at the
right side of machine on "HIGH"
or "LOW" speed position, the
light simultaneously turns on,
and with the switch on "OFF",
the light also turns off.