SINGER W510 User Manual
Page 17
Attention! The text in this document has been recognized automatically. To view the original document, you can use the "Original mode".
37
VI. GETTING TO KNOW YOUR SEWING
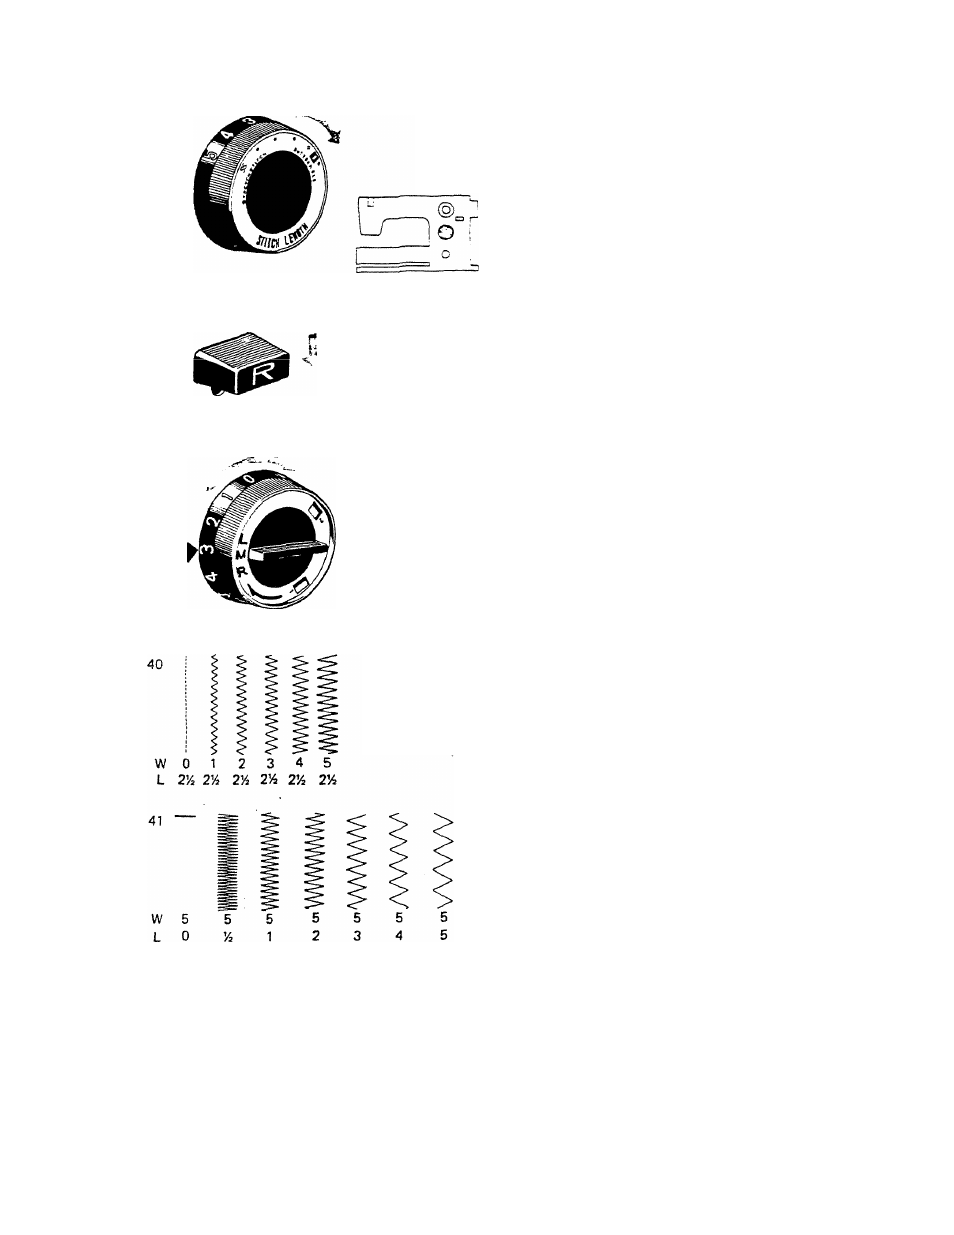
ADJUSTING THE STITCH
• Stitch Length Dial
This dial (Fig. 37) controls the forward
feeding of the fabric. At 0, the fabric does
not feed at all. As the numbers increase so
does the length of the stitch. Turn the blue
dial so that the desired number is below the
blue indicator.
38
L_J
o
o
39
pj~
Lr
o
Pattern:
Length;
Xk
Width: 0—5
Feed Dog: Up
Pressure: Normal
Foot: All Purpose
Needle Position: M
Pattern;
Length: 0-5
Width: 5
Feed Dog: Up
Pressure; Normal
Foot; All Purpose
Needle Position; M
• Reverse Lever
The "R" marked blue lever (Fig. 38) above
and to the right of the stitch length dial will
cause the machine to sew in reverse when
depressed. This lever may be used at the
beginning and end of sewing to lock the
threads.
To backstitch, simply push the lever down
and hold for the desired number of stitches.
It is advisable to tie the thread ends instead
of backstitching on soft sheer fabrics to
avoid puckering.
• Stitch Width Dial
This dial (Fig. 39) controls the swing of the
needle right and left for various widths of
stitchss. A»t Q, tH
6
nsscilc dess not. swing
therefore, a straight line of sewing results no
matter which stitch is selected.
At 1, the needle takes a narrow swing result
ing in a narrow column of stitching. At 5, '
the needle takes a large swing resulting in a
wide column of stitches. (Fig. 40)
• Relating Stitch Length to Stitch Width
When the width dial is engaged at one par
ticular width (such as 5), the stitch length
dial will now control bow close those
stitches come together. At length 0, the
fabric does not move, resulting in a ball of
stitches formed one on top of the other, as
is used in button sewing. At about 1/4, the
feed pulls the fabric through slowly, result
ing in a dense column of stitches called a
satin stitch. At length 5, a very long open
zigzag resu Its. (F ig. 41)
15