Stitch selector, Stitch length control, Adjusting stretch stitch balance – SINGER 384.13012 (Sold at Sears) User Manual
Page 34: Reverse stitch control
Attention! The text in this document has been recognized automatically. To view the original document, you can use the "Original mode".
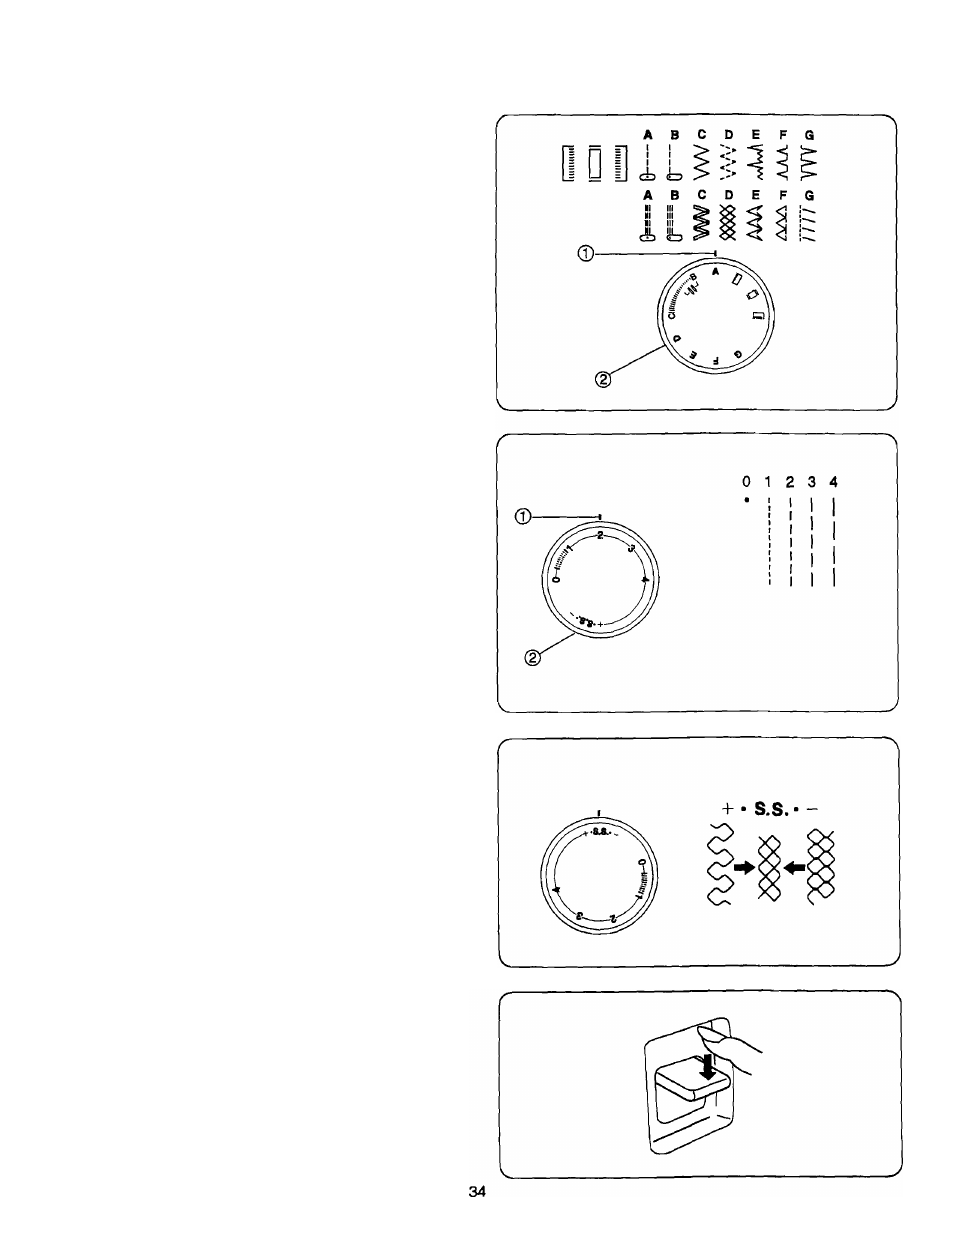
stitch Selector
© Setting mark
© Stitch selector
The stitch selector not only determines the stitch you select,
but also regulates the stitch width of zigzag stitch.
NOTE :To avoid needle or fabric damage, make sure the
needle is up and out of the fabric while selecting a
stitch.
Stitch patterns are color-coded to recommended setting zone
at the stitch length control.
ZONES:
Blue:
Straight, zigzag and utility stitches
Green: Built-in buttonhole
Pink:
Stretch stitches
Stitch Length Control
© Setting mark
© Stitch length control
The higher the number of stitch length control, the longer the
stitch. “ 0 ” means “no feed”. The stitch length control also
has a stretch stitch setting. To select a stretch stitch, set the
control at “S.S.”.
NOTE:
When you select a stitch (Blue) or buttonhole (Green),
make sure that the stitch length control is NOT set at
“STRETCH”.
Study the blue, green, and pink zones on the stitch length
control. These are recommended zones of stitch length
and are color-coded to the stitches.
Adjusting Stretch Stitch Balance
In stretch stitch sewing, the stitch length control should be in
the detent position between and “+” ( S.S. position) for
most materials. Depending upon the type of fabric used, you
may need to adjust this control to match forward stitches of
stretch sewing with reverse motion stitches. To shorten
stretch stitches, turn the control slightly toward
To lengthen, turn toward “+”.
Reverse Stitch Control
Sewing will be made in reverse while the reverse stitch
control is pressed.