Step 1, Step 2, Tiempo 1 – SINGER 3314 User Manual
Page 51: Tiempo 2, Temps 1, Temps 2
Attention! The text in this document has been recognized automatically. To view the original document, you can use the "Original mode".
Recommended settings
Stitch Selection: Zig-zag stitch (Pattern
Stitch Width; Pre-set
Foot: Buttonhole (L)
Needle Plate: General Purpose (A)
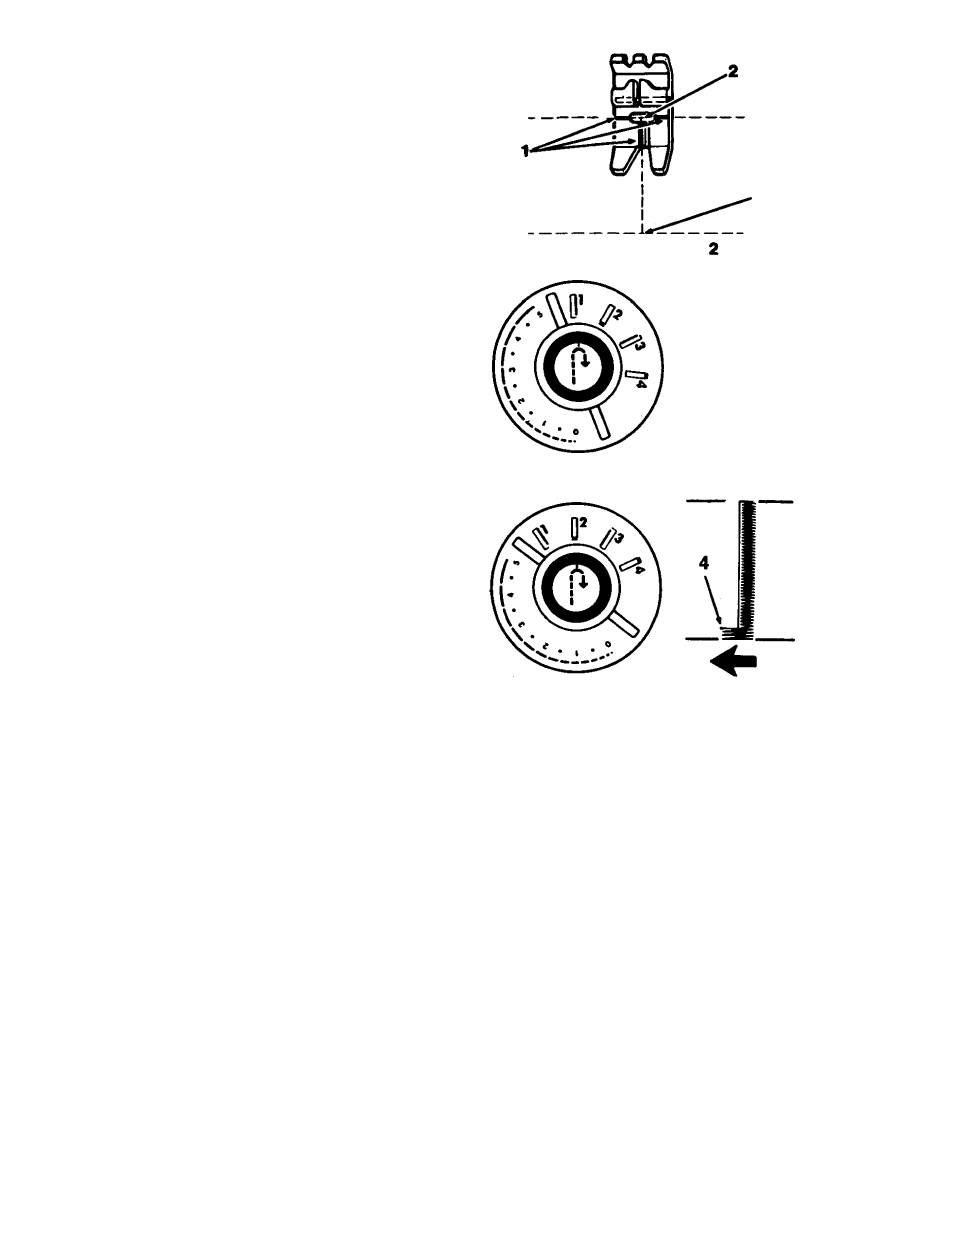
step 1
• Raise presser foot.
• Place fabric under foot.
• Centre 3 red guidelines (1) of foot around
beginning line of buttonhole.
• Turn buttonhole dial to the first buttonhole symbol
for the first step.
• Position needle in fabric at point (2) by turning
the hand wheel towards you.
• Stitch down to point 3.
step 2
• Raise needle out of fabric.
• Turn buttonhole dial to the second buttonhole
symbol for the second step.
• Make at least four stitches, ending at point (4).
Posiciones recomendadas
Selección punto; Disco zig-zag 1
Anchura punto: Prepuesta
Prénsatelas; Ojales (L)
Plancha aguja; Uso genera! (A)
Tiempo 1
• Levante el prénsatelas.
• Coloque el tejido debajo del prénsatelas.
• Centre las 3 líneas-guía rojas (1) del prénsatelas,
con la línea de comienzo del ojal.
• Gire el mando para ojales hacia el primer símbolo
del ojal para realizar el primer tiempo.
• Colocar la aguja en el tejido sobre el punto (2)
girando el volante del mano hacia Vd.
• Cosa hasta el punto (3).
Tiempo 2
• Saque la aguja del tejido.
• Gire el mando para ojales hacia el segundo
símbolo del ojal para realizar el segundo tiempo.
• De un mínimo de cuatro puntadas, terminando
en el punto (4).
\
7
Réglages recommandés
Sélecteur de point: Disque zig-zag 1
Sélecteur de largeur: pré-sélectionnée
Pied presseur boutonnière (L)
Plaque à aiguille universelle (A)
Temps 1
• Relevez le pied presseur.
• Placez le tissu sous le pied presseur.
• Alignez les repères rouges du pied presseur sur
les lignes de traçage de la boutonnière (1).
• Tournez le sélecteur de longueur pour amener
le premier symbole lèvre de la boutonnière face
au point (•).
• Descendez l’aiguille dans le tissu (2) en tournant
le volant à la main vers vous.
• Brodez la première lèvre (3).
Temps 2
• Relevez l’aiguille.
• Tournez le sélecteur de longueur pour amener
le deux symbole face au point ( •).
• Brodez le point d’arrêt (4) (quatre à six points).
49