Monograma en bloque, Monogrammes, Blindstitch – SINGER 3314 User Manual
Page 41: Punto de realce, Point de bourdon
Attention! The text in this document has been recognized automatically. To view the original document, you can use the "Original mode".
Punto de realce
Posiciones recomendadas
Selección punto: Zig-zag
Posición aguja: L[¿1*
Anchura punto:
Longitud punto: 0-2
Prénsatelas: Uso especia! (J)
Plancha aguja: Uso general (A)
El punto de realce es una serie de puntadas en
zig-zag bastante juntas. Se utiliza para
monogramas, bordado y apliques, produciendo
un acabado suave como de satin.
• Practique, para conseguir la apariencia
deseada del punto.
Monograma en bloque
• Marque las letras ligeramente en el anverso
del tejido.
• Centre las marcas debajo de la aguja.
• Cosa todo el contorno, dejando la aguja en el
tejido al girar.
• Lleve los hilos hacia la parte posterior del
tejido, anúdelos y córtelos.
Point de bourdon
Réglages recommandés
Sélection de point: zig-zag
Position d’aiguille: L[^ J
Largeur de point:
Longueur de point: 0 à 2
Pied presseur spécial (J)
Plaque à aiguille universelle (A)
Le point de bourdon est une série de points
de zig-zag rapprochés. Ce point permet les
applications, les finitions d'ourlets et la
broderie de monogrammes.
• Faites un essai pour choisir l'apparence
désirée.
Monogrammes
• Sur l'endroit du tissu, tracez légèrement
le dessin des lettres.
• Présentez ce tracé sous l'aiguille.
• Brodez en recouvrant le tracé; pour tourner
le travail, laissez t'aiguille dans le tissu.
• Tirez les fils sur l'envers du travail, nouez-
les et coupez-les.
Blindstitch
(only for machines with
interchangeable pattern discs)
Blindstitching provides a durable hem finish that
can be used on a variety of different weight
fabrics. Blindstitching takes a little practice,
however, so make a test sample first.
Recommended settings
Stitch Selection: Blindstitch (Pattern disc 3)
Needle Position:
Stitch Width:
Stitch Length: 2-5
Foot: Special for blindstitch
Needle Plate: General Purpose (A)
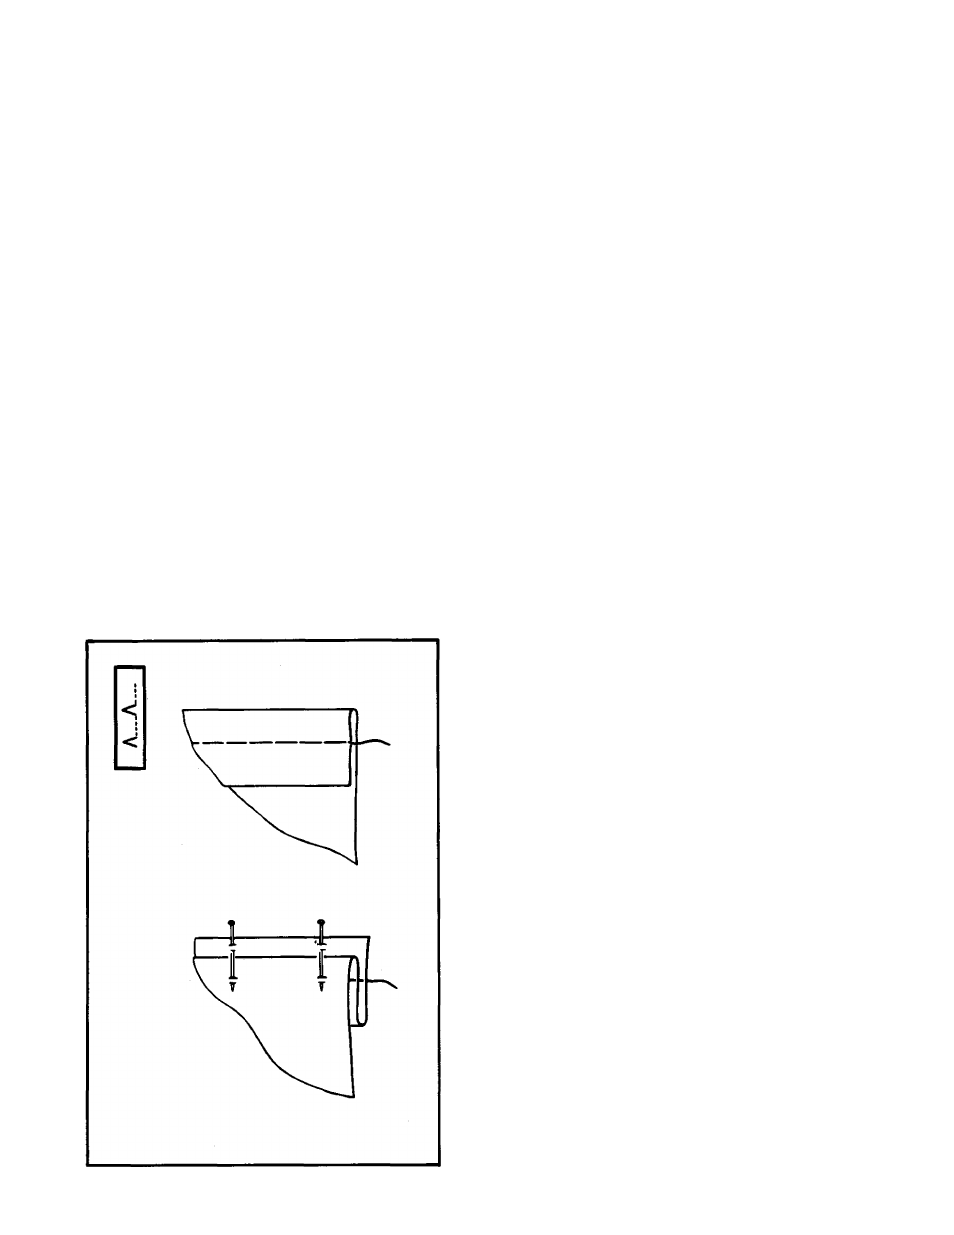
Prepare the hem by folding it and pressing it
in the usual way. You may want to baste the
hem to hold it in place, as shown. If so, be sure
to place the basting at least
Vz
inch (12mm)
below the top edge of the hem allowance.
With the wrong side of fabric uppermost, turn
the hem under, as shown, creating a soft fold
from the top edge of hem. Pin or baste a|l three
layers together in place.
39