Repriser, Darning, Zurcido – SINGER 3314 User Manual
Page 35
Attention! The text in this document has been recognized automatically. To view the original document, you can use the "Original mode".
Darning
Worn or torn spots on children’s clothes and
household linens can be darned effortlessly and
quickly with little practice. When greater control
is needed, an embroidery hoop, which may be
purchased at your SINGER dealer should be
used.
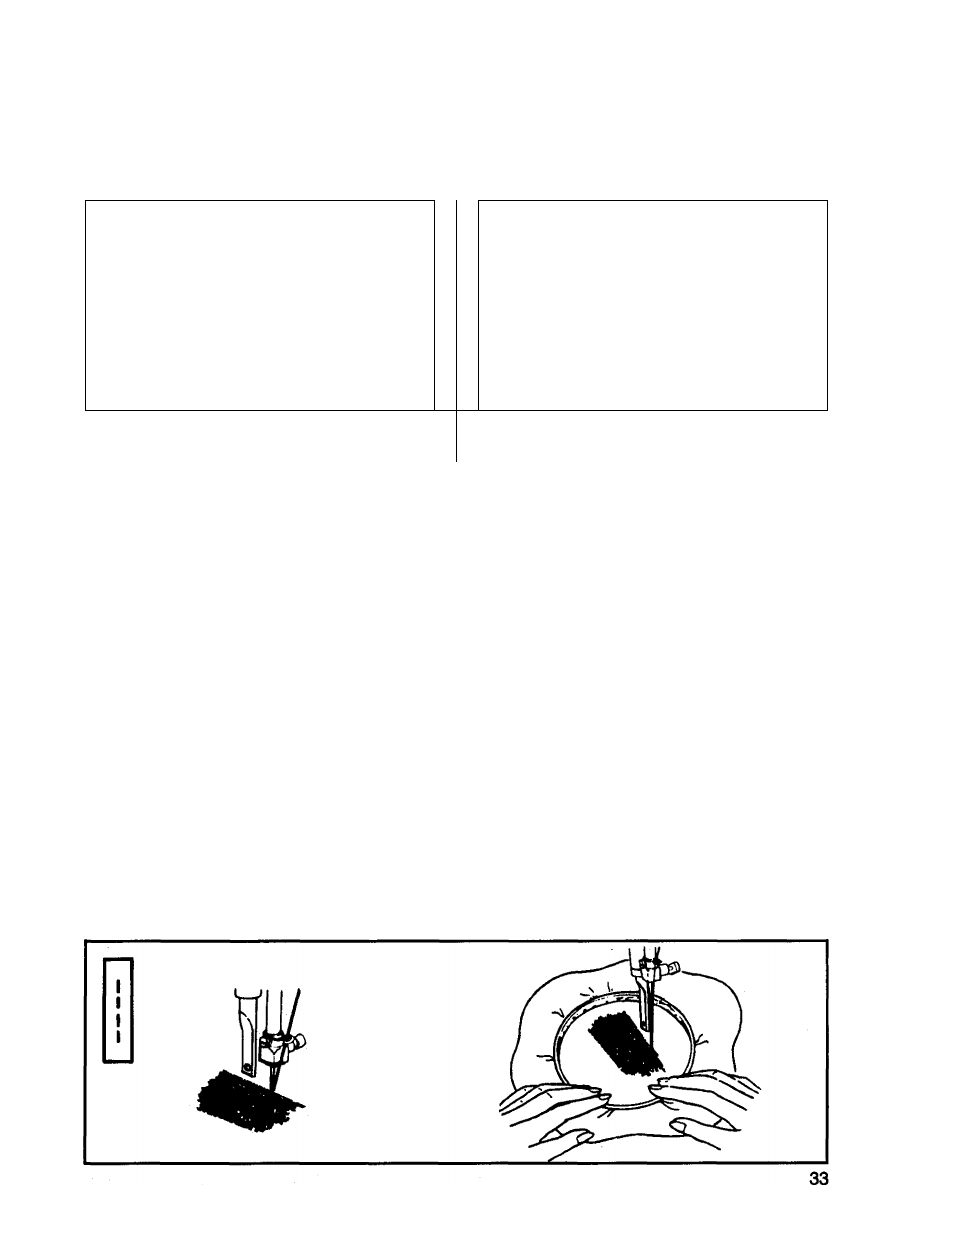
• Place area to be darned, right side up, under
presser foot; lower the foot and begin stitching,
alternately drawing the fabric toward you and
pulling it gently away from you.
• Continue this forward and backward motion as
you fill the area in with parallel lines of stitching.
Las partes desgastadas o rotas de las ropas de
niños y de la ropa blanca del hogar, se pueden
zurcir sin esfuerzo y rápidamente con un poco de
práctica. Cuando precise un mayor control del área
de zurcir, adquiera en su centro de costura un aro
de bordar para zurcir y bordar.
Zurcido
Recommended settings
Stitch Selection: Straight Stitch
Posiciones recomendadas
Selección punto: Punto recto
Needle Position:
Posición aguja: LQ*
stitch Width:
Anchura punto: [j]| | Í ^
Stitch Length: 2-5
Foot: General Purpose (B)
Needle Plate: General Purpose (A)
Attach feed cover plate (F)
Longitud punto: 2-5
Prénsatelas: Uso general (B)
Plancha aguja: Uso general (A)
Adaptar plancha cubre arrastre (F)
• If the area to be darned is open, baste a backing
on the underside.
• Si el área a zurcir está abierta hilvane un refuerzo
en el revés.
• Coloque el área a zurcir, con el derecho hacia
arriba, debajo del prénsatelas, baje este y
empiece a coser, tirando del tejido con suavidad
hacia adelante y hacia atrás, alternativamente.
• Continúe realizando estos movimientos según va
llenando el área con líneas paralelas de puntos.
Repriser
Avec un peu de pratique usures et trous dans les
vêtements d’enfant comme dans le linge de maison
peuvent être reprisés facilement et sans effort. S’il
s’agit de grandes reprises, utilisez un cercle à
broder que vous pourrez acheter dans votre
magasin SINGER.
Réglages recommandés
Point utilisé: point droit
Longueur de point: 2-5
Pied presseur: universel (B)
Plaque à aiguille universelle (A)
Plaque à repriser (F)
Position de l’aiguille:
J
Largeur de point: [|]|| | ^
• Si le tissu est troué, bâtissez un tissu de renfort
sous l’ouverture.
• Placez sous le pied presseur la partie à repriser,
l’endroit du tissu au-dessus. Baissez le pied
presseur et commencez à repriser en imprimant
délicatement au tissu un mouvement de va et
vient.
• Continuez ce mouvement de va et vient jusqu’à
ce que la partie à repriser soit recouverte de
lignes bien parallèles.