Attachimg a brnroh, Fonmmb a thread shahk, Shianki – SINGER 1200 Athena User Manual
Page 71
Attention! The text in this document has been recognized automatically. To view the original document, you can use the "Original mode".
I
o
LES
»Stitch: overedge stretch stitch
o Stitch width: to suit button
« Stitch length; C
® Sutton foot
o Feed cover plate
ATTACHIMG A
BrnrOH
» Attach button foot and feed cover plate to
machine and turn on machine.
® Select cveredge stretch stitch
^ .
»Turn hand wheel
toward you
moves to left side.
;;nti
neecie
• Place garment under foot, then position but
ton on garment.
® Turn hand wheel again to lower needle Into
left hole of button, and lower foot.
» Turn hand wheel again carefully until needle
is just above right hole. Adjust stitch width,
if required, so that needle will enter right
hole of button. See page 22 for Information
on stitch width control.
» Run machine slowly. Allow at least three
groups of crossover stitches to enter right
hole of button. Finish sewing on left side.
taking two or three tying stitches.
® Remove work from machine leaving 4 In
ches \10cm) of thread, pull thread ends
through to inside of garment, and knot them
close to fabric to form a secure finish.
fOnmmB A
THREAD SHAHK
Buttons sewn on coats and jackets should
have a thread shank to make them stand away
from the fabric. A thread shank is formed by
sewing over the blade of a regular machine
needle.
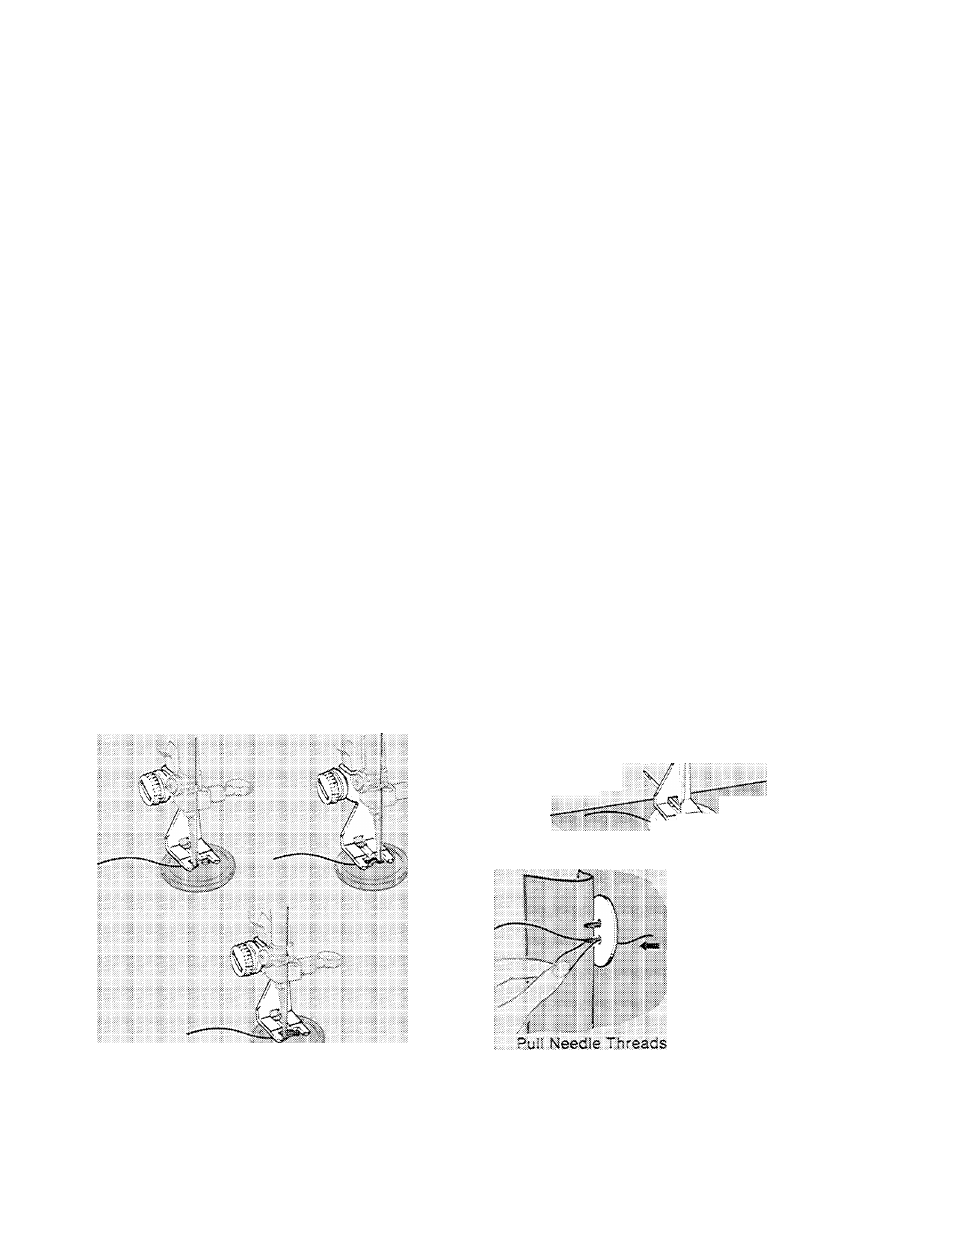
® Position needle, garment and button as de
scribed above.
® Place needle in groove of foot so that point
enters hole in foot first, as shown. The
further in you push needle, the longer the
shank will be.
® After stitching, remove needle from groove
of button foot, remove work from machine,
and cut threads about 6 inches (15cm) from
fabric.
® Pull needle thread ends to back of button,
form a firm shank between button and fabric
by winding threads tightly around attaching
stitches, and tie thread ends securely.
Attaching a Button
.
'A'
i
.Shianki
69