SINGER 1200 Athena User Manual
Page 10
Attention! The text in this document has been recognized automatically. To view the original document, you can use the "Original mode".
Aítachins Darning and Embroidery Foot
Attaching Cbalnstitch Fittings
SieamLGMsde,,
Darning and Embroidery Foot
1. Raise needle and take-up lever to highest
position by turning hand vsrheel toward
you.
2.
Raise foot.
3. Loosen presser foot screw and remove
presser foot shank.
4. Guide darfiing and embroidery foot into
position from back of machine. Make sure
lifting finger (B) is above needle clamp.
5. Tighten presser foot screw with coin.
CMAmmuB
i
^
eeole
plates
Mote: Remove bobbin if it contains thread in
order to prevent thread being caught when
piate is replaced.
1. Raise needle and take-up lever to highest
position by turning
the
hand wheel
toward
you.
2. Raise presser foot.
3. Open slide plate. Press down on front edge
of plate and lift up and out.
4. Position new plate over pins and release.
Plate is drawn into position by magnets.
See special Instructions below for attach
ing chainstitch plate.
5. Close slide plate.
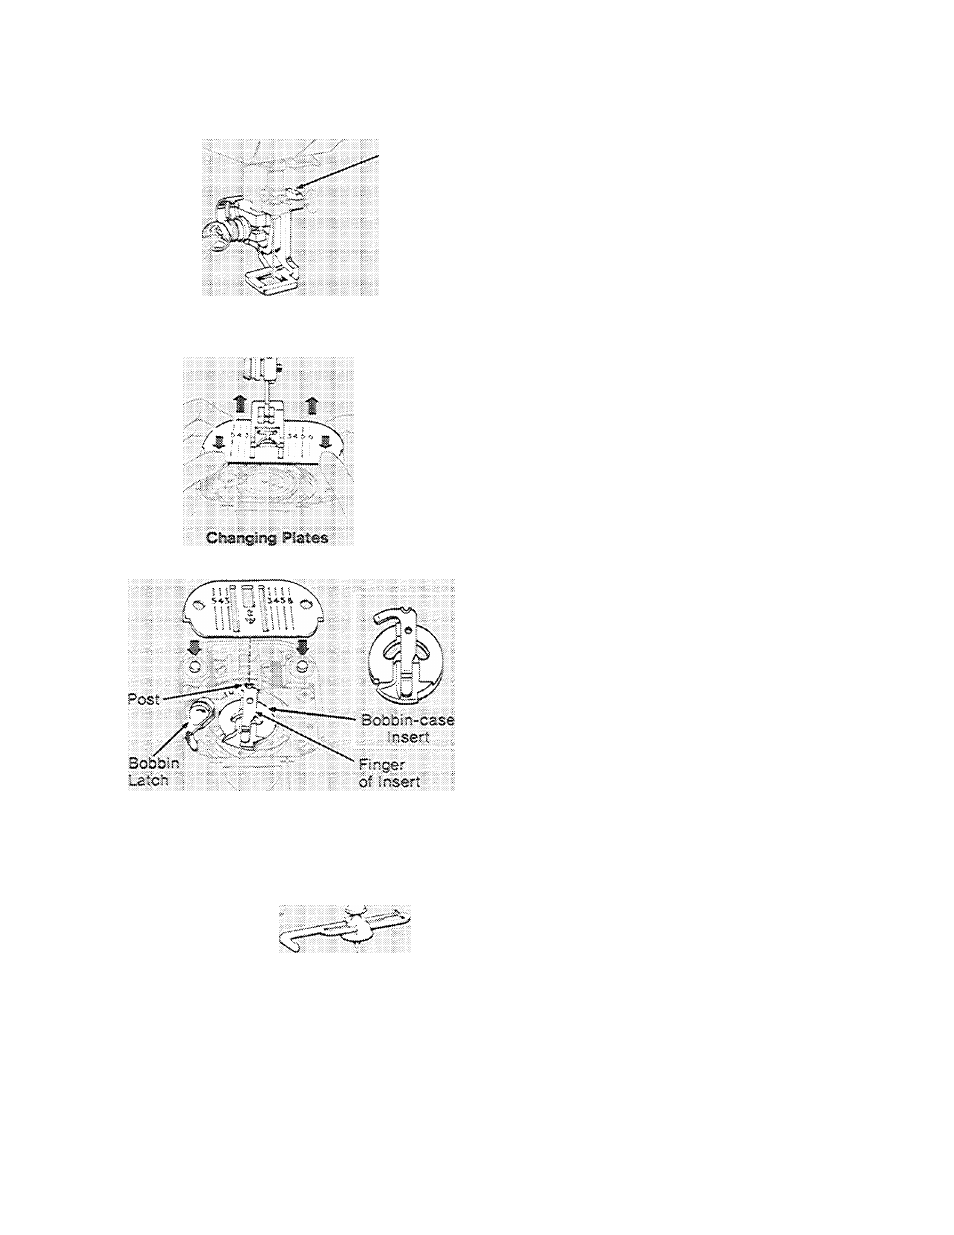
Chainstitch Plate and Insert
1. Raise needle and take-up lever to highest
position and raise presser foot.
2. Open slide plate.
3. Move bobbin latch to left and remove bob
bin and needle plate from machine.
4. Place bobbin-case Insert in bobbin case as
shown, with finger of insert positioned
under the feed.
5.
Position chainstitch plate over holding
pins, making certain that the
post of the
bobbin-case insert finger enters the hole in
the plate.
6. Close slide plate.
ATTACHIMC THE SEAÜ GUIDE
Place screw in hole to the right of the slide
piate; line up straight edge of guide with the
needle plate guideline for desired seam width,
and tighten screw.