Paris point hemstitcliing, Fririged edges – SINGER 1200 Athena User Manual
Page 54
Attention! The text in this document has been recognized automatically. To view the original document, you can use the "Original mode".
Paris Point Hemstitcliing
Ш
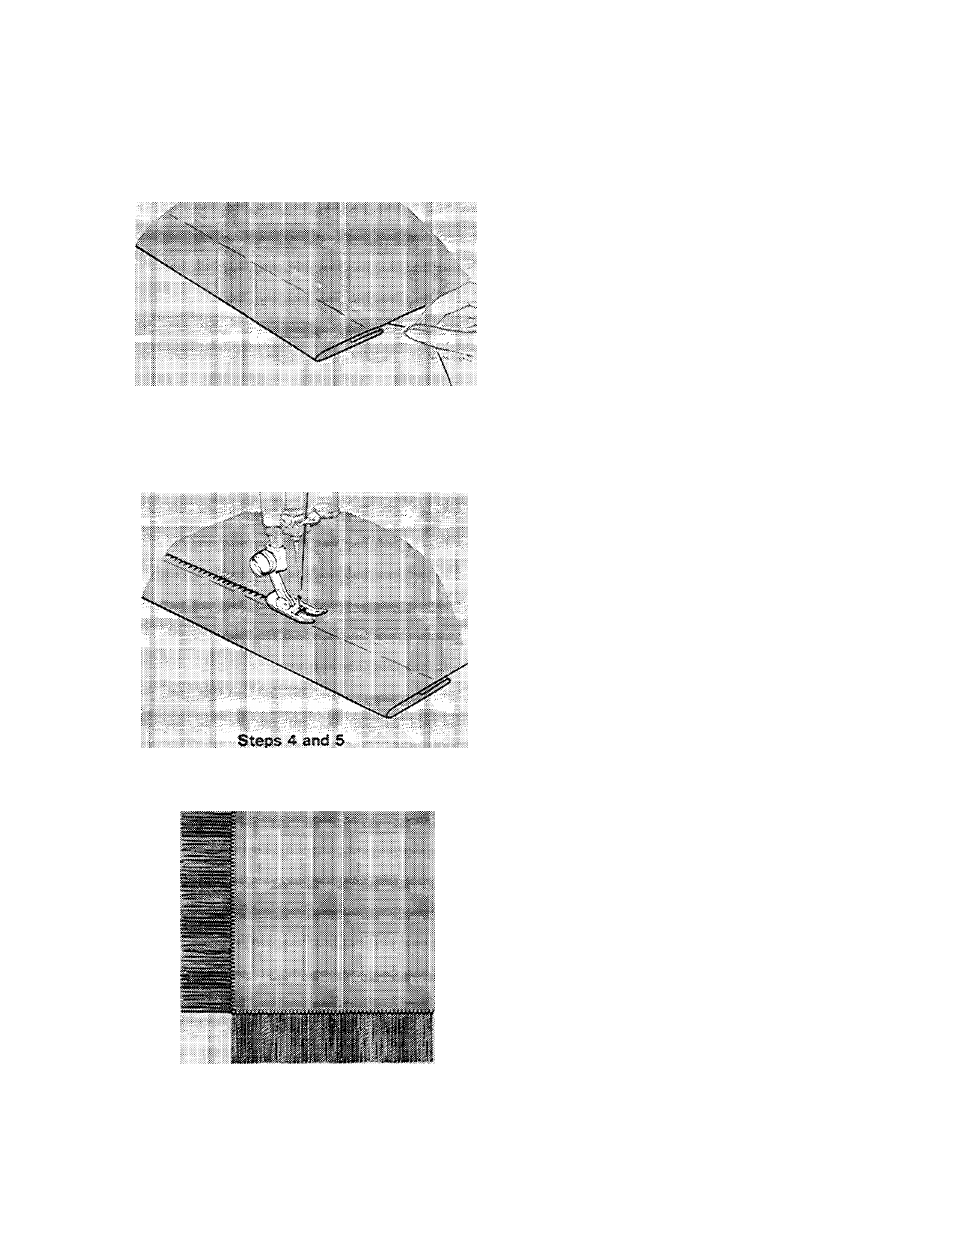
Steps 1, 2 and 3
• Stitch; Paris Point stitch ^
• Stitch width: to suit fabric and effect
® Stitch ieiigth; to suit fabric and effect
e General purpose needle plate
• General purpose foot or
• Special purposefoot
• Speed range; SLOW
Paris Point hemstitching is most effective
when used on firm, plain weave fabrics such
as lawn or organdy, or fabrics from which
threads can be drawn readily, such as linen.
1. Insert a size 18 needle and thread the
machine with a fine mercerized cotton, silk,
or synthetic sewing thread.
2. Turn edge of fabric over twice to make hem
of desired width. Fold and press on length
wise or crossv/ise thread of fabric. Baste in
place.
3. Draw out 2 to 4 threads just above top edge
of hem. The number of threads drawn will
depend on the texture of the fabric and the
depth of the open work desired.
4. Place work, right side up, under presser
foot
with the hem toward the left.
5. Lower the presser foot and stitch, guiding
the hem edge under the needle so that the
straight stitches are made in the drawn
thread channel (or through the single
thickness of fabric) and the sideward
stitches (or points)
in the hem.
Fririged Edges
® Cut fabric carefully to correct size.
* Draw a thread for depth of fringe along each
edge.
e Place fabric so that the edge to be fringed is
turned to the right.
® Stitch with matching or contrasting thread
along marked lines, pivoting on the needle
at corners.
• Fray fabric threads between stitching and
fabric edges to form fringe.
52