Zig-zag, Attaching lace, Stitchtes of personal choice – SINGER W8910 User Manual
Page 38
Attention! The text in this document has been recognized automatically. To view the original document, you can use the "Original mode".
Stitchtes of personal choice
Zig-zag
By pressing the push-button to the right under the
arrow until the light under the symbol for zig-zag goes
on, the machine will automatically be set for sewing a
stitch (stich length 2, stitch width 4) which is suitable for
overcasting. However, three-step zig-zag is recom
mended for overcasting light stretch fabrics or easily
frayable material. This latter stitch binds the threads
better and looks nicer.
If the stitch length and width is adapted to the mate
rial, it is very suitable for many sewing operations like
gathering with shirring elastic, bound edging, sewing on
appliqués and attach lace.
Use presser foot J when overcasting but do not forget
to increase the stitch width to 5. Otherwise presser foot
A is most commonly used, although when sewing close
zig-zag (less than 1 mm stitch length), presser foot B is
more suitable.
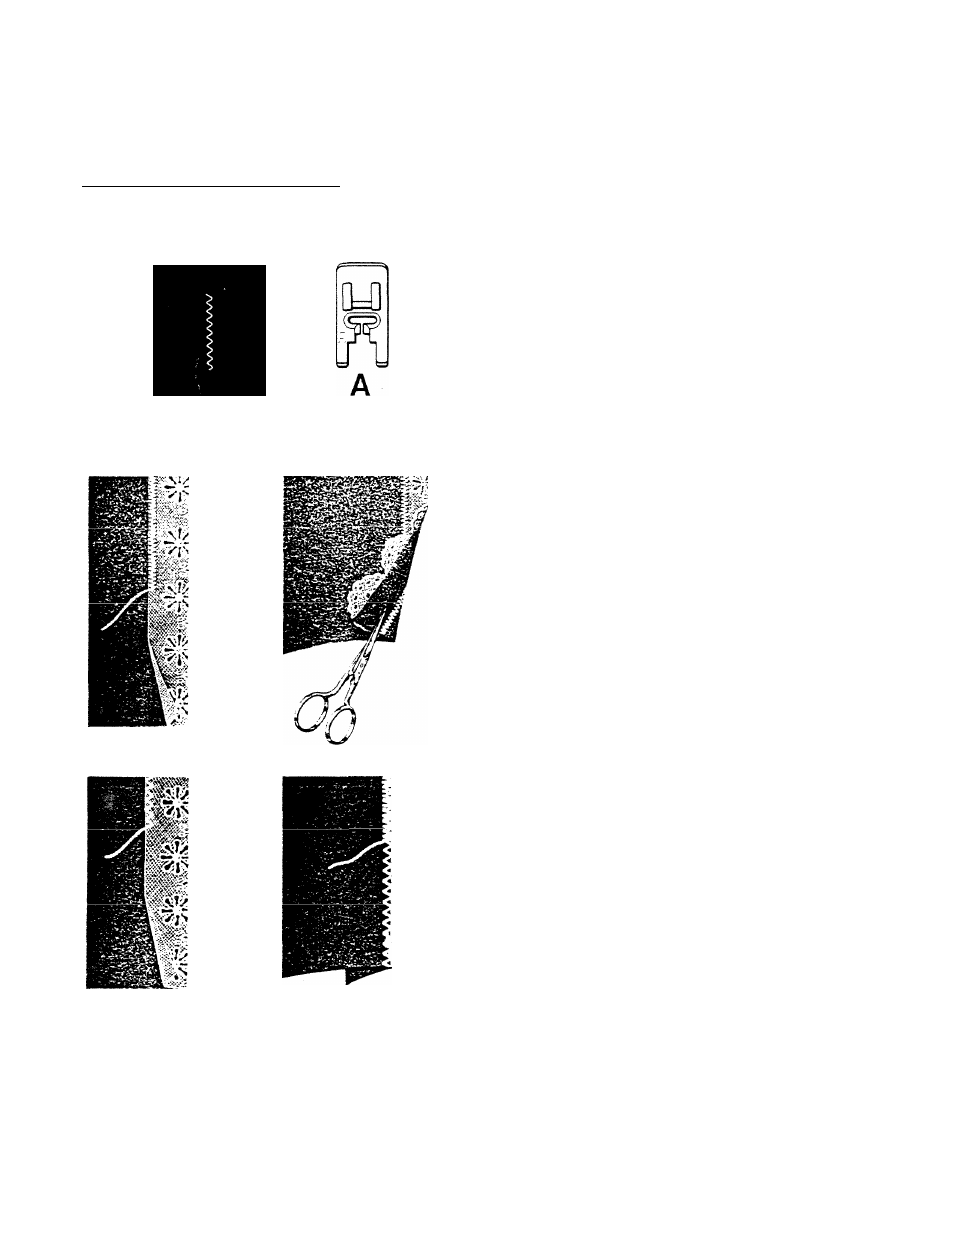
Attaching lace
The simplest way to attach lace is to place it 1 cm
(1/2") or so in on the fabric and stitch with fairly close
zig-zag (stitch length 0.5, stitch width 3). Trim from the
wrong side.
The lace will be more firmly attached if it is first placed
approx. 1 cm (1/2") in on the fabric and sewn on with
narrow, widely-spaced zig-zag, stitch length 1.5 and
stitch width 2. Fold the fabric to the wrong side and sew
once more from the right side, this time using a slightly
wider zig-zag and closer stitches (stitch length 0.5, stitch
width 3). If you want the seam to be more pronounced,
use the raised seam presser foot F and fine cording.
Trim from the wrong side or fold a hem and sew with
straight stitching or a decorative stitch.
36