Stitch length, stitch width, O ft, Control panel – SINGER W8910 User Manual
Page 20: F if, Rstitch length, stitch width
Attention! The text in this document has been recognized automatically. To view the original document, you can use the "Original mode".
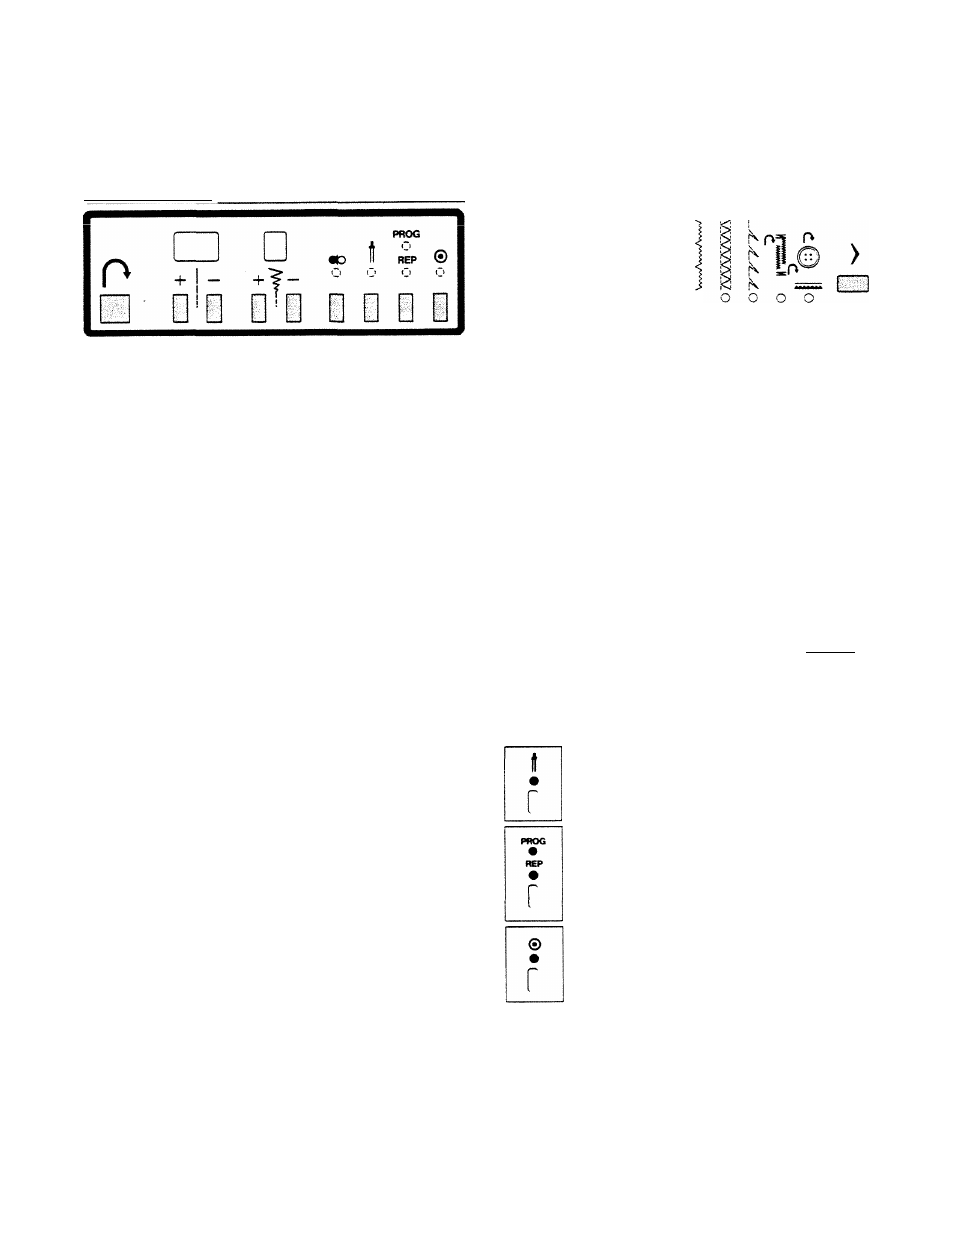
Control panel
The machine is equipped with 9 built-in utility stitches
and indicators for buttonholing and sewing on buttons.
Press the push-button under the arrow to the right of
the stitch symbols to engage the required stitch. Lights
will indicate which stitch is set.
By pressing the push-button at the bottom right, you
can set the machine for the type of fabric you will be
sewing. You only need to differentiate between stretch
and non-stretch fabrics and decide if your fabric is light,
medium or heavy. On pages 20-21 you will find some
information about the characteristics of various types of
fabric.
Read more about needles on pages 16 and 17, fine
cord on page 28 and presser foot pressure on page 9.
At the bottom left you will find an indication as to
which presser foot is most suitable, if it is advisable to
sew with a finer needle, when the presser foot pressure
should be reduced and when you should use a fine cord
or interfacing. Red lights indicate what is recommended.
n
The symbol to the left on the control
panel indicates reverse feeding. As long
as the button is depressed the machine
will sew the selected stitch in reverse. It
is also used when buttonholing and pro
gramming decorative stitches and letters.
See pages 46—50.
гs
+
_
0
f if
«0
r
Stitch length, stitch width
The stitch length is indicated in the left
digial indicator and the stitch width in
the right one. The buttons under the digi
tal indicators are to be used to increase
or decrease the values from 0 to 6 mm.
In certain cases the stitch length is only
variable between 1.5 and 4.5 mm.
O ft,
>
o o o o o o
^
^
y M
Q
y
yjy^
^ y- y jr y y y oyy
y y y r o y ' r Z 0 ' ^
/ 2 3 4 0 6 7 , ^ 9
InJ
R
•
Presiwr foot J
B
^
Stnstch needle
r •
?*r.f 0 • H • Non stretch Rne cord I Interfacing { G U I D E light • riKKiium # heavy • terry • ( light • Stretch! _ I othcH- • LMther/ vinyl • Manual setting # MATERIAL { ' 1 The button under this symbol is for mirroring the engaged stitch pattern. See The button under this symbol is for limiting the stitch width when using the The button under this symbol is for programming decorative stitches and let The button under this symbol is for finalizing a complete pattern and fasten 18
page 46.
twin needle, delivered with the machine.
See pages 16 and 17.
ters. Please refer to pages 46—50.
ing off. See pages 46-50.