Electrical, Changing voltage – Sears 315.220100 User Manual
Page 9
Attention! The text in this document has been recognized automatically. To view the original document, you can use the "Original mode".
ELECTRICAL
CHANGING VOLTAGE
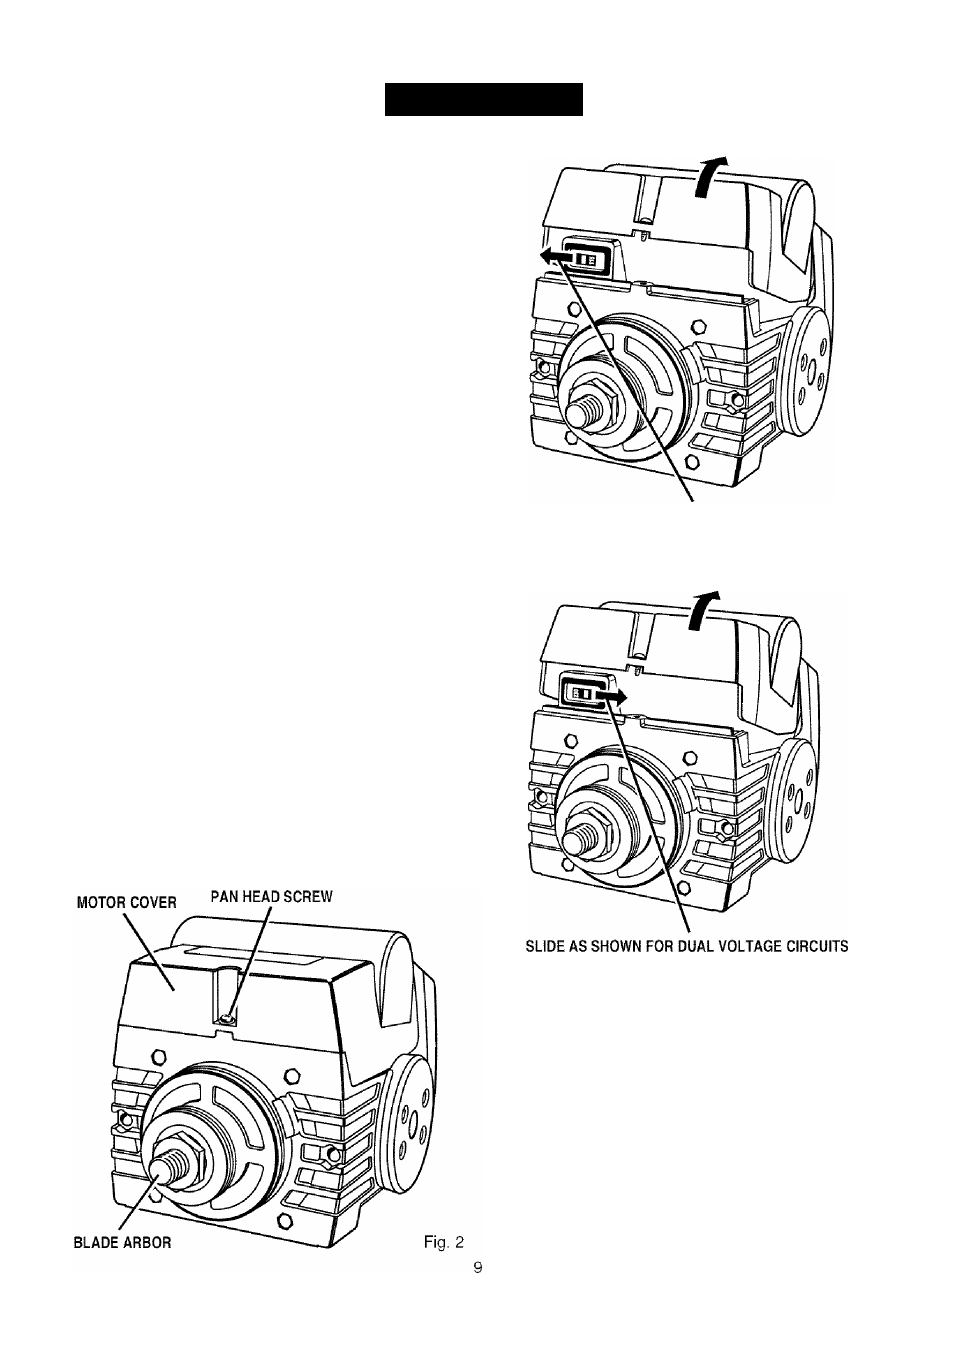
See Figures 2 - 4.
Your radial saw has been set up at the factory to
operate efficiently on a 120V AC single voltage circuit.
However, if heavy duty operation is required, the
circuits are overloaded, or the circuit is low voltage,
have a qualified electrician change the voltage on the
main power system to a 240V AC voltage circuit.
WARNING:
The control cut device is set up for
a 120V AC single voltage circuit. Do not modify
the control cut cord. Identify the control cut
cord and tie it back out of the way.
■ Correctly identify the control cut cord, unplug it,
and set it aside.
■ Unplug the main power cord.
■ Remove the blade following the procedure in the
Assemb/y section.
■ Remove the pan head screw above the blade
arbor on the motor cover. Lift motor cover to
expose switch. See Figure 2.
■ Use a small screwdriver to slide the dual voltage
switch to the 240V position. See Figures 3 and 4.
■ Reinstall motor cover.
■ Replace the 120V plug on the main cord with a UL
listed 240V, 15 amp, 3-prong plug.
■ Follow the instructions provided with the UL listed
plug.
■ Plug the cord into a 240V, 15 amp, 3-blade recep
tacle. Make sure the receptacle is connected to a
240V AC power supply through a 240V branch
circuit that has a 15 amp fuse or circuit breaker.
Note: No adapter is available for this type of plug
or receptacle.
LIFT MOTOR COVER TO EXPOSE SWITCH
SLIDE AS SHOWN FOR SINGLE VOLTAGE CIRCUITS
SWITCH SHOWN IN 110-120 VOLT POSITION
Fig. 3
LIFT MOTOR COVER TO EXPOSE SWITCH
SWITCH SHOWN IN 220-240 VOLT POSITION
Fig. 4
CRIlFTSMflN* RADIAL SAW 315.220100