Iajiiage or re^val eati tessli, Aot iisre waiec, steam – Carrier 50QT User Manual
Page 11
Attention! The text in this document has been recognized automatically. To view the original document, you can use the "Original mode".
w
recharge. If necessary, refer to Carrier Standard
Service
Techniques
Manual,
Chapter
1,
Refrig
erants, page 1-21, for oil recharging procedure. Use
Carrier PP33-1, Texaco WF-32 or Suniso 3GS oil.
FAN MOTOR BEARINGS — Oiling holes are pro
vided at each end of condenser fan motor. Remove
fan motor and lubricate motor with 32 drops (16
drops per hole) of SAE 10 nondetergent oil at
intervals described below:
a.
Annually, when environment is very dirty,
ambient temperature is higher than 105 F and
average unit operating time exceeds 15 hours
a day.
b.
Every 3 years when environment is reasonably
clean, ambient temperature is less than 105 F and
unit operating time averages 8 to 15 hours a day.
c.
Every 5 years when environment is clean,
ambient temperature is less than 105 F and unit
operating time averages less than 8 hours a day.
INDOOR MOTOR — To oil indoor motor, remove
dust caps or plugs from oil holes located at each end
of the motor. Use a teaspoon, 5 cc (5 ml), 3/16 oz or
16 to 25 drops of a good grade of SAE 20 nondeter
gent motor oil in each oil hole. Allow time for total
quantity of oil to be absorbed into each bearing.
After oiling motor, be sure to wipe off excess oil
from housing and replace cap or plugs on oil port.
Outdoor Coil Cleaning — To be done at the
beginning of each cooling season or more often if
required.
aot iiSre
waiec, steam>
or voiatUe or coiro^xve
oji tass
m
"
1. Shut off power to unit.
2.
Remove chassis from sleeve by removing 6 bolts
and sliding chassis out. Transport chassis to an
appropriate cleaning location.
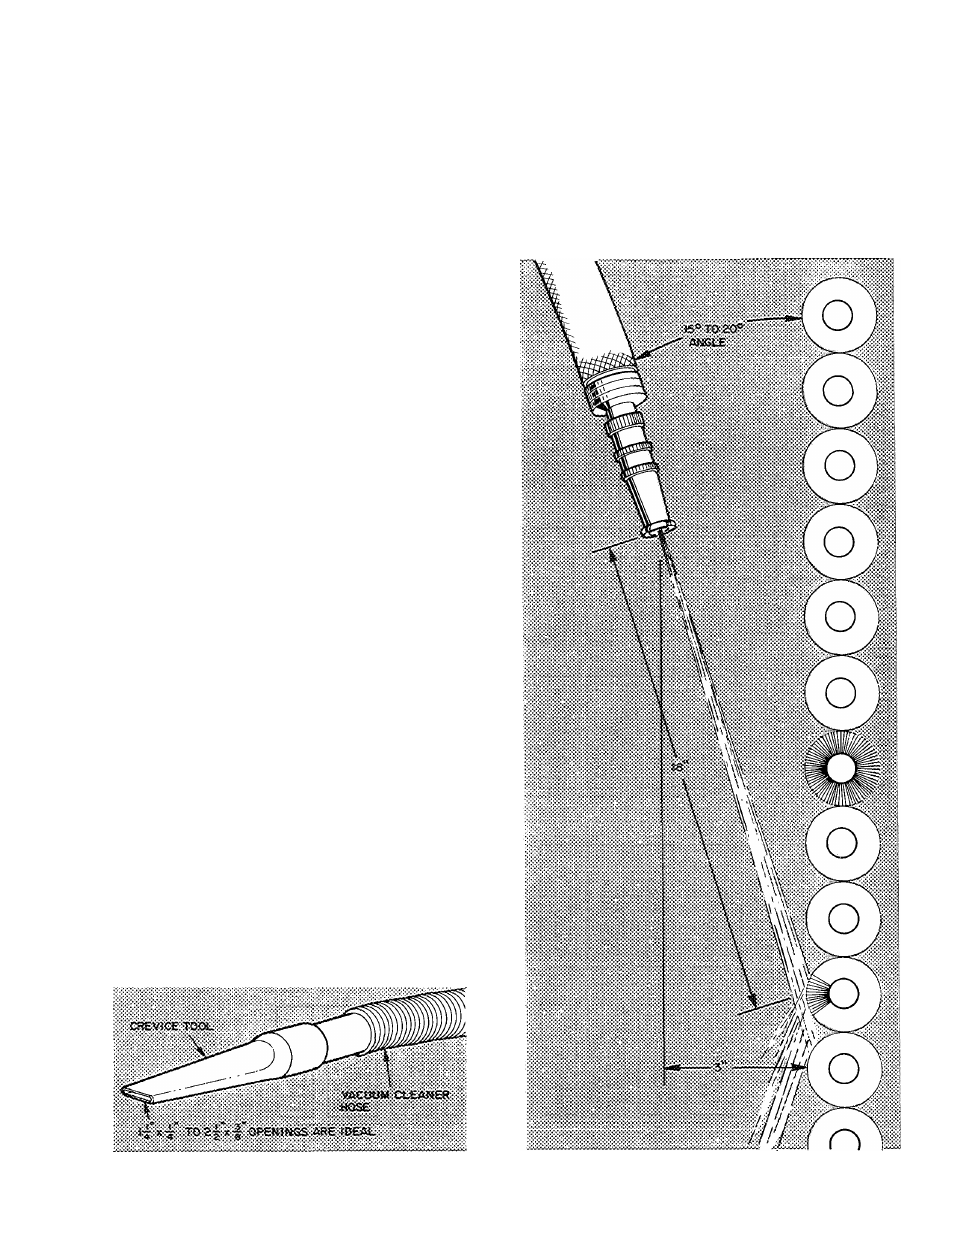
3. Clean coil using vacuum cleaner and its crevice
tool (see Fig. 16). Work crevice tool perpendicu
larly to coil tubes, making sure tool only touches
dirt on fins. To prevent fin removal, do not
“scrub” fins with tool or move tool parallel to
coil tube configuration.
4. If oil deposits are present, spray coil with liquid
household
detergent.
Wait
10
minutes,
then
proceed to step 5.
5. Using garden hose, spray coil perpendicularly to
coil tubes with a constant stream of water at
moderate pressure (see Fig. 17). Keep nozzle at a
15 to 20 degree angle, about 3 in. from coil face
and 18 in. from tube. Spray so debris is washed
out and away from coil making sure water does
not contact components on side of chassis.
Fig. 16 — Crevice Cleaning Tool
Fig. 17 — Positioning Hose to Spray Coil
II