Indoor blower wheel adjustment or removal, Indoor blower wheel adjustment, Or removal – Carrier 1995 Room Air User Manual
Page 9
Attention! The text in this document has been recognized automatically. To view the original document, you can use the "Original mode".
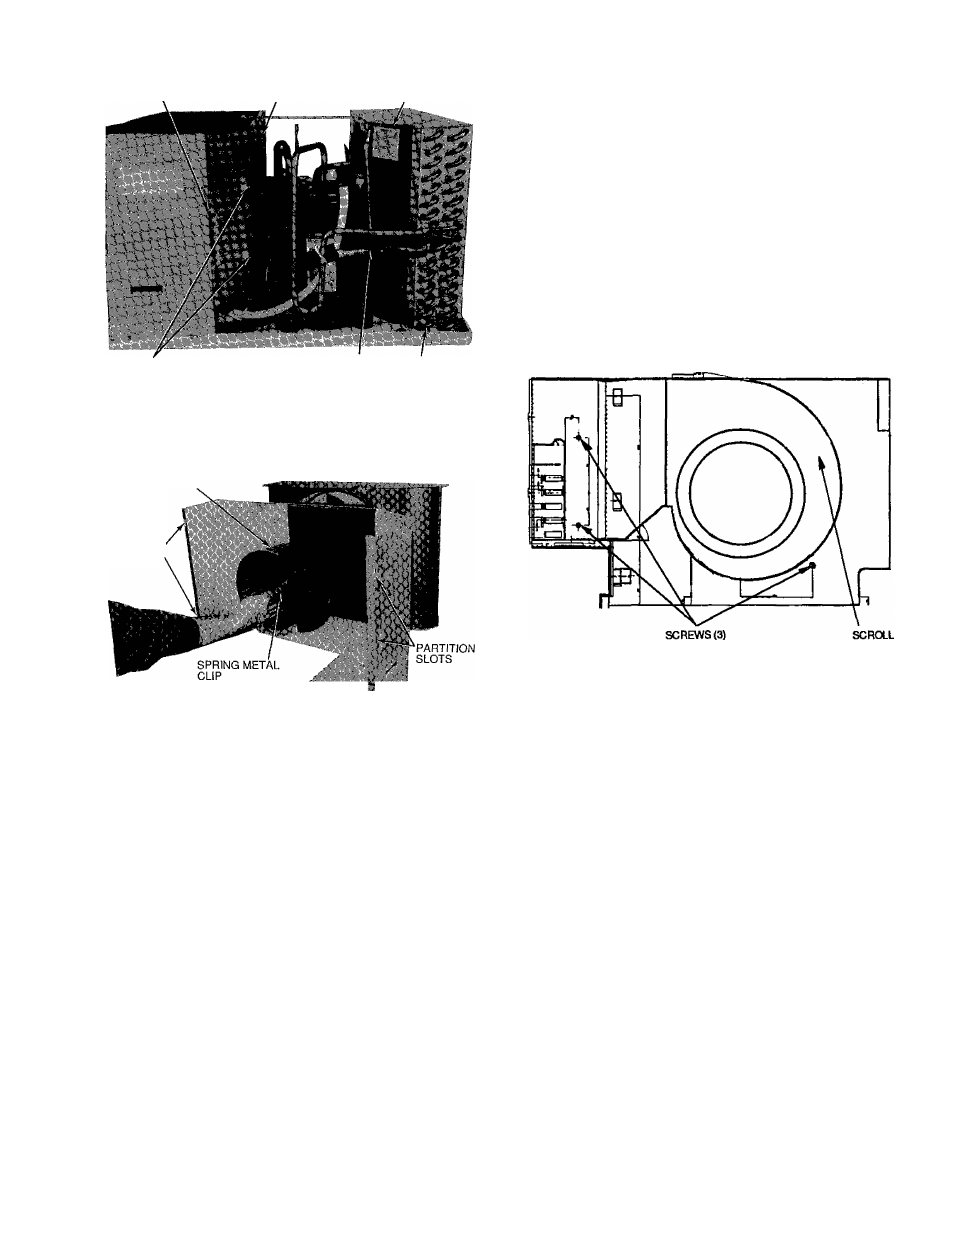
INDOOR PLASTIC
SCROLL (HIDDEN)
SHEET METAL
PARTITION
CONDENSER
ORIFICE
SCREWS
{2 OUT OF 3)
TYPICAL STRAINER
LOCATION
CONDENSER
COIL
NOTE: Third screw is located on ieft side of partition as viewed from
front of unit
Fig. 22 — Screws Securing Partition to Indoor
Plastic Scroll Assembly
BLOWER WHEEL
PARTiTiON
SLOTS
'•■T'
s
Fig. 23 — Removing Indoor Blower Wheel
Indoor Blower Wheel Adjustment or Removal
1 Remove ah-handling system See Air-Handling System
Removal instructions, page 7
2 Mark shaft at a point where wheel hub and motor shaft
meet to aid in reassembly
3 Remove 3 screws securing partition to evaporator (in
door) scroll See Fig 22 and 24
4 Separate chassis from partition by disengaging at parti
tion slots See Fig 6
5 Remove spring metal clip from blower wheel hub See
Fig 23
6 Slide off blower wheel from motor shaft
7 Reverse above procedure for reassembly
NOTE Scroll enclosure is insulated with expanded poly
styrene The distance between indoor blower wheel and scroll
enclosure is %4 inch See Fig 25
Fig. 24 — Screws Securing Partition to
Evaporator Scroll