Filter removal, Front grille removal, A cautioh – Carrier 1995 Room Air User Manual
Page 4
Attention! The text in this document has been recognized automatically. To view the original document, you can use the "Original mode".
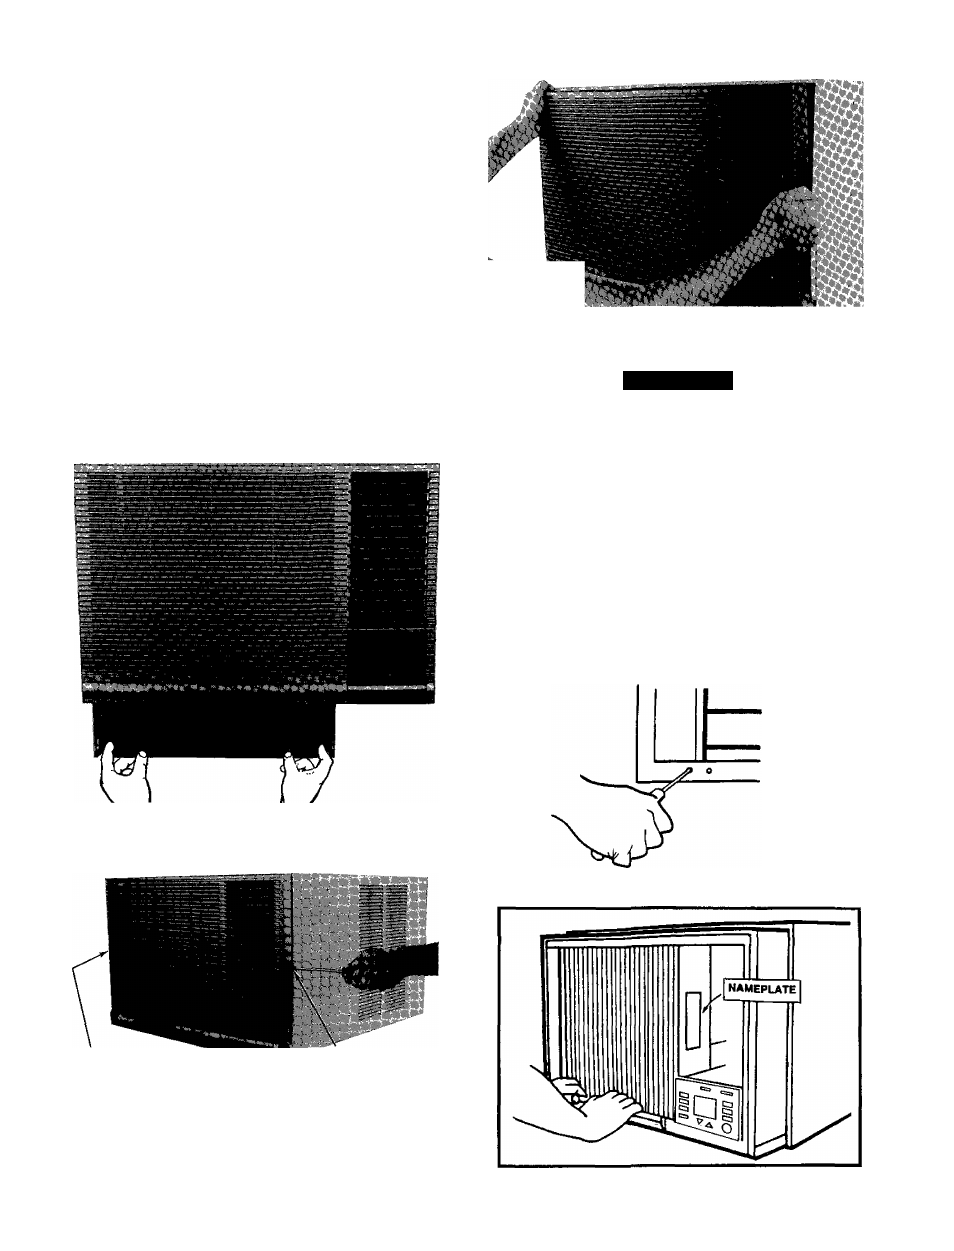
Filter Removal
1 Place index fingers inside the openings on either side of
the filter frame See Fig 1
2 Apply pressure inward toward the center, while pulling
filter down and out
3 Vacuum filter, or wash in lukewarm water Shake off
excess water and dry thoroughly
4 Replace filter by sliding filter upward behind front grille
until filter snaps in place
Front Grille Removal
1 Remove 2 screws located on either side of front grille
See Fig 2
NOTE Facing the front of unit, grille screw on the right-
hand side serves as a unit security screw
2 Pull grille out and upward, removing it from chassis
See Fig 3
3 To replace grille, place grille top on unit top edge and
firmly press grille back into position
4 Replace screws
Fig. 1 — Removing Filter
SCREW (HIDDEN)
SCREW (SECURITY)
Fig. 2 — Removing 2 Screws from Front Grille
■■
Fig. 3 — Removing Front Grille
Chassis Removal
A CAUTIOH
Coil fins are sharp Use care when removing chassis
from casing to avoid personal injury Do not use plas
tic parts for lifting or pulling, they are not structural
members of the chassis Lift using basepan only Chas
sis is heavy Obtain assistance for lifting
Chassis can be serviced without removing unit casing from
window or wall location
1 Remove front grille See Front Grille Removal instruc
tions, this page
2 If unit has not been installed, remove shipping screw
See Fig 4
3 Slide chassis out from casing See Fig 5
4 Reverse above procedure to reinstall chassis in casing
Be sure to replace and tighten left-hand screw and right-
hand security sciew on the front grille
Fig. 4 - Removing Shipping Screw
Fig. 5 - Sliding Chassis Out from Casing