Triner Scale 600-E Series User Manual
Page 22
Page 3-3
3.3 USER (“A”) MENU
3.3.1 ENTERING THE USER MENU
1. Enter the Setup (“F”) menu by following the directions in Section 3.2.1.
2. Use the right or left directional keys shown in Figure 3-1 to move right or left in the
Setup (“F”) menu until the scale shows ” A 1”.
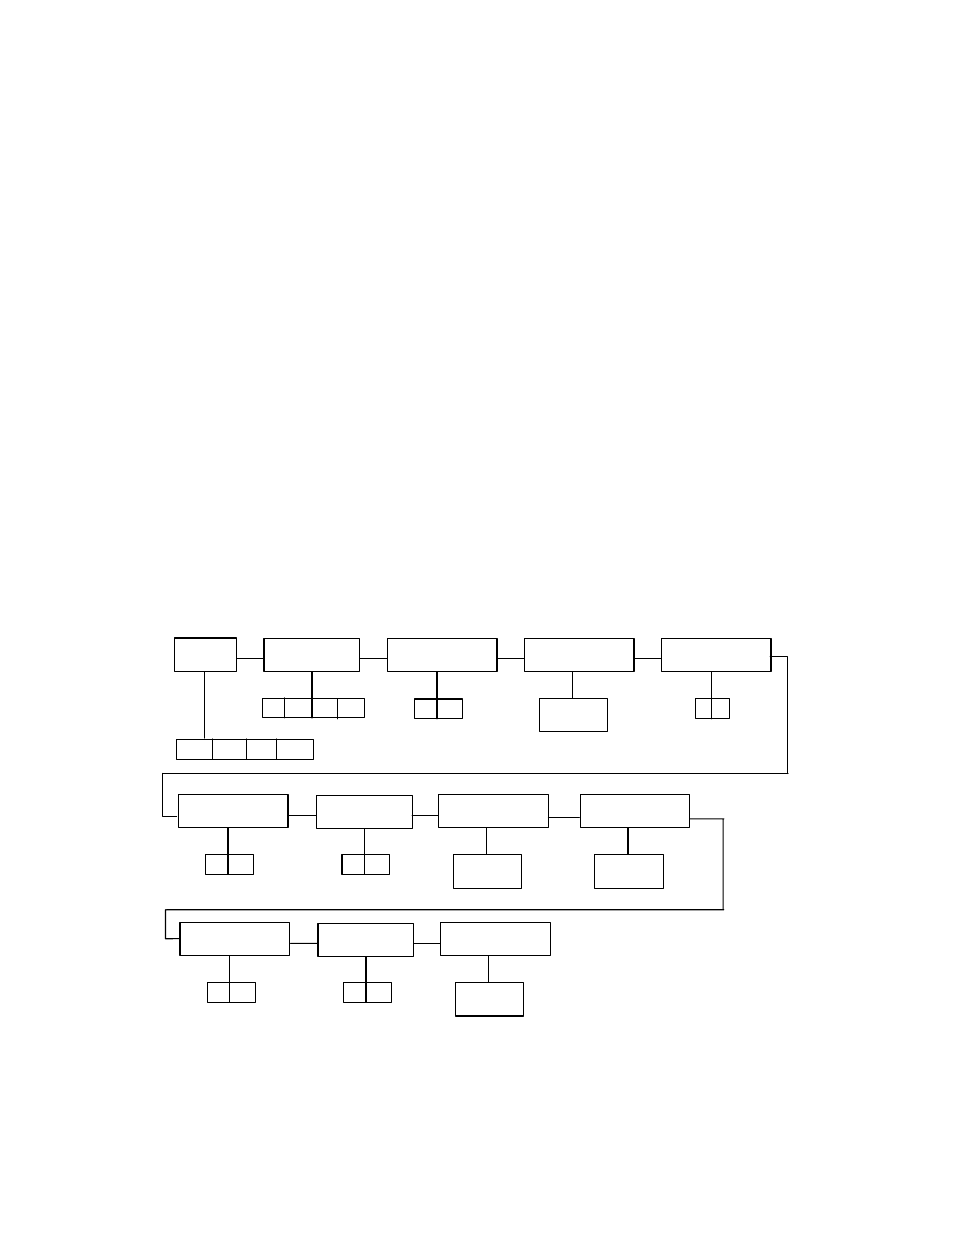
3.3.2 NAVIGATING IN THE USER MENU
Use the directional keys shown in Figure 3-1 to move around in the User Menu Chart shown
in Figure 3-3 below.
1.
To move to a new “A” heading, use the TARE (left) or PRINT (right) key to move right
or left in the User Menu Chart.
2.
To move to the selection level, press the ZERO (down) key once. The current saved
selection is shown.
3.
To view the available selections for the current “A” heading, use the TARE (left) or
PRINT (right) key to move through the selection field.
4.
To save a new selection, press the NET/GROSS (Set) key .To exit without saving,
press the lb/kg (up) key to return to the current “A” heading.
5.
Repeat Steps 2 through 5 until the User Menu is programmed.
A1
Baud Rate
1200 2400 4800 9600
A2
Data Bits, Parity
8n 7O 7E
A3
Transmission Mode
C
d
A4
Display Check
A5
Enable lb/kg Key
0 1
Press ZERO
key to begin
A7
ID No. Enable
A6
Serial Port Mode
0
1
0
1
A8
ID No. Entry
Press ZERO
key to begin
A9
No. of Line Feeds
Press ZERO
key to begin
7n
A11
Bag Limit Mode
A10
Accumulator Mode
0
1
0
1
A12
Bag Limit Value
Press ZERO
key to begin
Figure 3-3: User Menu Chart