Top Flite TOPA0712 User Manual
Page 8
8
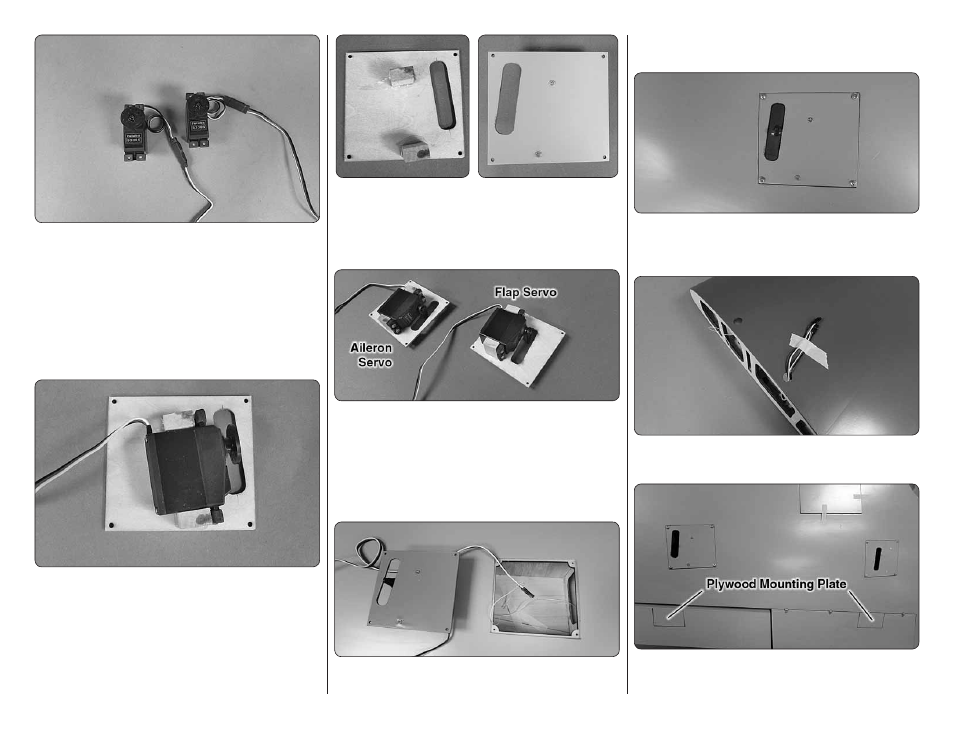
Begin with your right wing panel fi rst so your assembly
matches the photos in the manual.
❏
❏
1. Install a 24" [610 mm] servo extension to your
aileron servo. Secure it with heat shrink tubing, tape or
other method for securing them together.
❏
❏
2. Install a 12" [305 mm] servo extension to your
fl ap servo. Secure it with heat shrink tubing, tape or
other method for securing them together.
❏
❏
3. Remove the tape holding the servo covers to
the bottom of the wing. Locate two 5/16" x 1/2" x 3/4"
[8mm x 13 mm x 19mm] hardwood blocks. The markings
on the back of the cover are correct for Futaba servos.
Place your particular brand of servo on the cover making
sure they fi t between the locations for the blocks. Adjust
the positioning of the blocks for your brand of servo.
❏
❏
4. Glue the blocks to the servo cover. Once the
glue has cured, drill a 1/16" [1.6mm] hole through the
cover and into the servo mounting blocks Secure the
block to the cover with a #2 x 3/8" [#2 x 9.5 mm] wood
screw. Do this for both of the servo covers.
❏
❏
5. Center the servos and install the servo arm onto
your servos. The servos require a 3/4" [19mm] servo
arm (typically the longest servo arm with your servo).
Place your servo onto the mounting blocks. Drill a 1/16"
[1.6mm] hole through the servo mounting tabs into the
mounting blocks. Secure the servos to the mounting
blocks with the screws that came with your servos.
❏
❏
6. Inside the aileron and fl ap servo compartment
you will fi nd a string. Tie the string to the servo leads.
The other end of the string is taped to the root wing of
the rib. Pull the leads through the wing.
❏
❏
7. Install the servo covers to the wing, securing
them to the wing with four #2 x 3/8" [9.5 mm] screws
and four #2 fl at washers.
❏
❏
8. Tape the servo leads to the top of the wing to
prevent the leads from falling back into the wing.
❏
❏
9. Located in both the aileron and the fl ap is
a plywood mounting plate. If you look at the control