Top Flite TOPA0712 User Manual
Page 7
7
PREPARATIONS
NOTE ABOUT THE AIRFRAME
As part of the design and manufacturing of this model
we recognized that this very short coupled airframe was
going to need nose weight for the airplane to balance
properly. There is not a lot of room on the fi rewall to
mount weight so we have pre-installed the required nose
weight into the airframe. If you use the recommended
engine this airplane should be very close to the proper
balance point.
1. If you have not done so already, remove the major
parts of the kit from the box and inspect for damage.
If any parts are damaged or missing, contact Product
Support at the address or telephone number listed in
the “Kit Inspection” section on page 6.
2. Use a covering iron with a covering sock on high heat
to tighten the covering if necessary. Do this for all of the
components of the model. Apply pressure over sheeted
areas to thoroughly bond the covering to the wood.
ASSEMBLE THE WING
Note: Throughout this instruction manual you will be
instructed to use screws to secure different parts. In
all cases, whenever a screw is threaded into wood
sheeting or wood blocks we recommend that you install
the screw and then remove it. Apply a drop of thin CA
glue into the hole to harden the threads. After the glue
has hardened, re-install the screw. Following this step
will insure that you have a solid thread for your screws.
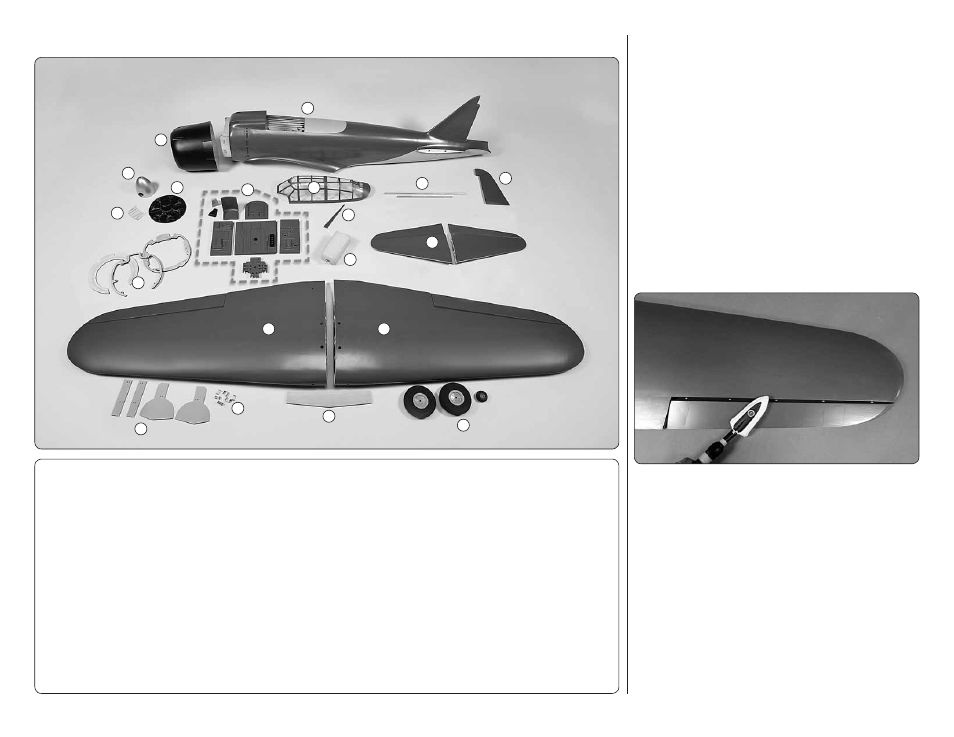
—————————————— CONTENTS —-—————————————
1.
Cowl
2.
Fuselage
3.
Spinner
4.
Pushrod
Tubes
5.
Dummy
Engine
6.
Cockpit
Interior
7.
Canopy
8.
Antenna
9.
Stabilizer
Tubes
10. Rudder
11. Stabilizers and Elevators
12. Fuel Tank
13. Cowl Mounting Rings
14. Right Wing
15. Left Wing
16. Landing Gear Doors
17. Door Brackets
18. Wing Joiner
19. Wheels
1
11
6
16
2
12
4
14
8
18
9
19
10
7
17
3
13
5
15