Top Flite TOPA0712 User Manual
Page 16
16
❏
16. Install the horn and pushrod on the left side of
the fuselage using the same technique.
❏
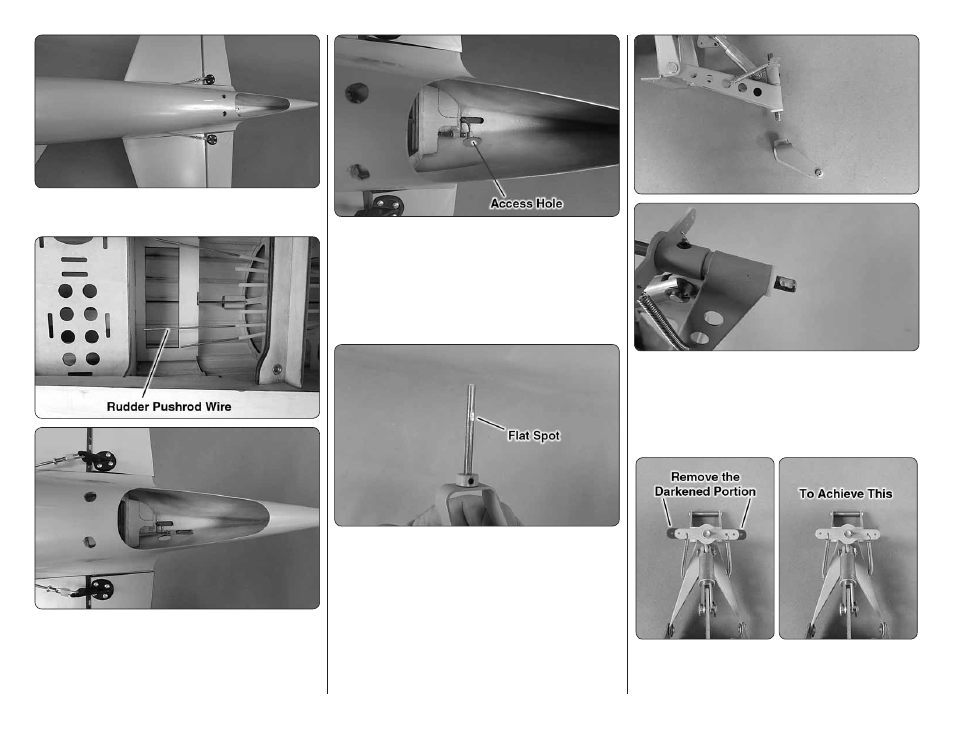
17. Cut a 4-40 x 48" [1220mm] metal pushrod to a
length of 33" [838mm]. Slide the threaded end of the
wire into the rudder tube, sliding it to the back of the
fuselage. Install a 4-40 nut, silicon clevis keeper and
4-40 threaded metal clevis onto the wire.
❏
18. Attach the clevis to the horn on the rudder control
wire. The easiest way to do this is to insert a fl at blade
screw driver into the hole in the tail cone, spreading
the clevis to allow the pin to lock into the clevis. Apply
a drop of thread locker to the nut and tighten it against
the clevis. Slide the clevis keeper over the clevis.
MOUNT THE RETRACTABLE TAIL GEAR
❏
1. Remove the steering arm from the Robart
retractable tail gear assembly (not included). File a fl at
spot on the shaft for the set screw in the steering arm
to lock onto. Mount the steering arm to the shaft with a
drop of thread locker and the set screw.
❏
2. File another fl at spot near the bottom of the shaft
for one of the set screws in the strut. Tighten both set
screws with a drop of thread locker on each. Be certain
the steering arm and the axle in the strut remain parallel
with each other. Make adjustments to the fl at spots if
necessary.
❏
3. Using a high speed rotary tool, hacksaw or other
cutting tool, cut off the part of the steering arm outside
of the center hole and re-shape the end of the steering