Top Flite TOPA0712 User Manual
Page 13
13
❏
❏
17. If necessary loosen the bracket mounting
screws so that you can adjust the position of the brackets
so the doors are fl ush with the wing. Remove each screw
one at a time, apply a drop of thread locker to each
screw and re-install it to the landing gear. When you
are satisfi ed with the positioning of the doors, tighten
the screws.
❏
❏
18. Install the landing gear cover over the landing
gear. Drill a 1/16" [1.6 mm] hole through each of the
mounting holes. Secure the cover with fi ve #2 x 3/8"
[ 9.5 mm] screws.
❏
19. Repeat steps 1-16 for the left wing.
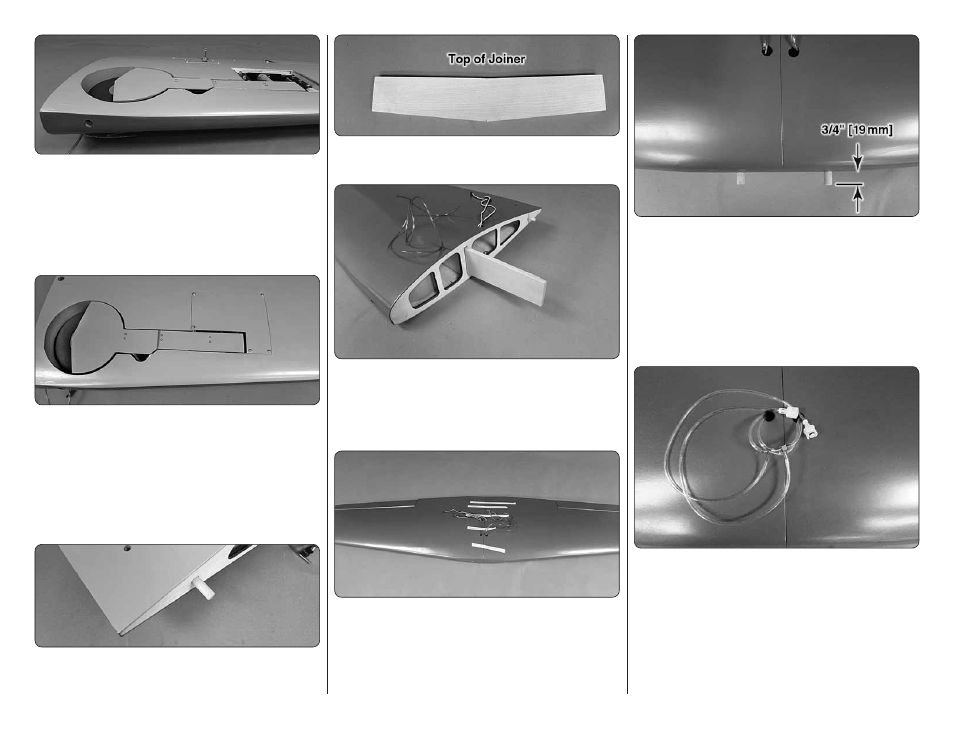
JOIN THE WING HALVES
❏
1. Glue the 5/16" x 1-1/2" [8mm x 38mm] dowel into
the hole at the rear of the root rib in the right wing.
❏
2. Locate the hardwood wing joiner. Test fi t the
joiner into the wings.
❏
3. You will see two holes in the wing panels. These
holes are to allow the servo leads and the air lines to
exit the wing. Important: Be sure that you feed all of
the servo leads and all of the air lines through these two
holes before gluing the wings together in the next step.
❏
4. When you are satisfi ed with the fi t of the joiner,
glue the joiner into the wing joiner pockets with 30
minute epoxy. When gluing the wings together be sure
that you use plenty of glue in the joiner pockets on the
joiner and the root ribs of the wing. Use masking tape
to hold the wings together while the glue cures.
❏
5. Test fi t the two 3/8" x 1-1/ 2" [9.5mm x 51mm] wood
dowels into the two holes in the leading edge of the
wing. Place them into the holes so that 3/4" [19mm] of
the dowel extends out of the wing. Make a mark on the
dowel to indicate this distance. Remove the dowel. Then
apply epoxy into the holes and on the dowel. Slide the
dowel into the hole, leaving 3/4" [19 mm] extending from
the wing. Clean off any excess epoxy with denatured
alcohol and a paper towel.
❏
6. Read through the instructions that came with the
landing gear to familiarize yourself with the required
connections. Cut the two pink lines so about 3" [76mm]
extend from the wing. Install a “T” fi tting between the
lines. Take one of the pieces you cut and install it on the
“T” fi tting and then install an air line quick disconnect
fi tting on the end of it. Do the same for the purple line.