Heckler&Koch MR762A1-LRP User Manual
Page 19
36
37
ASSEMBLY (HK MAGAZINE)
To assemble the magazine, use the reverse sequence used for disassembly. If magazine
was cleaned, ensure that it is properly lubricated prior to assembly. Attach the follower and
locking plate to the spring and slide the follower into the magazine housing (it will only
assemble in one direction, do not force it). Push the locking plate down into the housing
enough so that the floorplate can be slid back onto the magazine housing. Ensure that the
locking plate button is secure in the floorplate hole.
Check the function of the magazine by tapping it on your hand. Also check the function
of the follower, for free movement by depressing it with the cleaning rod. Lastly check the
secure attachment to and fit of the magazine in the rifle.
CAUTION: It is possible to improperly load the cartridges if the guide is not
positioned correctly, the rim of the cartridge could possibly get caught in the rear
groove. Constantly check spring tension in between stripper clips. Unload magazine if
in doubt. Replace the stripper clip guides regularly as they wear with use.
Using thumb pressure on the rear of the top cartridge, press down firmly until all ten
rounds are below the feed lips of the magazine. Remove the empty stripper clip while
holding the stripper clip guide in place. Repeat until the magazine is full. Remove stripper
clip guide and retain it for future use.
NOTE: Do not slam the magazine on a table or a fixed hard surface during filling or
damage to the feed lips may occur. Instead apply gradual pressure to accomplish this
task.
NOTE: Protect the magazines from drop-induced damage on hard surfaces (concrete,
metal, etc.). Many weapon stoppages begin in feed devices that are not properly
cared for or that are abused unnecessarily.
MAGAZINE DISASSEMBLY
CAUTION: Parts are under considerable spring pressure. Wear safety goggles and
point the base of the magazine housing in a safe direction when disassembling or
assembling. Read the complete procedure before attempting to disassemble the
magazine.
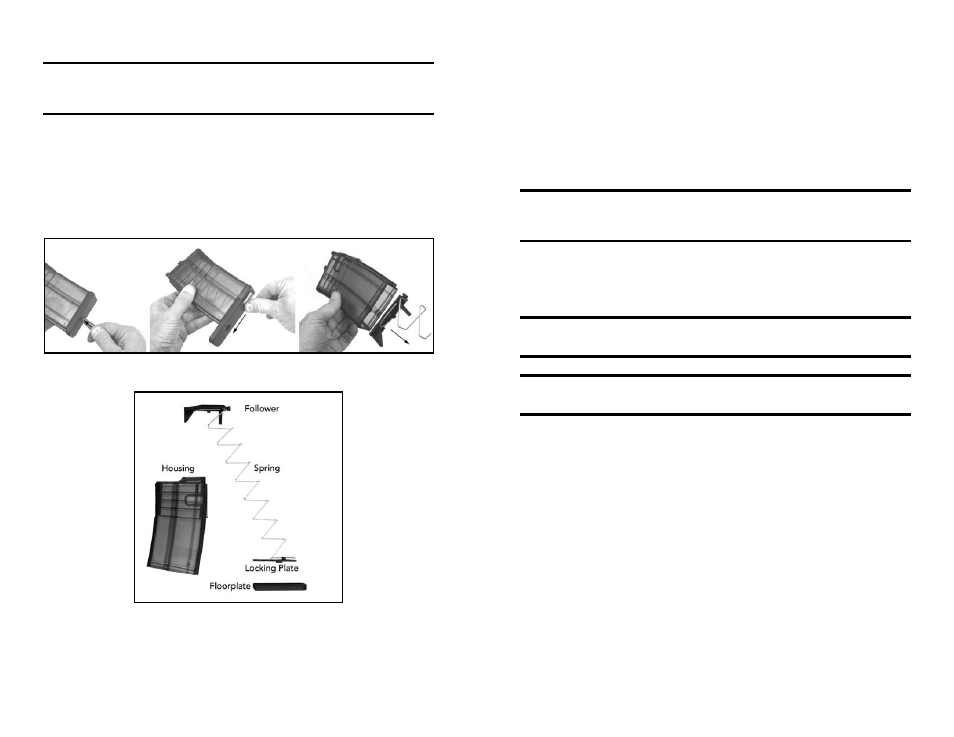
To disassemble the magazine for cleaning or inspection, push in the locking plate button
(located in a hole in the magazine floorplate) with a finger, cleaning rod, cartridge, or
similarly shaped object. As you depress the locking plate through the floorplate hole ,
push the floorplate towards the rear of the magazine housing (Fig. 53). Once the floorplate
is clear of the magazine housing; the locking plate, spring, and magazine follower can
easily be removed. Take note as to the arrangement of these parts for reassembly (Fig. 54).
For cleaning purposes, it is not necessary to disassemble the follower and locking plate
from the spring. Both 20 and 10-round magazines are disassembled and reassembled in
the same matter.
Fig. 53 – Magazine Disassembly
Fig. 54 – Magazine Components (20 round shown)