Heckler&Koch MR762A1-LRP User Manual
Page 17
32
33
Fig. 47 – Firing Pin Retaining Pin Installation
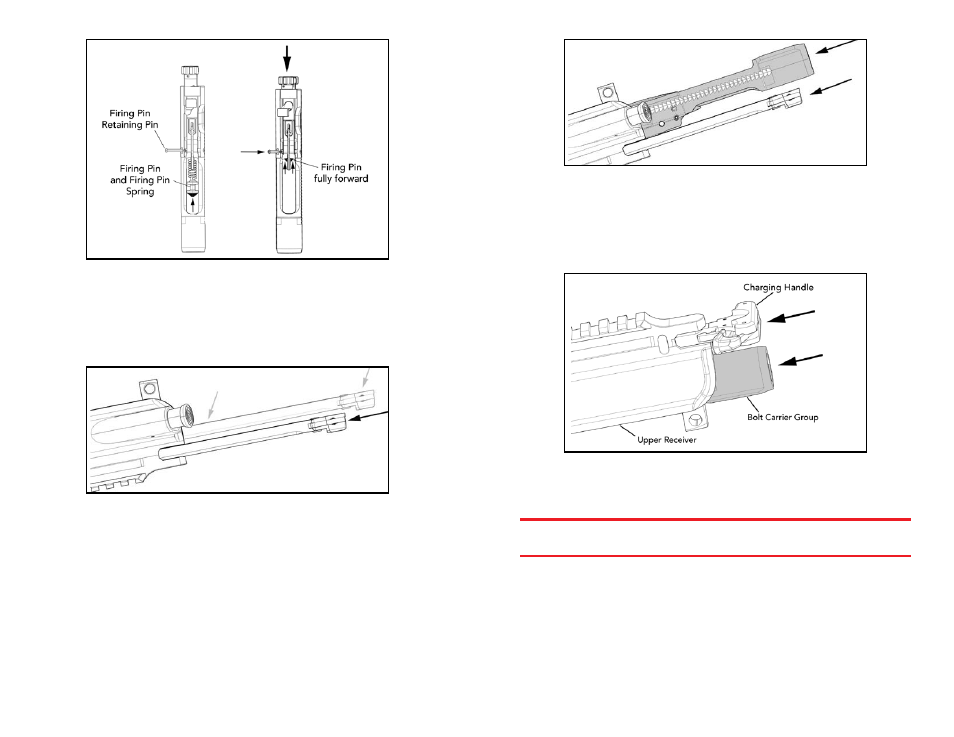
f. Turn the upper receiver upside down, insert the charging handle into the upper
receiver, align the lugs on the outsides of the charging handle with the recesses on the
inside of the upper receiver then press down until the charging handle is flush with the
inside of the receiver then press slightly forward (Fig. 48).
Fig. 48 – Charging Handle Installation
g. With the upper receiver and charging handle upside down, install the bolt assembly
onto the bottom of the charging handle ensuring that the bolt carrier’s anvil and the
top of the cam pin are centered in the bottom cavity of the charging handle (Fig. 49).
Fig. 49 – Installing the bolt assembly into the upper receiver
h. Push the charging handle and bolt group completely into the upper receiver until the
locking lugs on the bolt head engage the locking on the barrel extension and the latch
on the charging handle engages the oval locking surfaces on either the left or right
hand sides of the upper receiver (Fig. 50).
Fig. 50 – Completing installation of the bolt assembly into the upper receiver
4. Upper and Lower Receivers:
WARNING: Always use the Disassembly Tool to disengage the detents on both the
rear takedown pin and the front pivot pin. Attempting to install the pins without
disengaging the detents could lead to damage of the lower receiver.
a. Ensure that both the captive front pivot pin and rear takedown pin are drifted out to
the right hand side of the receiver. If necessary, use the small surface of the MR762A1
disassembly tool.
b. Place the upper receiver pointed downwards with the flash hider resting on a padded
surface.
c. Mount the lower receiver to the upper receiver. Drift the front pivot pin from right to
left. The pivot pin will not completely lock but it will engage the upper receiver (Fig.
51).