Assemble the wing – Great Planes Venus II 60 ARF - GPMA1027 User Manual
Page 9
❏
4. Use epoxy to glue the 1/8" [3 mm] plywood wing joiner
brace to the balsa wing joiner. Use clamps or masking tape
to hold the pieces together while the epoxy hardens. Set the
joiner aside so the assembly will be ready when it’s time to
join the wings later.
Set the fuselage and wing joiner assembly aside while you
work on the wings…
❏ ❏
1. Cut four hinges from the precut CA hinge strip. Stick
a T-pin through the middle of each hinge. Insert the hinges
into the hinge slots in one of the wing halves.
❏ ❏
2. Join the matching aileron to the wing, and then take
out the T-pins. Make sure there is a small gap between the
leading edge of the aileron and the wing—just enough to
see light through or to slip a piece of paper through.
❏ ❏
3. Apply at least eight drops of thin CA to the top and
bottom of each hinge. Allow enough time between drops so
the CA can soak into the hinge rather than running into the
hinge gap. Hint: CA applicator tips are highly recommended.
❏ ❏
4. After the CA has hardened for a few minutes, pull
hard on the aileron to make sure it is secure. Add more CA
if necessary.
❏
5. Join the other aileron to the other wing half the same way.
❏
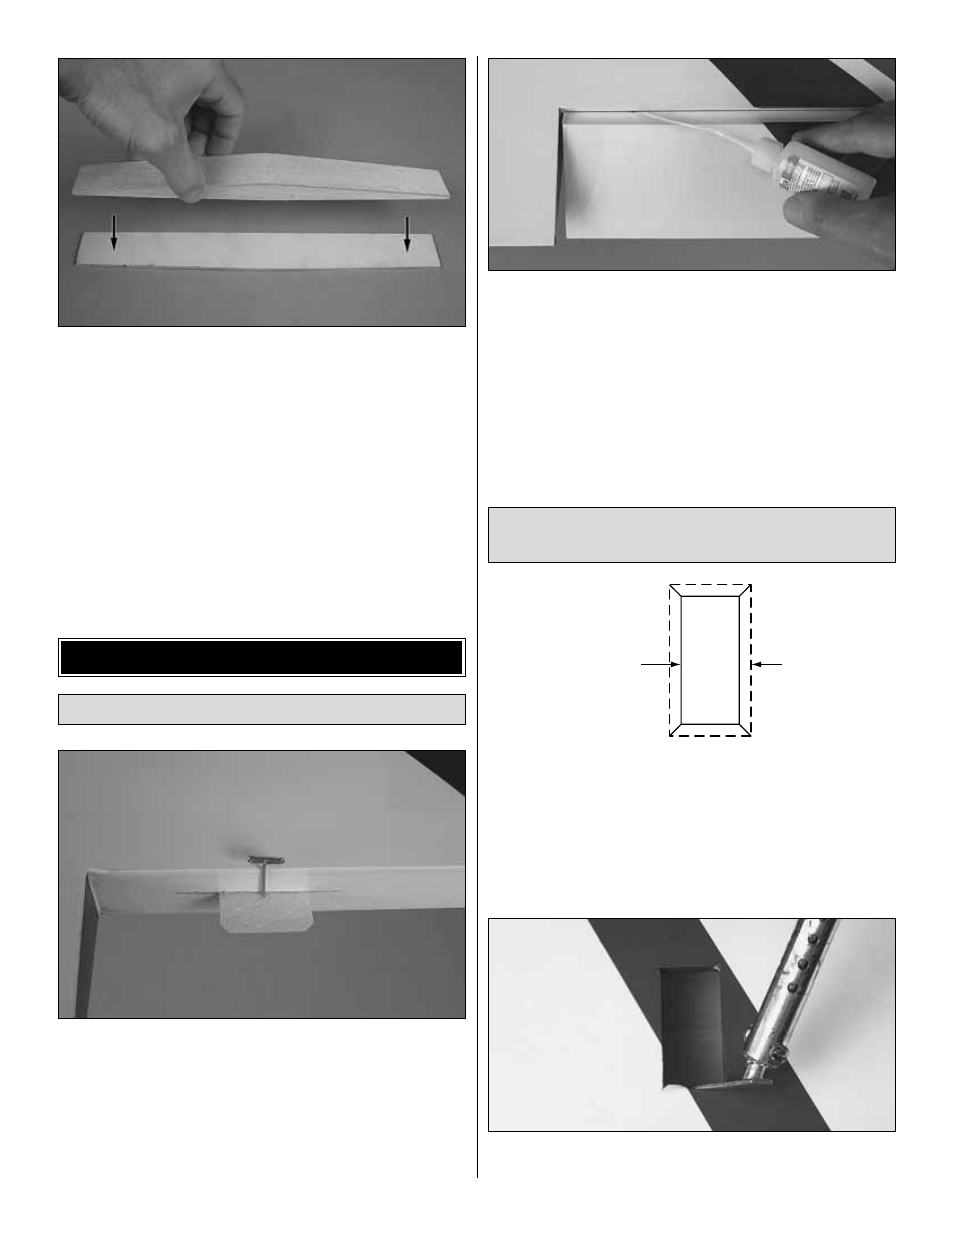
1. Use a straightedge and a hobby knife to cut the
covering 1/8" [3 mm] inside the openings in the bottom of
both wings for the aileron servos. Slit the covering up to the
corners of the openings.
❏
2. Also cut the covering from the top of the wings over the
holes for the servo wires (next to the root end of both wings) and
from the top and bottom of the wings over the wing bolt holes.
❏
3. Use a trim iron to iron the covering down inside the
aileron servo openings.
S
ERVO OPENING
IN WING.
CUT THE COVERING
1/
8
" [
3
mm] FROM
THE EDGE
S
OF
THE OPENING.
S
LIT THE COVERING
UP TO THE CORNER
S
.
Mount the Servos and
Hook Up the Ailerons
Hinge the Ailerons
ASSEMBLE THE WING
9