Great Planes Venus II 60 ARF - GPMA1027 User Manual
Page 15
❏
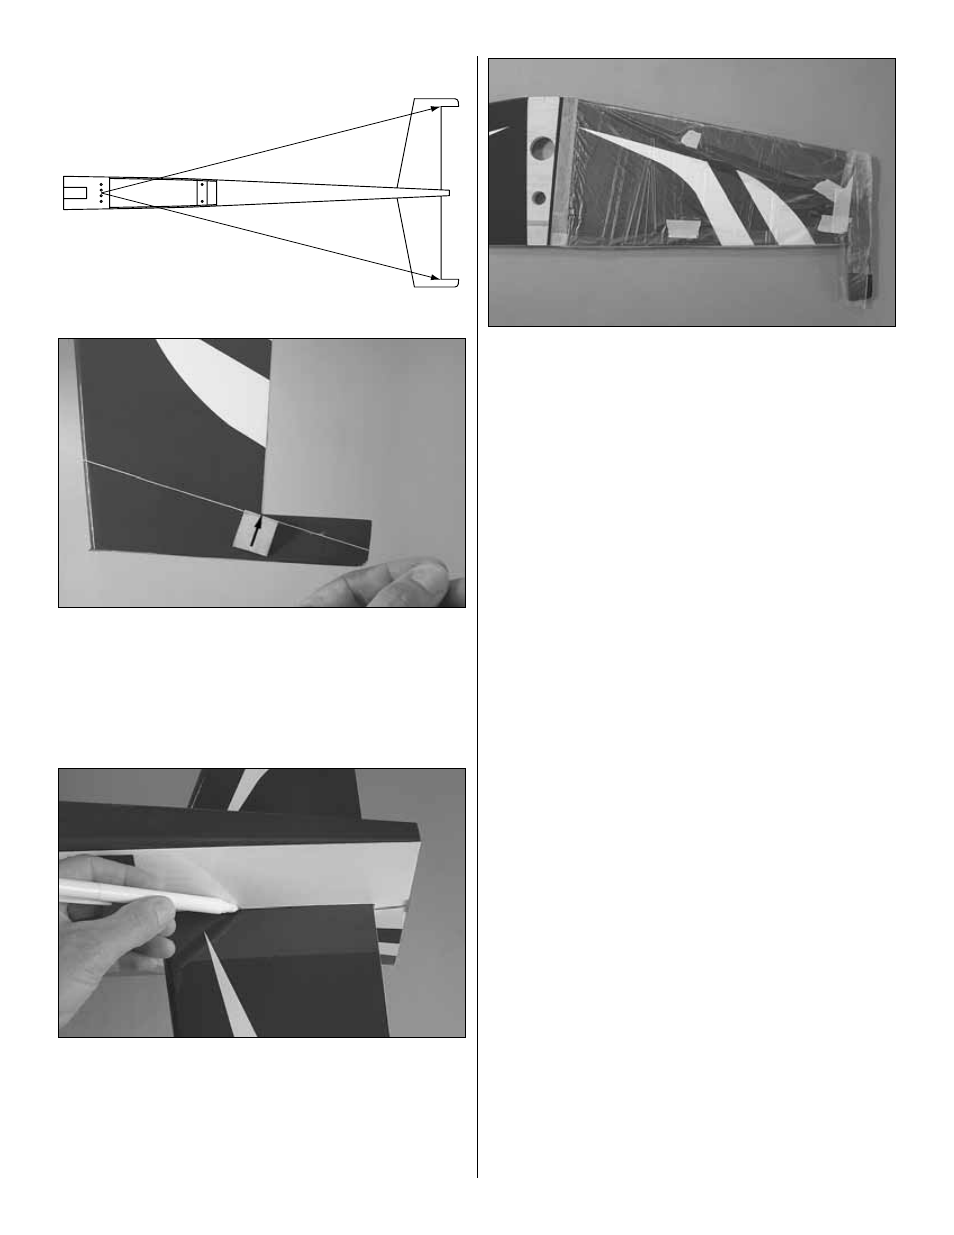
8. Fold a piece of masking tape over the string near the
other end and draw an arrow on it. Slide the tape along the
string and align the arrow with one end of the stab as shown.
Swing the string over to the same position on the other end
of the stab. Rotate the stab about the trailing edge and slide
the tape along the string until the stab is centered and the
arrow aligns with both ends, as shown in the sketch.
❏
9. Use a fine-point felt-tip pen to mark the outline of the
fuselage on the top and bottom of both sides of the stab.
❏
10. The same as was done when mounting the belly pan
to the bottom of the wing, use a heated soldering iron to cut
the covering 1/16" [2 mm] inside the lines you marked, then
peel the covering from the stab.
❏
11. When gluing two parts together, one of the things that
can be done to achieve the strongest bond possible is to
apply glue to both parts being joined (as was done when
joining the wing halves). And like the wing, this is important
when gluing in the stabilizer—epoxy should be applied
liberally in the stab slot in the fuselage and to the stab. But
to keep the stab clean while sliding it in, wrap one half with
a thin plastic bag or food wrap.
Finally! Time to glue in the stab…
❏
12. Thoroughly coat all joining areas of the stabilizer
and fuselage with 30-minute epoxy. Then immediately slide
the stab into position. Use more paper towel squares and
denatured alcohol to wipe off excess epoxy. Take off any
protective wrapping around the stab and continue to clean
off epoxy. Reinsert the T-pins through the back of the stab on
both sides of the fuselage and use the pin-and-string to
permanently center the stab. Position any weight used to
align the stab with the wing. Do not disturb the model until
the epoxy has hardened.
❏
13. The same as was done for the stabilizer, slide the fin
into position, mark the outline of the fuselage on both sides,
cut and peel off the covering, then use 30-minute epoxy to
glue the fin into position.
❏
14. After all the epoxy has hardened, join the elevators to
the stab with the CA hinges and thin CA. Don’t forget to use
T-pins to keep the hinges centered.
A
A'
A = A'
15