Great Planes Venus II 60 ARF - GPMA1027 User Manual
Page 11
❏
7. Now that the servos and control horns have been
mounted, remove the servo mounting screws and the
control horn screws. Add a few drops of thin CA to each
screw hole to harden the “threads” in the holes. After the CA
has hardened, reinstall all the screws to securely mount the
servos and the horns.
❏
1. Without using any glue, test fit the wing halves with the
joiner prepared earlier. Make sure the halves fit together well.
If there is a problem with the fit, look for obstructions such as
glue bumps or wood slivers inside the wings where the
joiners fit. Make any adjustments necessary to get a good fit.
❏
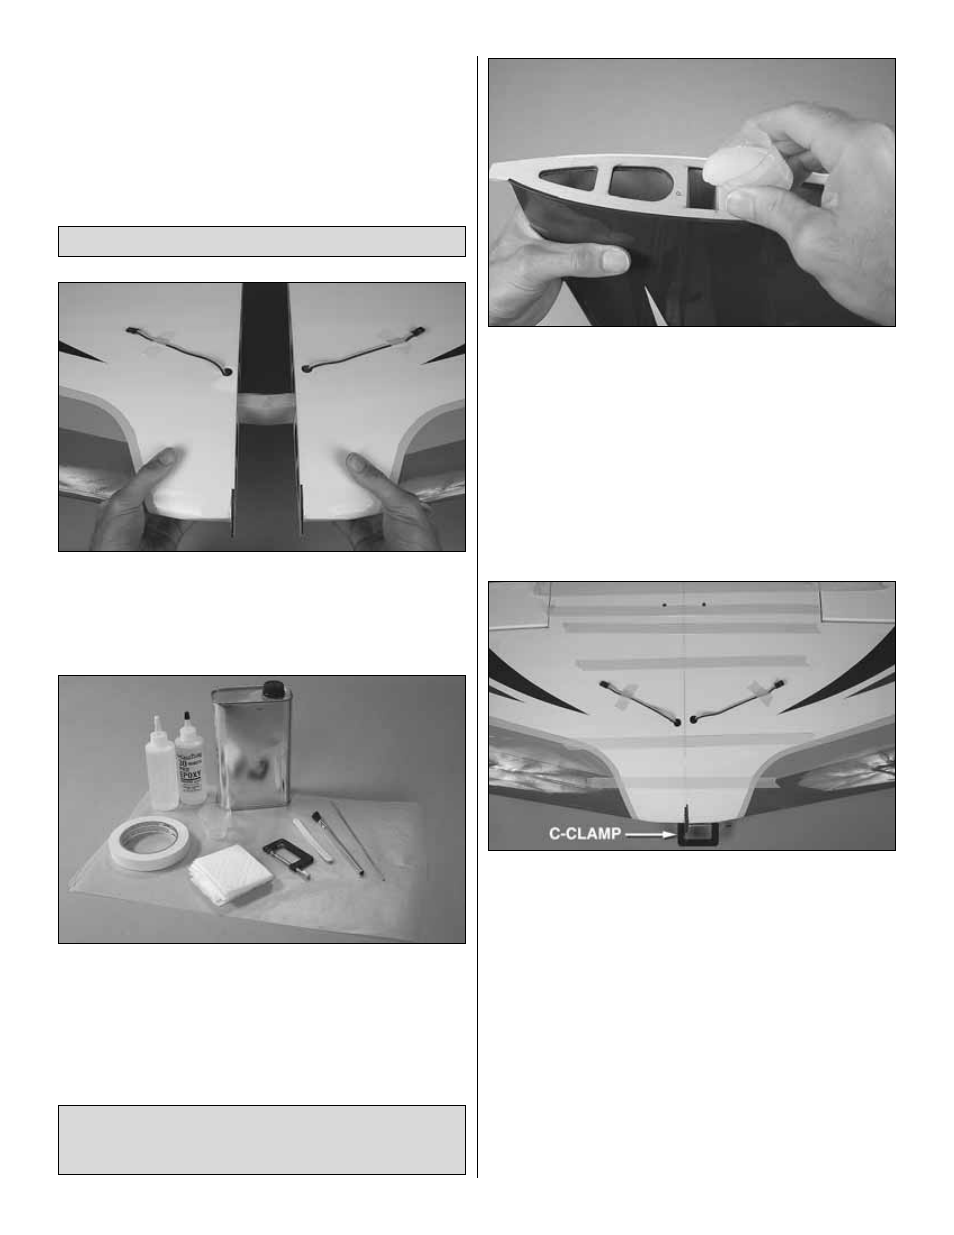
2. Place a sheet of wax paper on your workbench and
gather all the items required for joining the wings, which are
30-minute epoxy, a mixing cup, an epoxy mixing stick, an
epoxy brush, paper towels and denatured alcohol for epoxy
clean up. Caution: Do not use 5-minute epoxy for joining the
wing halves. It will not provide enough working time.
❏
3. Separate the wings and take out the joiner. Mix
approximately 3/4 oz. [20cc] of 30-minute epoxy. Pour a
generous amount into the wings where the joiner goes.
Working quickly, use piece of wire or a dowel to distribute
the epoxy all the way around inside the wings.
❏
4. Use an epoxy brush to coat the root ribs of both wings
and one half of the joiner all the way around. Slowly insert
the epoxy-coated half of the joiner. Wipe away excess epoxy
as it is forced out. Note: There should be no air pockets
inside the wing where the joiner fits—the cavity should be
filled with epoxy. Proceed immediately to the next step.
❏
5. Coat the protruding end of the joiner all the way around
with epoxy. Join the other wing, slowly pressing the two
halves together, allowing excess epoxy to drip out as you go.
When the wings come together, wipe away excess epoxy
that is squeezed out, then use a C-clamp and several strips
of masking tape on both the top and bottom of the wing to
tightly hold the two halves together. If epoxy continues to
work out of the wing under the tape, remove one strip at a
time and wipe off the epoxy, then replace with another strip
of tape. Do not disturb the wing until the epoxy has hardened.
IMPORTANT! Be certain the leading and trailing edges of
both wing halves align with each other where they join.
❏
6. After the epoxy has hardened, slowly and carefully pull
away the masking tape. If any of the covering loosened, iron
it back down with a covering iron with a covering sock on
medium heat.
Read steps 3 through 5 all the way through before
proceeding. It is important to use the proper technique
for joining the wing halves to ensure a strong wing.
Join the Wing
11