Final assembly – Great Planes Venus II 60 ARF - GPMA1027 User Manual
Page 22
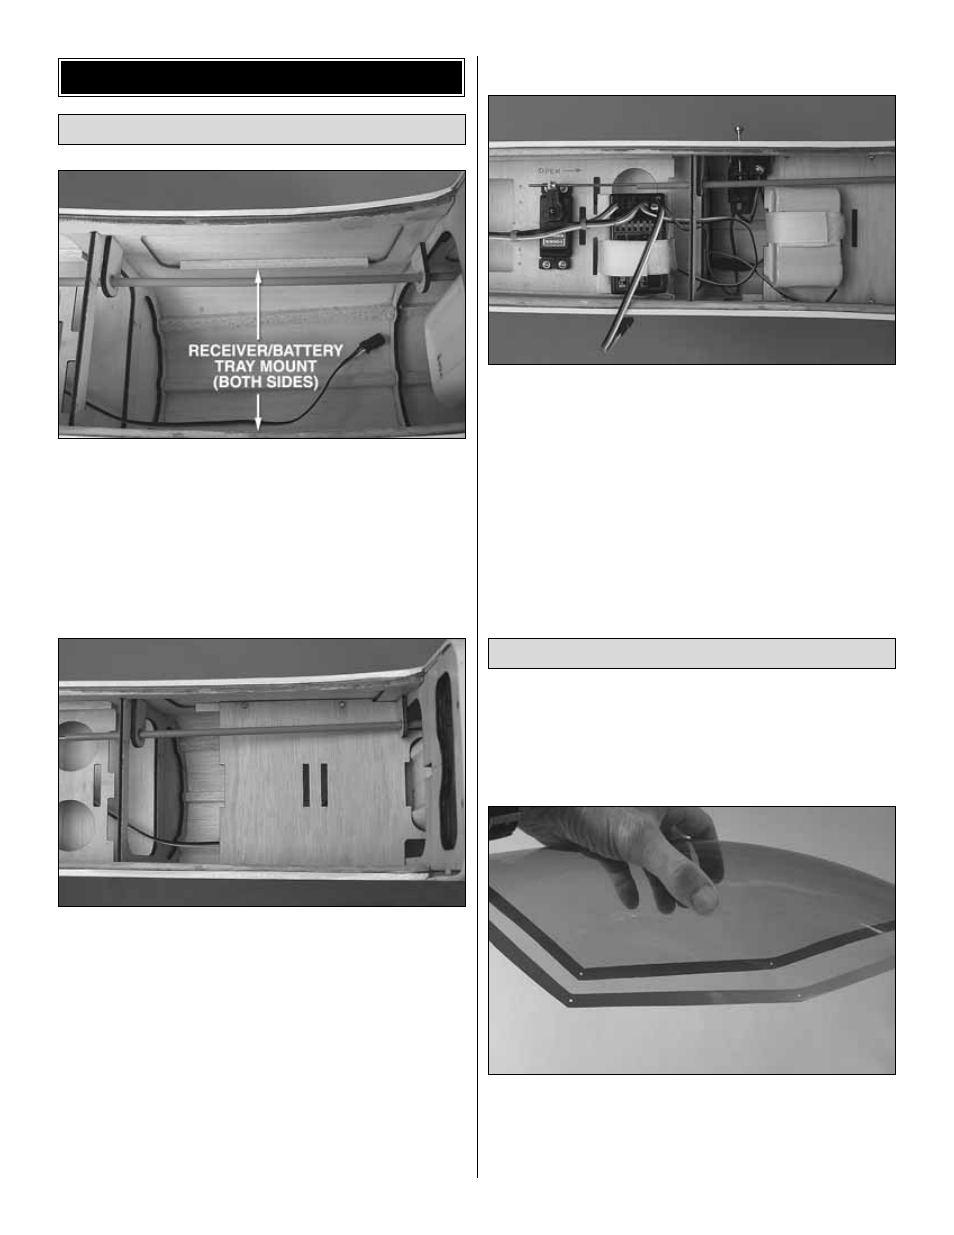
❏
1. Glue both 3/16" x 3/16" x 4" [5 x 5 x 100 mm] hardwood
receiver/battery tray mounts into position where shown—
be certain the forward throttle guide tube holder will not
interfere with the plywood receiver/battery tray.
❏
2. Position the plywood receiver battery tray on the tray
mounts you just glued in. Drill 1/16" [1.6 mm] holes through
the tray and the rails. Remove the tray, enlarge the holes in
the tray only with a 3/32" [2.4 mm] drill, and then mount the
tray to the rails with four #2 x 3/8" [10 mm] screws. Remove
the screws and the tray, harden the screw holes with thin
CA, allow to harden, then mount the tray.
❏
3. Now you may glue the guide tube holders into position.
Refer to the following photo while
completing the radio installation.
❏
4. Mount the receiver and battery pack to the forward or
aft radio trays with 1/4" [6 mm] R/C foam (not included) and
the Velcro strips.
❏
5. Mount the on/off switch in a location that will be easy
to reach from outside the model and will not get coated with
engine exhaust.
❏
6. Guide the receiver antenna through the antenna tube
down the fuselage.
❏
1. Trim the base of the pilot so he will fit under the canopy
when both are in poistion on the fuselage. The same as was
done for the covering over the stabilizer and belly pan, mark,
then cut and remove the covering from the cockpit floor for
the pilot. Securely glue the pilot into position with CA.
❏
2. Drill 3/32" [2.4 mm] holes through the canopy at the four
locations shown.
❏
3. Place the canopy on the fuselage. Using the holes in the
canopy as a guide, drill 1/16" [1.6 mm] holes into the fuselage.
Mount the Pilot and Canopy
Finish Radio Installation
FINAL ASSEMBLY
22