Building instructions, Assemble the horizontal tail – Great Planes RC Universe FlatOuts ARF - GPMA1117 User Manual
Page 7
Please note that all of the plastic parts used when building
the FlatOuts R/C Universe Bipe are identified by name and
part number, for example: Z-bend clevis (A1). The part
numbers are molded next to each part on the parts trees for
easy identification.
The carbon tube diameters referenced throughout this
manual may be difficult to measure without calipers. The
dimensions provided consist of 1 mm, 2 mm, 3 mm, and 5.5
mm. These four sizes can be identified by comparing all the
tubes next to each other. Once the diameters are
determined, it is advisable to group the tubes together by
size for quick reference.
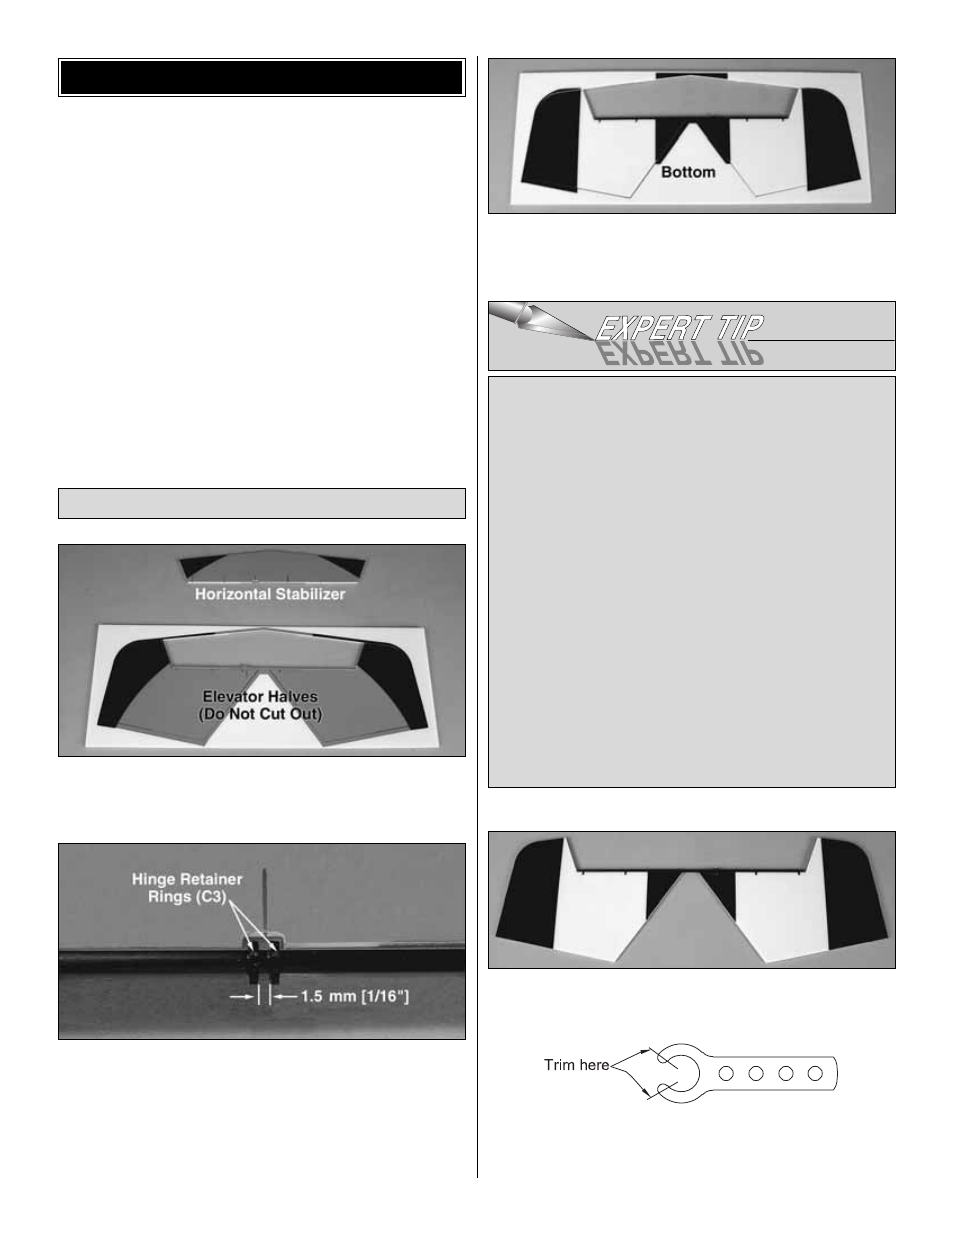
❏
1. Cut the horizontal stabilizer free from the foam sheet
using a hobby knife with a sharp #11 blade. DO NOT cut the
elevator halves free at this time.
❏
2. Without removing the elevator halves from the foam
sheet, slide two hinge retainer rings (C3) onto the elevator
joiner tube. Align the rings with the cutout in the left elevator
half. The ring on the right should be in line with the edge of
the cutout and there should be a 1.5 mm [1/16"] gap
between the two rings. Secure both rings to the tube with a
drop of glue on the outside of the gap.
❏
3. Using the
Expert Tip that follows, permanently join the
elevator halves by gluing in the 3 x 216 mm [1/8" x 8-1/2"]
elevator joiner tube.
❏
4. Now the elevator halves may be cut from the sheet.
❏
5. To avoid broken clip hinges (C2) and control horns (C1)
during assembly, trim them as shown before installing onto
the 3mm carbon tubes.
HOW TO GLUE THE TUBES TO
THE CONTROL SURFACES
Note: You may want to protect your work surface from
excess glue. We recommend the use of Great Planes Plan
Protector
™
(GPMR6167) for this purpose.
A. Cut several 40 mm [1-1/2"] pieces of cellophane tape. Fold
the last 5 mm [1/4"] over to make a tab for easy removal.
B. Lightly coat the leading edges of the elevators with
foam-safe CA–do not use an excessive amount. Hint: A
CA applicator tip is recommended to accurately control
the bead of glue.
C. Tape the tube to the leading edge of the elevators.
Weight the assembly down on a flat surface to prevent
warping and allow the glue to harden without accelerator.
D. Once the glue has hardened, remove the tape.
E. Add a fillet of glue to the bottom of the joiner tube
and elevators.
Assemble the Horizontal Tail
BUILDING INSTRUCTIONS
7