Install the servos – Great Planes RC Universe FlatOuts ARF - GPMA1117 User Manual
Page 15
❏
1. Remove the stock servo arms from all three of the servos.
❏
2. Refer to the
Kit Contents section on page 5 and select
the correct spline size for the servos you will be using. There
are three sizes to choose from:
(G1 - G3)
Futaba S3103, Airtronics 94091
(G4 - G6)
Hitec HS-55, Hitec HS-50, Futaba 3108M
(G7 - G9)
JR 241
❏
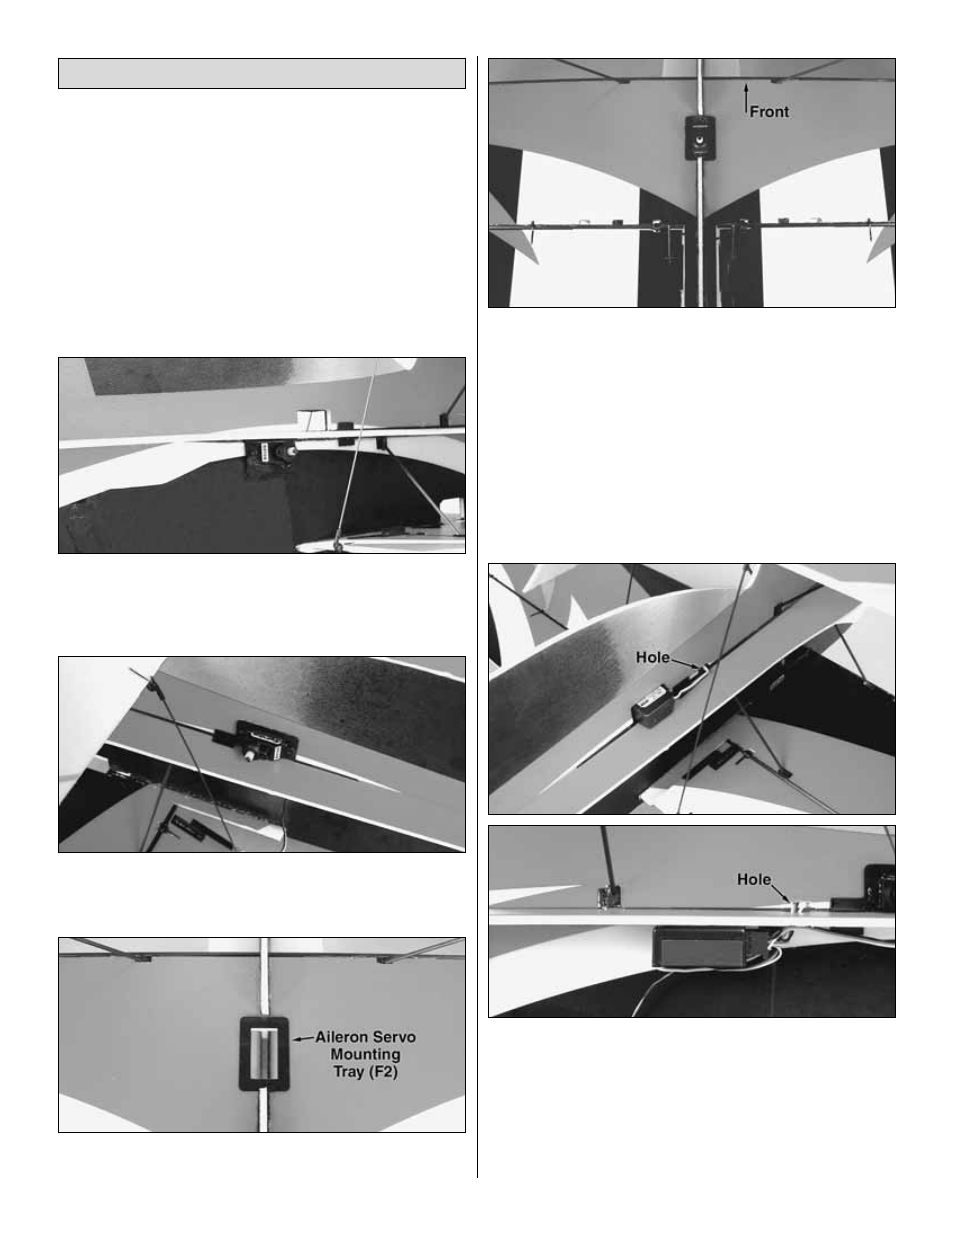
3. Glue the rudder servo into the rear servo mount in the
right side of the fuselage. The output shaft should be forward.
❏
4. Glue the elevator servo into the front servo mount in the
left side of the fuselage. The output shaft should be forward.
❏
5. Glue the aileron servo mounting tray (F2) over the
cutout in the underside of the wing.
❏
6. Glue the aileron servo into the tray with the output shaft
facing toward the back of the airplane.
❏
7. Cut two small holes in the fuselage for the elevator
servo wire to pass through to the left lower quadrant. Use
double-sided servo tape (not included) to secure the
receiver to the underside of the horizontal fuselage section
on the left side. Be sure to position the receiver so that all
the servo wires can reach it without the use of servo
extensions. Connect the servos to the receiver and power up
the radio system to center all three servos.
Install the Servos
15