Great Planes RC Universe FlatOuts ARF - GPMA1117 User Manual
Page 14
❏
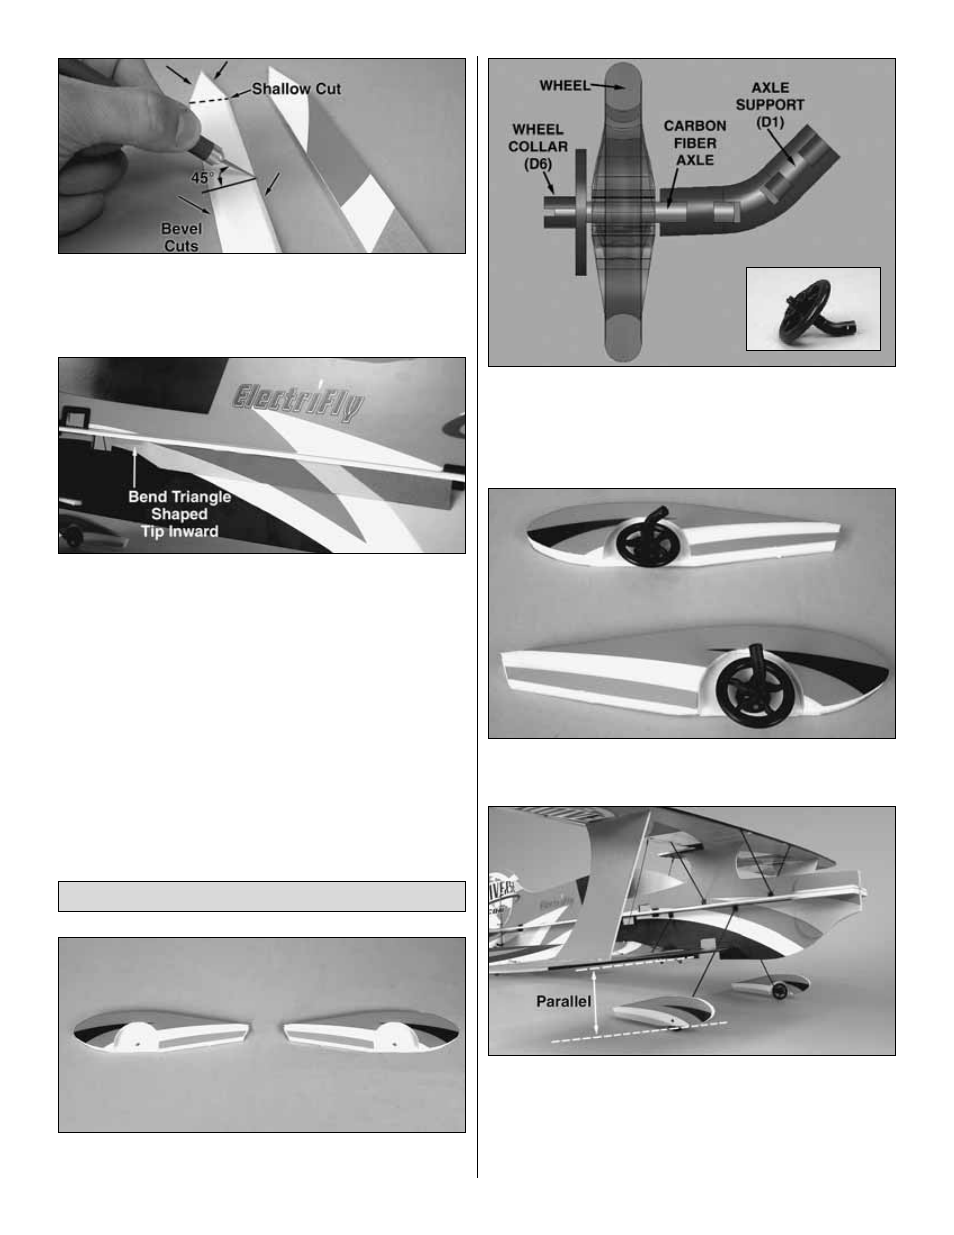
6. Cut a 45° beveled edge on the sides and tips of the
fuselage braces with a sharp hobby knife. Make a shallow
cut along the line shown in the picture. Do not cut all the way
through the foam for this cut.
❏
7. Align the colored pattern on the fuselage braces with the
colors on the fuselage and glue them into position. These
braces mount at a 45° angle to the fuselage, matching the
bevel cuts you made in the prior step. Bend the triangle shaped
tips of the braces inward to glue against the fuselage.
❏
1. Glue the inner wheel pants to the outer wheel pants.
Be sure to make one left and one right wheel pant.
❏
2. Assemble the axle supports (D1), axles, wheels, and
wheel collars (D6) to make two landing gear assemblies.
Secure the wheel collar to the axle with a drop of glue, but
do not glue the axle to the axle support until later. Be sure
that the wheels rotate freely.
❏
3. Glue the wheel pants to the wheel collars. You do not
need to align the position of the axle supports at this time.
❏
4. Slide the wheel assemblies onto the 2 x 190 mm [5/64"
x 7-1/2"] landing gear rods. Rotate the assemblies so that the
wheel pant bottoms are parallel with the wings and the wheels
are pointed straight ahead. When satisfied with their fit, apply
a few drops of glue to the axle supports at the axles and at the
landing gear rods.
Assemble the Landing Gear
14