Connect the rod struts – Great Planes RC Universe FlatOuts ARF - GPMA1117 User Manual
Page 12
❏
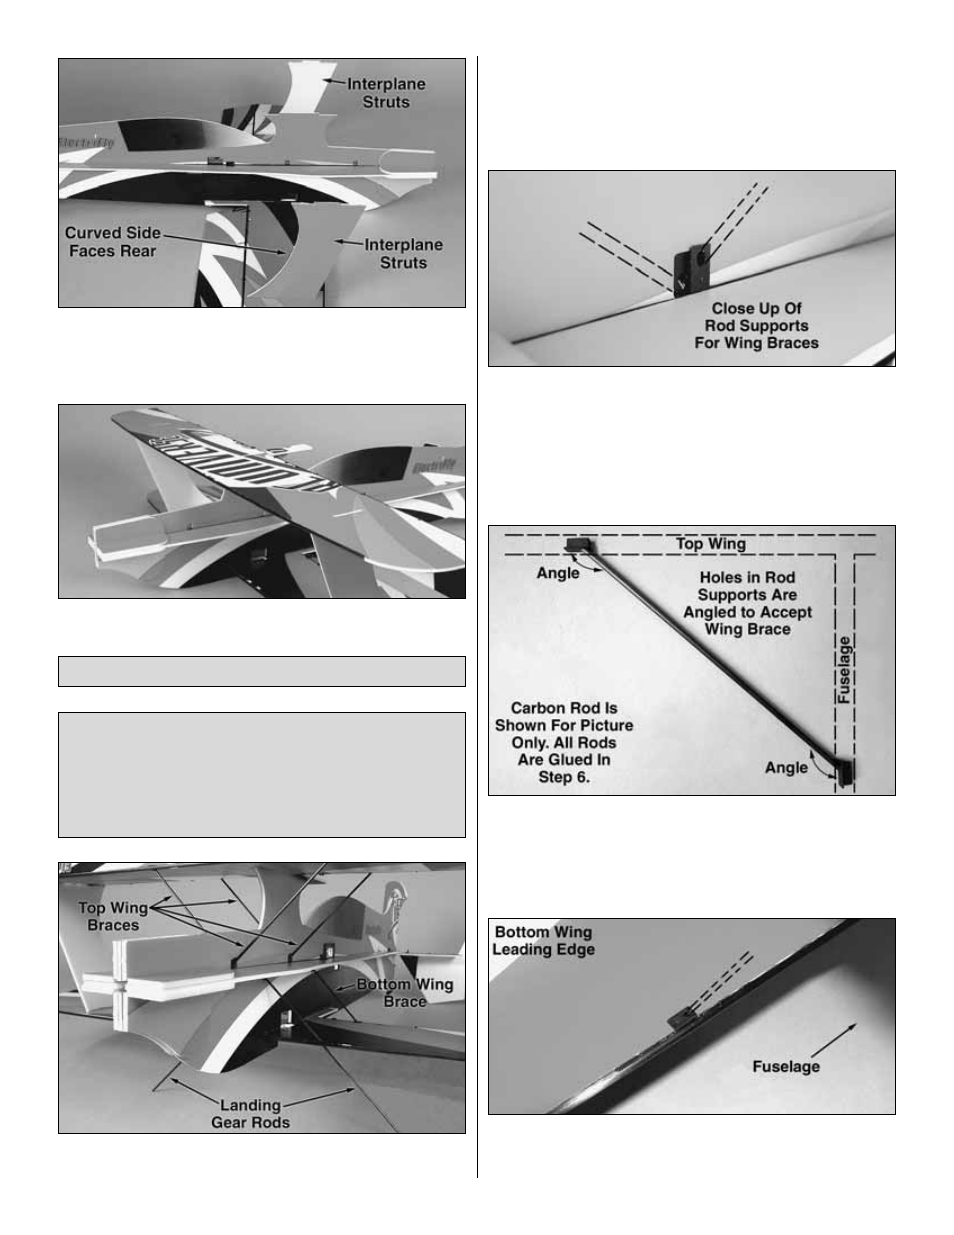
7. Glue the interplane struts into the lower wing. The red
sides of the struts points outward. Try to glue the struts so
they are 90 degrees to the wing. However, the top wing will
align the struts straight when completed.
❏
8. Glue the top wing to the fuselage and wing struts.
❏
1. Locate sixteen rod supports (D2), four 2 x 115 mm
[5/64" x 4-1/2"] top wing braces, two 2 x 85 mm [5/64" x
3-11/32"] bottom wing braces, and two 2 x 190 mm [5/64"
x 7-1/2"] landing gear rods.
❏
2. There are four square cutouts in the center of the fuselage
between the wings. Each cutout receives two rod supports glued
side-by-side and facing opposite directions. It does not matter
which rod support is in the forward position.
❏
3. Make note how the holes in the rod supports are
angled. The rod supports must be installed so that these
holes are aligned to accept the carbon rods.
❏
4. The rectangular cutouts at the leading and trailing edges
of the wings will only receive one rod support per cutout. Install
them into the cutouts.
Before gluing any parts in the following steps, it is a good
idea to dry fit the supports and braces to be sure they are
being installed in the correct orientation. Rather than
provide excessive text describing the installation of each
brace, simply refer to the picture of the completed wing
braces below for their locations on the plane.
Connect the Rod Struts
12