Pilot installation (optional) – Great Planes PT-19 EP ARF - GPMA1149 User Manual
Page 18
18
❏
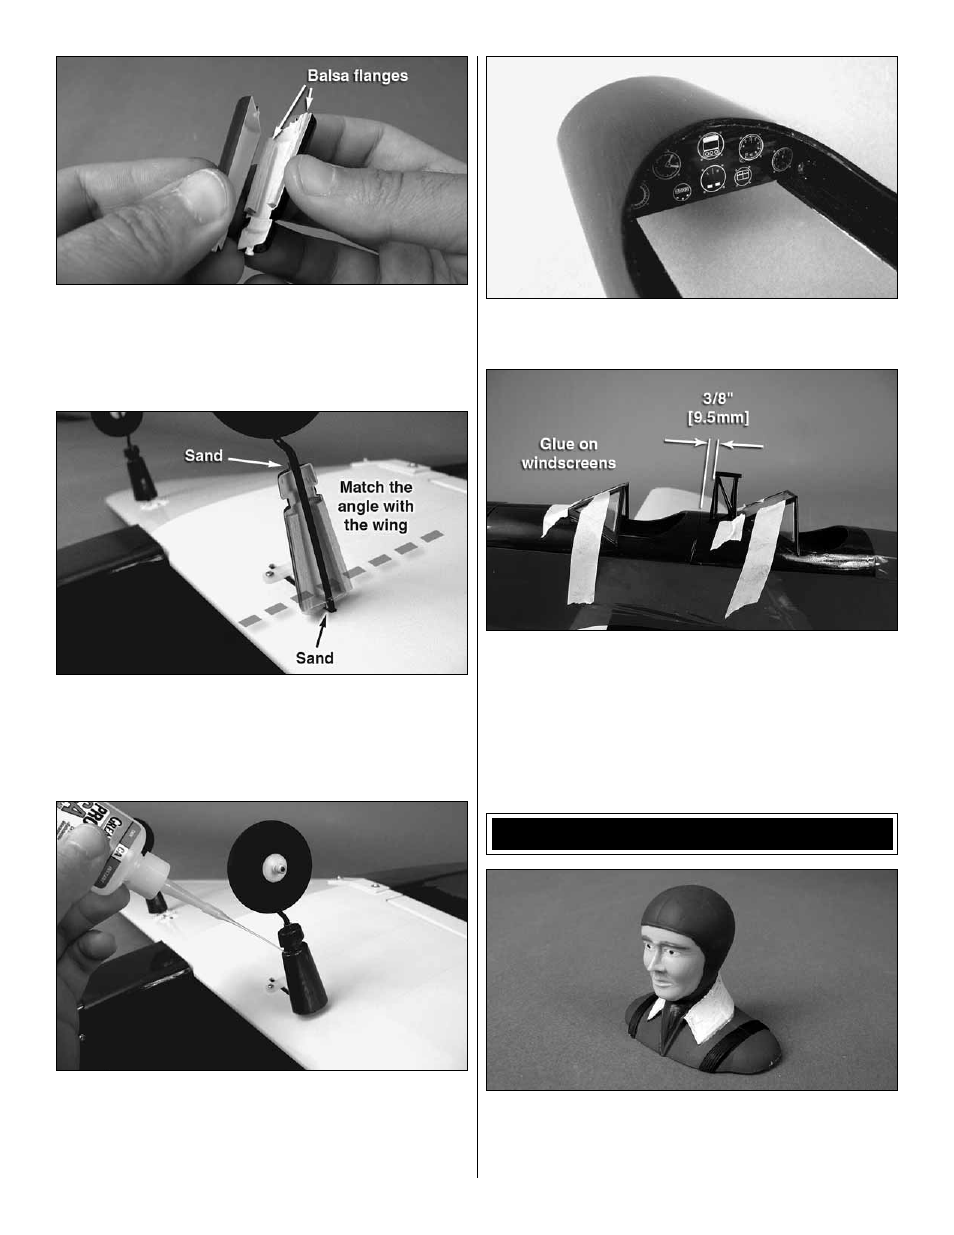
8. Using some scrap balsa, cut four short strips to make
fl anges to help join the left and right pieces. Glue two fl anges
to one half using thin CA. Look at the picture to help you see
how the parts will be joined. Test fi t them, but do not join
them yet.
❏
9. Turn the model over. Lightly sand the landing gear wire
where each pant will attach. Glue the fl anged half of each gear
pant to each landing gear wire using medium CA. Pay special
attention to the way the top of the gear pant is angled and
install the fl anged side accordingly (inboard or outboard).
❏
10. Fit the other half of each gear pant to the fl ange and
hold it in position. Carefully wick a bit of thin CA into each
fl ange. Clean up any excess using CA debonder and a clean
paper towel. Do this for both gear pants.
❏
11. Cut out the instrument panel decals. Trim them to fi t
and apply them to both cockpits now.
❏
12. Install the safety bar assembly behind the edge of the
rear hatch so that it is 3/8" [9.5mm] from that edge. Note: For
the best results use R/C-56 canopy glue (JOZR5007) and
drill four 1/8" [3.2mm] holes for the legs of the safety bar to
fi t into.
❏
13. Install the windscreens using R/C-56 canopy glue or
the eight 2mm x 4mm sheet metal screws supplied in this kit.
PILOT INSTALLATION (OPTIONAL)
❏
1. If you want to install a pilot fi gure, please purchase
Williams Brothers 1/8 Standard Pilot (WBRQ1040). Note: You
will have to paint this pilot. We recommend using a regular
hobby paint brush and acrylic modeling paint.