Finish the model – Great Planes PT-19 EP ARF - GPMA1149 User Manual
Page 16
16
❏
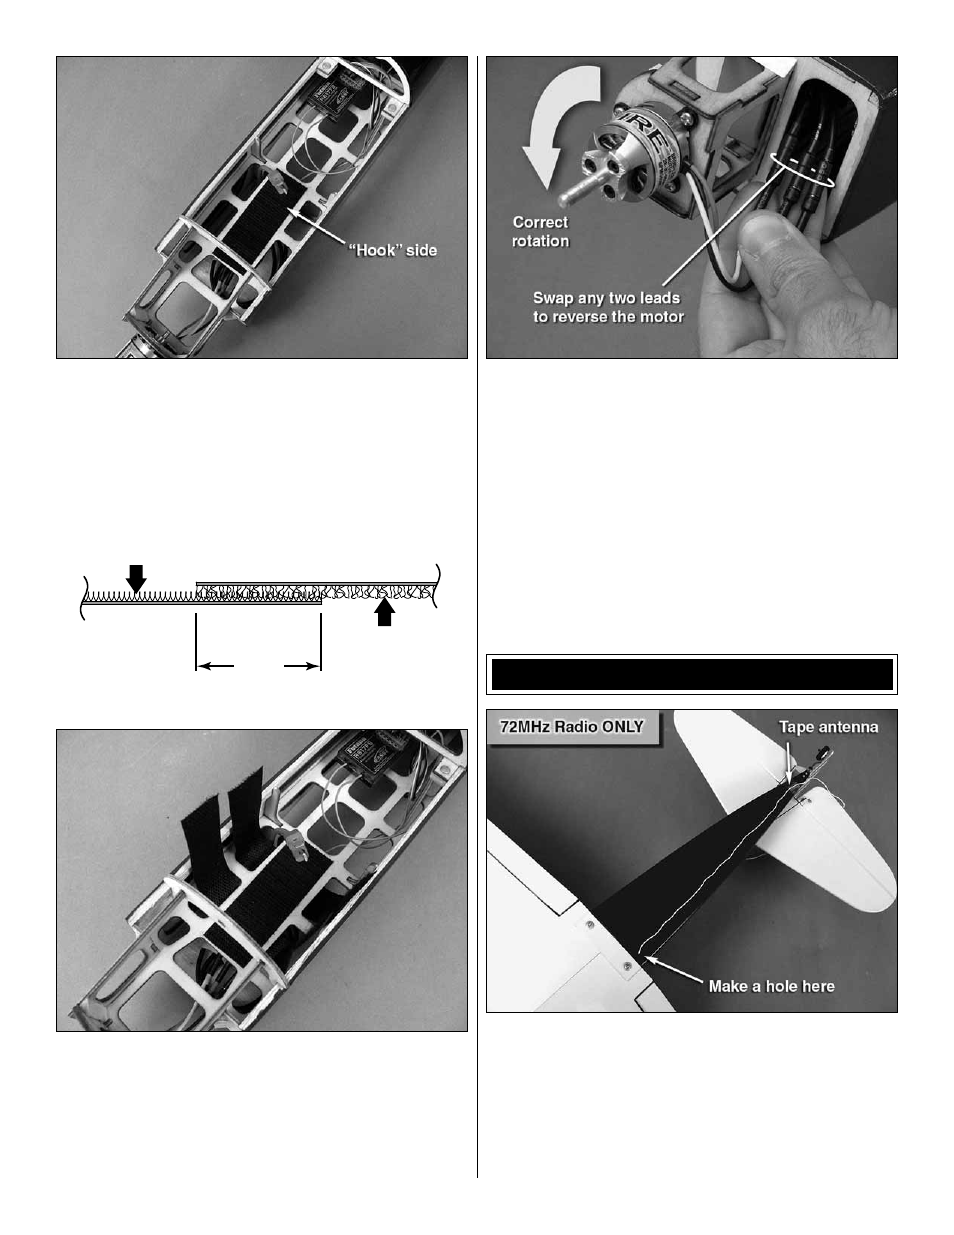
7. Prepare the surface and attach the remaining adhesive
backed hook-and-loop material (hook side) to the battery tray
in the location shown. Stick the loop side to your battery. For
extra hook & loop material, please purchase GPMQ4480.
“Loop” side
“Hook” side
Cut the hook & loop to the correct length and join
the pieces together to make a strap.
1-1/2"
[38mm]
❏
8. Using the two 110mm strips of non-adhesive backed
hook-and-loop material, make two battery straps by
separating the hook side from the loop side and reattaching
them to each other so that there is 1-1/2" [38mm] of overlap.
Fit the straps to your battery compartment as shown. After
you balance (C.G.) your model later, you may use some CA
to glue these to the bottom of the battery tray.
❏
9. Note: DO NOT accomplish this step with the propeller
installed! Turn on your transmitter. If you have a Futaba radio
system reverse channel 3 at your transmitter. Place the
throttle stick to idle. Read and understand the instructions
that came with your ESC so that you know how to arm the
ESC and operate it safely. Plug the charged LiPo battery into
the ESC now and arm the motor. Slowly advance the throttle
to spin the motor. Check the direction of motor rotation. If the
motor rotates clockwise as viewed from the front, unplug and
reverse the position of any two ESC motor wires. Unplug the
LiPo and turn off your transmitter.
FINISH THE MODEL
❏
1. If you are using a 72MHz radio system, make a hole in
the bottom of the fuselage in the location shown and route
the receiver antenna out of the fuse. Tape it in place at the
tail. Install the wing using two 3 x 25mm machine screws and
two 3mm washers. Apply a drop of thread locking compound
to the screw threads and route the aileron servo lead up
through the battery tray to the receiver.