Connecting without scart cable – Philips VR800 User Manual
Page 7
Attention! The text in this document has been recognized automatically. To view the original document, you can use the "Original mode".
Connecting with scart cable without
'Easy Link/NexTView'
\ l l l l l M I I I I
I l l l l l l l l l l l
Connecting without scart cable
IWWiWV
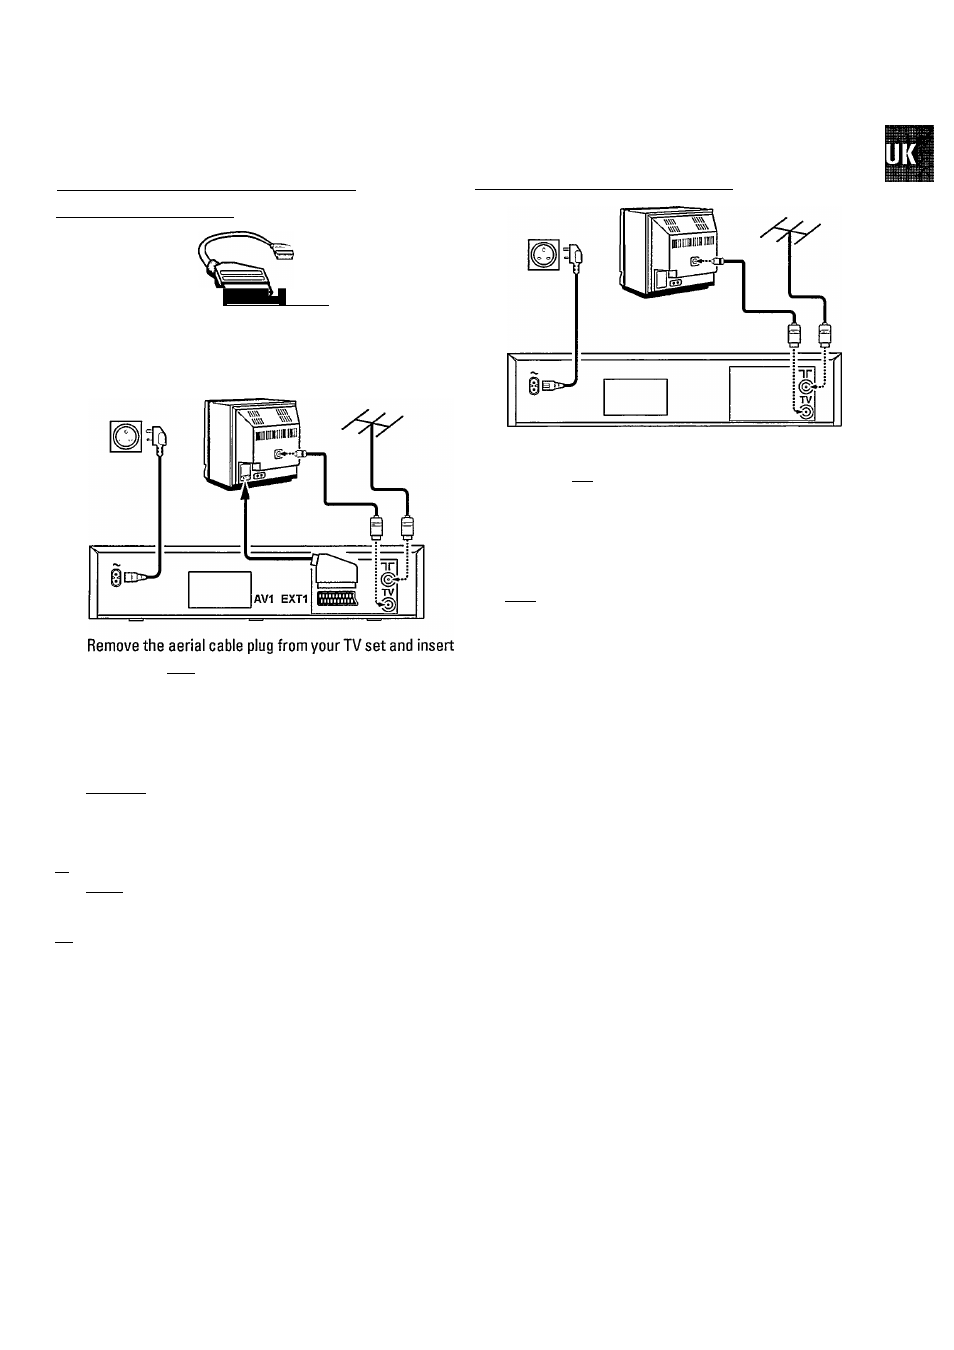
If your television does not have a scart (EURO-AV) socket,
please do not read further here, but turn to the next paragraph
'Connecting without scart cable'.
m
m
HI
HI
it into the I nr I socket atthe back of the video recorder.
HI
Plug one end of the aerial cable provided into the
socket on the video recorder and the other end into the
aerial input socket on your TV set.
HI
Plug one end of the scart cable into the scart socket
lAVi EXTilonthe back of the video recorder and the other
end into the scart socket on your TV set.
HI
Switch on the TV set.
fsl Insert one end of the mains cable into the mains socket
Iz-v/1 atthe back of the video recorder and plug the other
end into the wall socket.
fe] When your TV set automatically switches to programme
number e.g.; 'EXT', 'O', or 'AV', a welcoming text appears
on the TV screen.
When your TV set does not switch automatically, select
the required programme number manually (see instruc
tion manual TV set).
HI Subsequently, read the paragraph 'Initial Installation' in
the section 'Automatic TV Channel Search'.
m
Remove the aerial cable plug from your TV set and insert
it into the nr I socket atthe back of the video recorder.
Plug one end of the aerial cable provided into the
socket on the video recorder and the other end into the
aerial input socket on your TV set.
Insert one end of the mains cable into the mains socket
\r\y I atthe back of the video recorder and plug the other
end into the wall socket.
Switch on your TV set and select the programme number
thatyou have chosen for video playback (see operating
manual for your TV set).
The video recorder will now send a welcoming text on
UHF-channel CH35 or583MHz.
Tune in the TV set in the UHF wave band until this picture
appears.
CONGRATULATIONS ON THE
PURCHASEOFYOURNEW
PHILIPS VIDEORECORDER
TO CONTINUE PRESS OK
m
Subsequently, read the paragraph 'Initial Installation' in
the section 'Autoinstall'.